Search: AI, Hybrid, Classic

  • Pricing
  • Help
    • My Licenses
      • Login
      • Download
      • Why us
      • Contact us
    • Features
      • Google Retail Search
      • Weaviate
      • Elasticsearch
      • OpenSearch
      • Solr
      • Algolia
      • Roadmap
      • Artificial Intelligence
      • Hosting
      • Releases
    • Documentation
    • Support
    • Testimonials
    • Live Demos
    • Blog
Menu
  • Pricing
  • Help
    • My Licenses
      • Login
      • Download
      • Why us
      • Contact us
    • Features
      • Google Retail Search
      • Weaviate
      • Elasticsearch
      • OpenSearch
      • Solr
      • Algolia
      • Roadmap
      • Artificial Intelligence
      • Hosting
      • Releases
    • Documentation
    • Support
    • Testimonials
    • Live Demos
    • Blog
Search
Search
Search
Search

Home » Your configuration journey, step by step » Add-ons

Add-ons

991 views 0 March 14, 2017 Updated on July 13, 2019

WPSOLR PRO is built with WPSOLR as it’s core, plus add-ons.

Extensions are groups of features that extends the core capabilities with WordPress actions and filters.

Each extension can be individually activated, deactivated, and configured.

How to find add-ons ?

They are all placed in the tab “Activate Extensions”, but some of their configuration can be found in other tabs.

Extensions menu dashboard

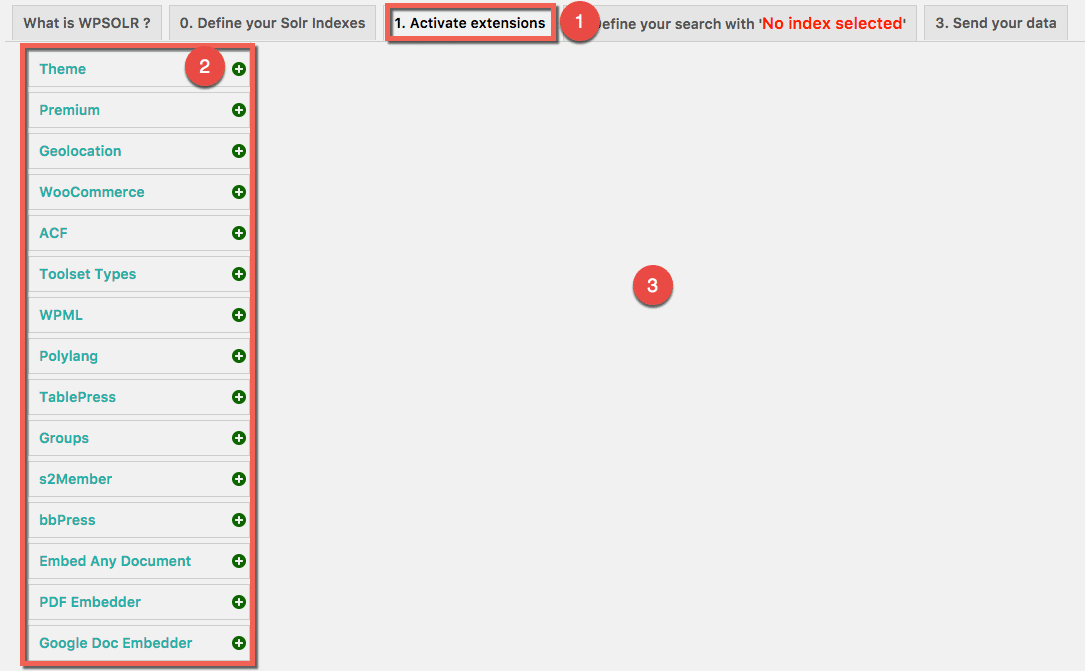
Here is how the add-ons dashboard work on the previous screen:

  1. Click on the main add-ons tab to open the extensions dashboard
  2. Click on the add-on you want to setup on the left menu
  3. A screen displays the configuration options for the add-on selected


How to unlock add-ons ?

Unlocking an add-on is a two-steps process. You first have to activate your add-on license. And then you must activate the add-on .


How to activate an add-on license ?

Open the license activation popup window

The procedure to activate your add-on license:

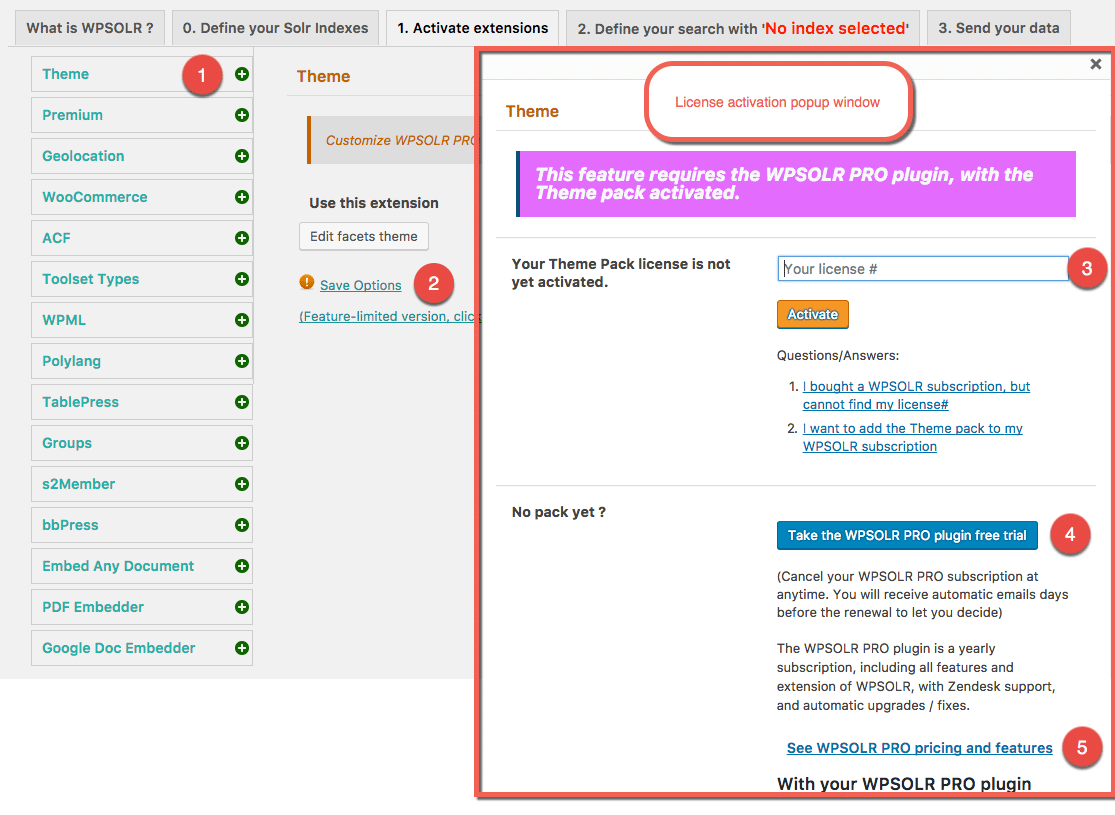
  1. Click to open your add-on settings. Notice the icon plus, which indicates that the extension is not activated and not authorized.
  2. Click on the icon warning to open the license activation popup window.
  3. Enter the license# you received by email after buying your WPSOLR PRO license.
  4. Or use this button to buy a WPSOLR PRO license.
  5. This link redirects you to the pricing page of the WPSOLR PRO license.


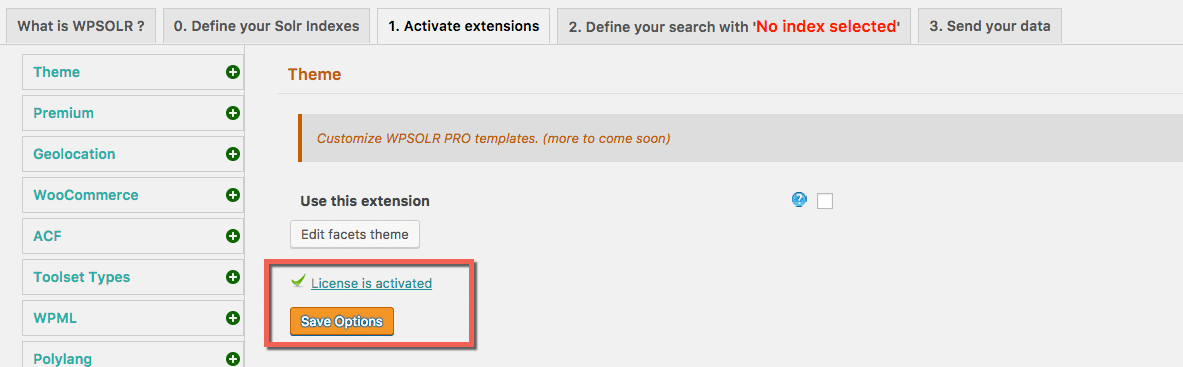
After activating your license, you should see a confirmation like this :

Confirmation icon that an extension license is activated


How to activate an add-on ?

Once your add-on license is active, you can finally activate the add-on itself.

It’s quite simple: just select the checkbox, and save.

Here is the procedure:

Extension activation
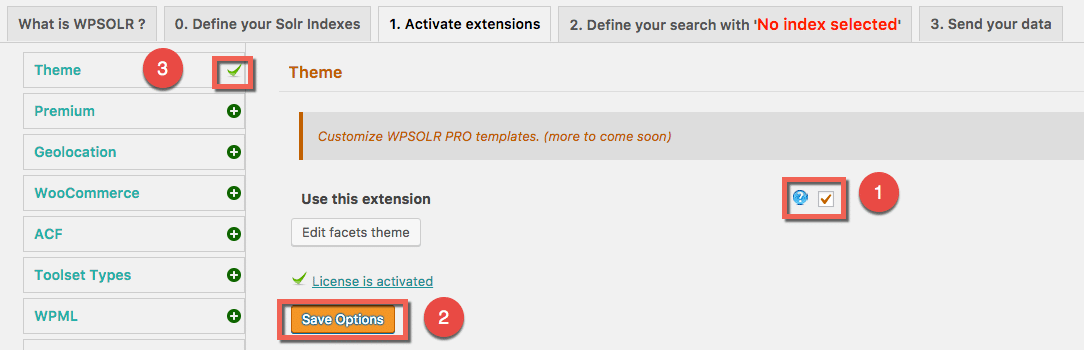
  1. Select the activation checkbox
  2. Save
  3. Notice that the activated add-on shows now a new icon!

Was this helpful?

Yes  No
Related Articles
  • Hybrid search
  • Question Answering
  • Cohere
  • OpenAI
  • HuggingFace
  • CLIP

Didn't find your answer? Contact Us

Previously
Connect to an Elasticsearch index
Up Next
bbPress add-on
Expand All Collapse All
  • What is it WPSOLR ?
    • The standard WordPress SQL search
    • The WPSOLR search with Elasticsearch, Apache Solr, or Algolia
  • Your configuration journey, step by step
    • Install Apache Solr
    • Hosted Apache Solr and SolrCloud Services
    • Install Elasticsearch
    • Elasticsearch Hosting
    • Configure your indexes
      • Create a Google Retail search index
      • Create a Weaviate index
        • Transformers
        • CLIP
        • HuggingFace
        • OpenAI
        • Cohere
        • Question Answering
        • Hybrid search
      • Generate a test Apache Solr index
      • Generate a test Elasticsearch index
      • Create an Apache Solr index
      • Create a SearchStax SolrCloud index
      • Create an Elastic Elasticsearch index
      • Create an Amazon AWS OpenSearch index
      • Create an Algolia index
      • Create an Elasticsearch index
      • Create an Opensolr Solr index
      • Create a Qbox Elasticsearch index
      • Create an ElasticPress Elasticsearch index
      • Create an Aiven Elasticsearch or OpenSearch index
      • Create a Bonsai Elasticsearch index
      • Create an Amazon AWS Elasticsearch index
      • Create an ObjectRocket Elasticsearch index
      • Create a Cloudways Elasticsearch index
      • Create an Alibaba Cloud Elasticsearch index
      • Create a Compose Elasticsearch index
      • Connect to an Apache Solr index
      • Connect to an Elasticsearch index
    • Add-ons
      • bbPress add-on
      • YITH WooCommerce Ajax Search add-on
      • SEO add-ons
        • Yoast SEO add-on
        • All in One SEO add-on
      • Listable add-on
      • ACF add-on
      • Advanced Scoring add-on
      • Cron Scheduling add-on
      • Theme add-on
        • Filters layouts
          • Radiobox & Checkbox Layout
          • Numeric Range Layout
          • Colour Picker Layout
          • Range Slider Layout
        • Add Ajax to the current Theme
        • Collapse taxonomy hierarchies
        • Custom Facets CSS
      • WPML add-on
      • Premium add-on
        • Manage more than one Elasticsearch or Solr index
      • PDF Embedder add-on
      • Geolocation add-on
      • AI Natural Language APIs add-on
        • Amazon Comprehend
        • Google Natural Language
        • Aylien Text Analysis
        • MeaningCloud
        • Qwam Text Analytics
      • Toolset Types add-on
      • AI Image and OCR APIs add-on
        • Google Vision
        • Amazon Rekognition
      • Embed Any Document add-on
      • MyListing add-on
      • Polylang add-on
      • WooCommerce add-on
      • Cross-domain search add-on
      • Directory+ add-on
      • Toolset Views add-on
      • Listify add-on
      • Jobify add-on
      • Query Monitor add-on
  • Quick start
Login
Support
Privacy policy
  • Terms and Conditions
  • © 2020 wpsolr.com. All Rights Reserved.
Youtube
Roadmap