Your search is in good hands

  • Pricing
  • Documentation
    • User guides
    • Support
    • Features
      • Weaviate
      • Elasticsearch
      • OpenSearch
      • Solr
      • Algolia
      • Roadmap
      • Artificial Intelligence
      • Hosting
      • Addons (Plugins, themes, features)
      • Releases
    • Blog
  • Demo
    • All Demos
    • Testimonials
  • My Licenses
    • Login
    • Why us
    • Contact us
Menu
  • Pricing
  • Documentation
    • User guides
    • Support
    • Features
      • Weaviate
      • Elasticsearch
      • OpenSearch
      • Solr
      • Algolia
      • Roadmap
      • Artificial Intelligence
      • Hosting
      • Addons (Plugins, themes, features)
      • Releases
    • Blog
  • Demo
    • All Demos
    • Testimonials
  • My Licenses
    • Login
    • Why us
    • Contact us

Home » Your configuration journey, step by step » Add-ons » AI Image and OCR APIs add-on » Amazon Rekognition

Amazon Rekognition

771 views 0 January 22, 2021 Updated on January 27, 2021

What is the Amazon Rekognition API?

Amazon Rekognition is a computer vision api created by Amazon. Powered by an advanced AI, it can recognise and detect a lot of objects in images. It can detect faces, recognise celebrities and even read text visible in photos. This API is very useful when combined with WPSOLR. Images and text can then both be used when searching your website.

Create a user with Amazon Rekognition access

Image Screenshot-2021-01-21-at-17.03.11-1024x431.png of Amazon Rekognition

Log in to your AWS account.

Image Screenshot-2021-01-21-at-17.03.26-1024x302.png of Amazon Rekognition

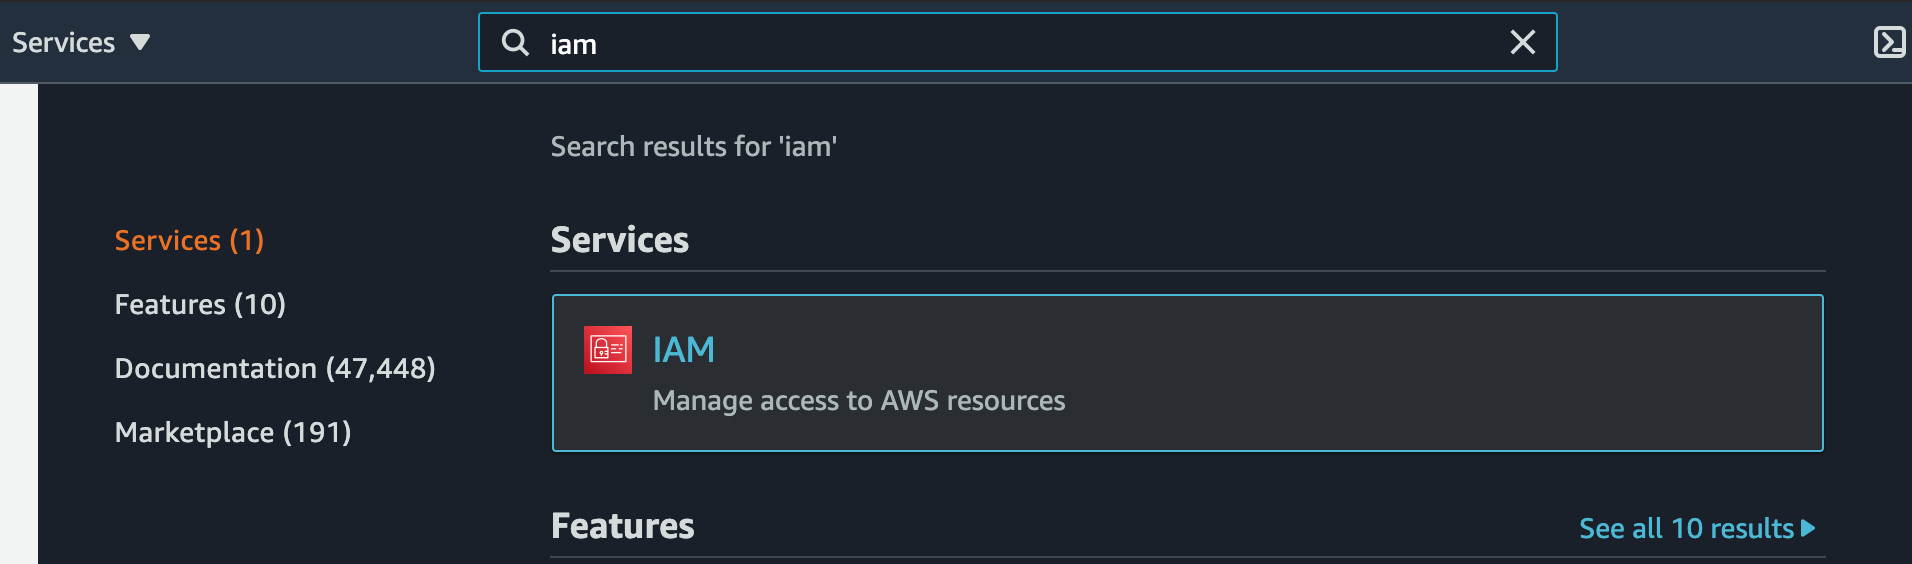
Then search for iam in the search bar at the top. Click on “IAM” in Services.

Image Screenshot-2021-01-21-at-17.03.38-1-1024x517.png of Amazon Rekognition

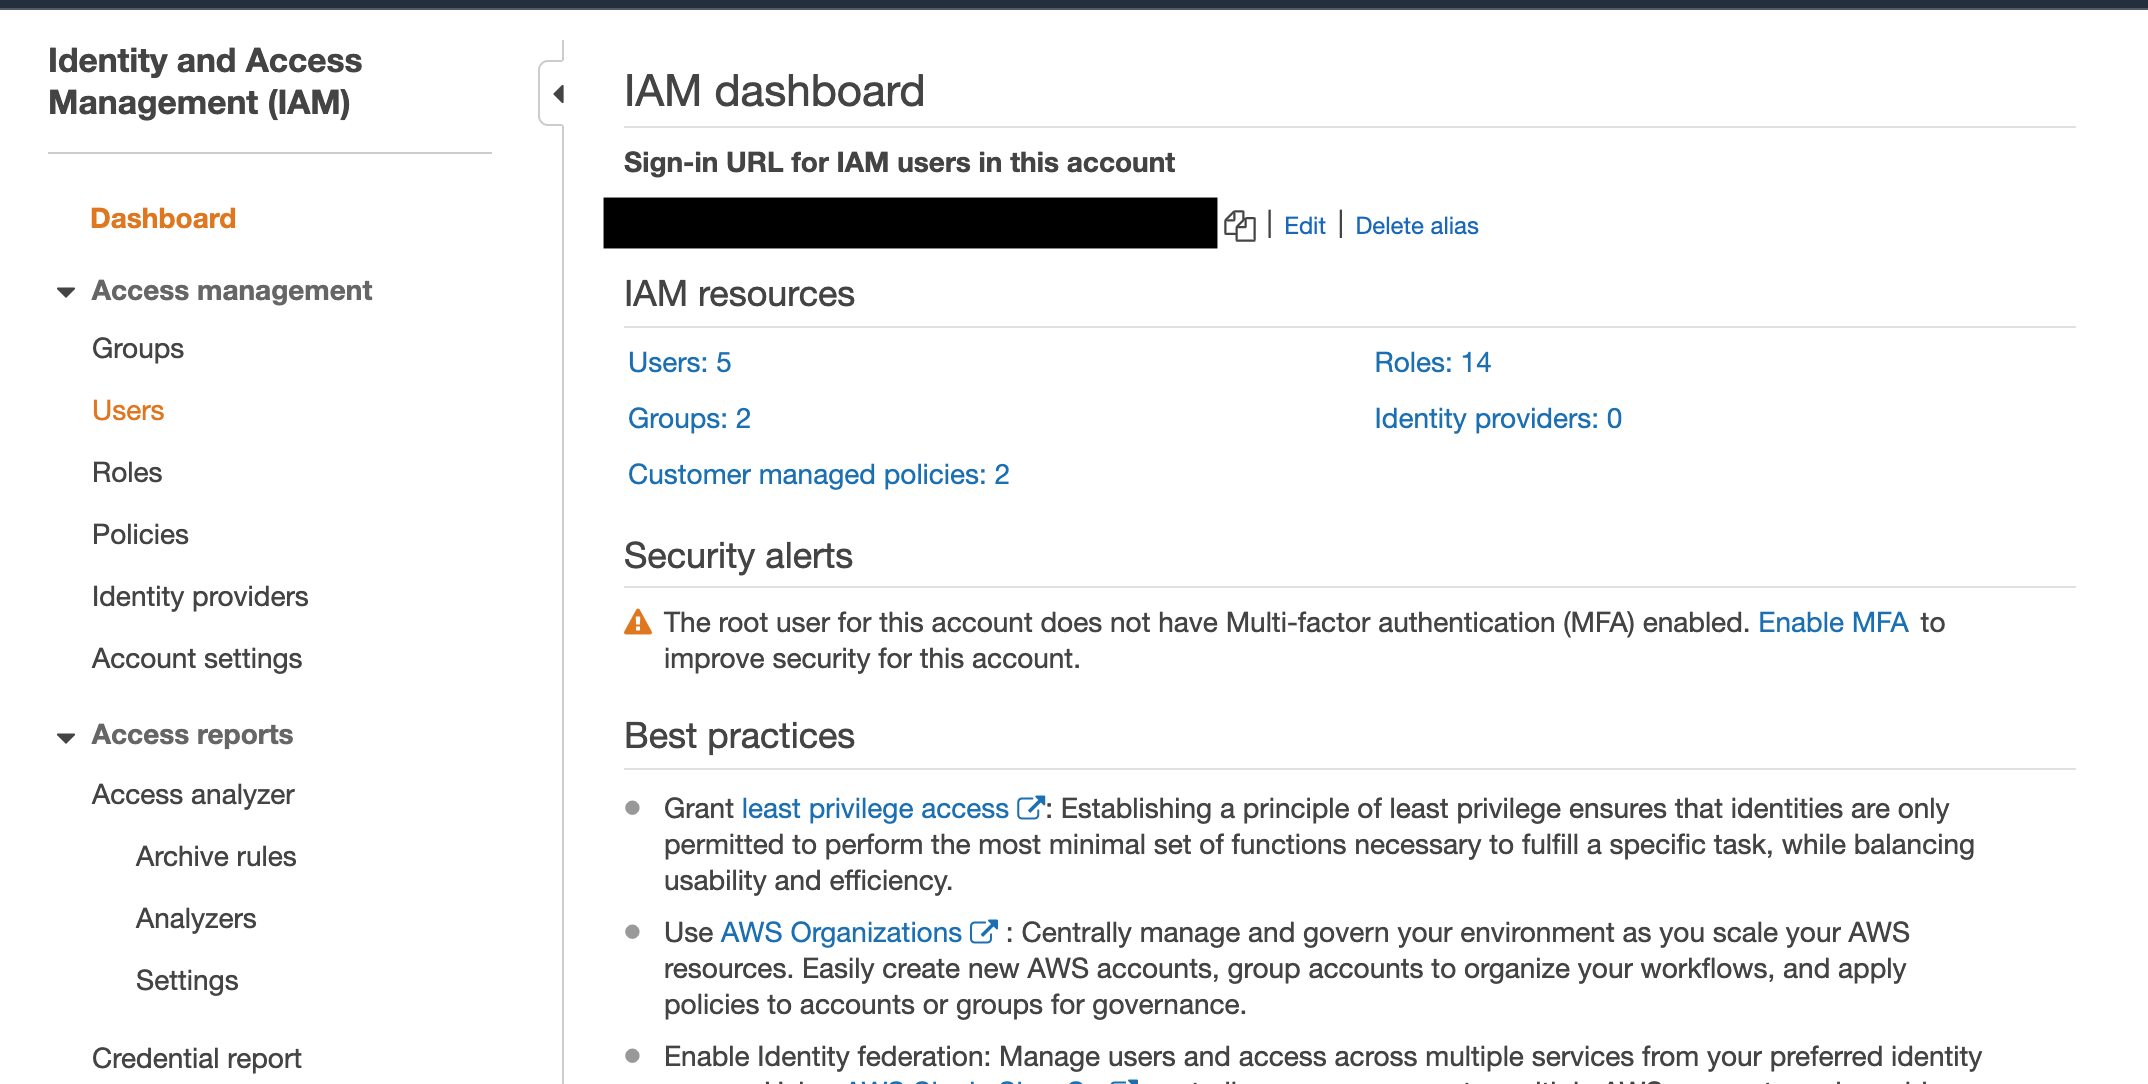
Next, select “Users” in “Access management”, then add a user.

Image Screenshot-2021-01-21-at-17.04.59-1024x444.png of Amazon Rekognition

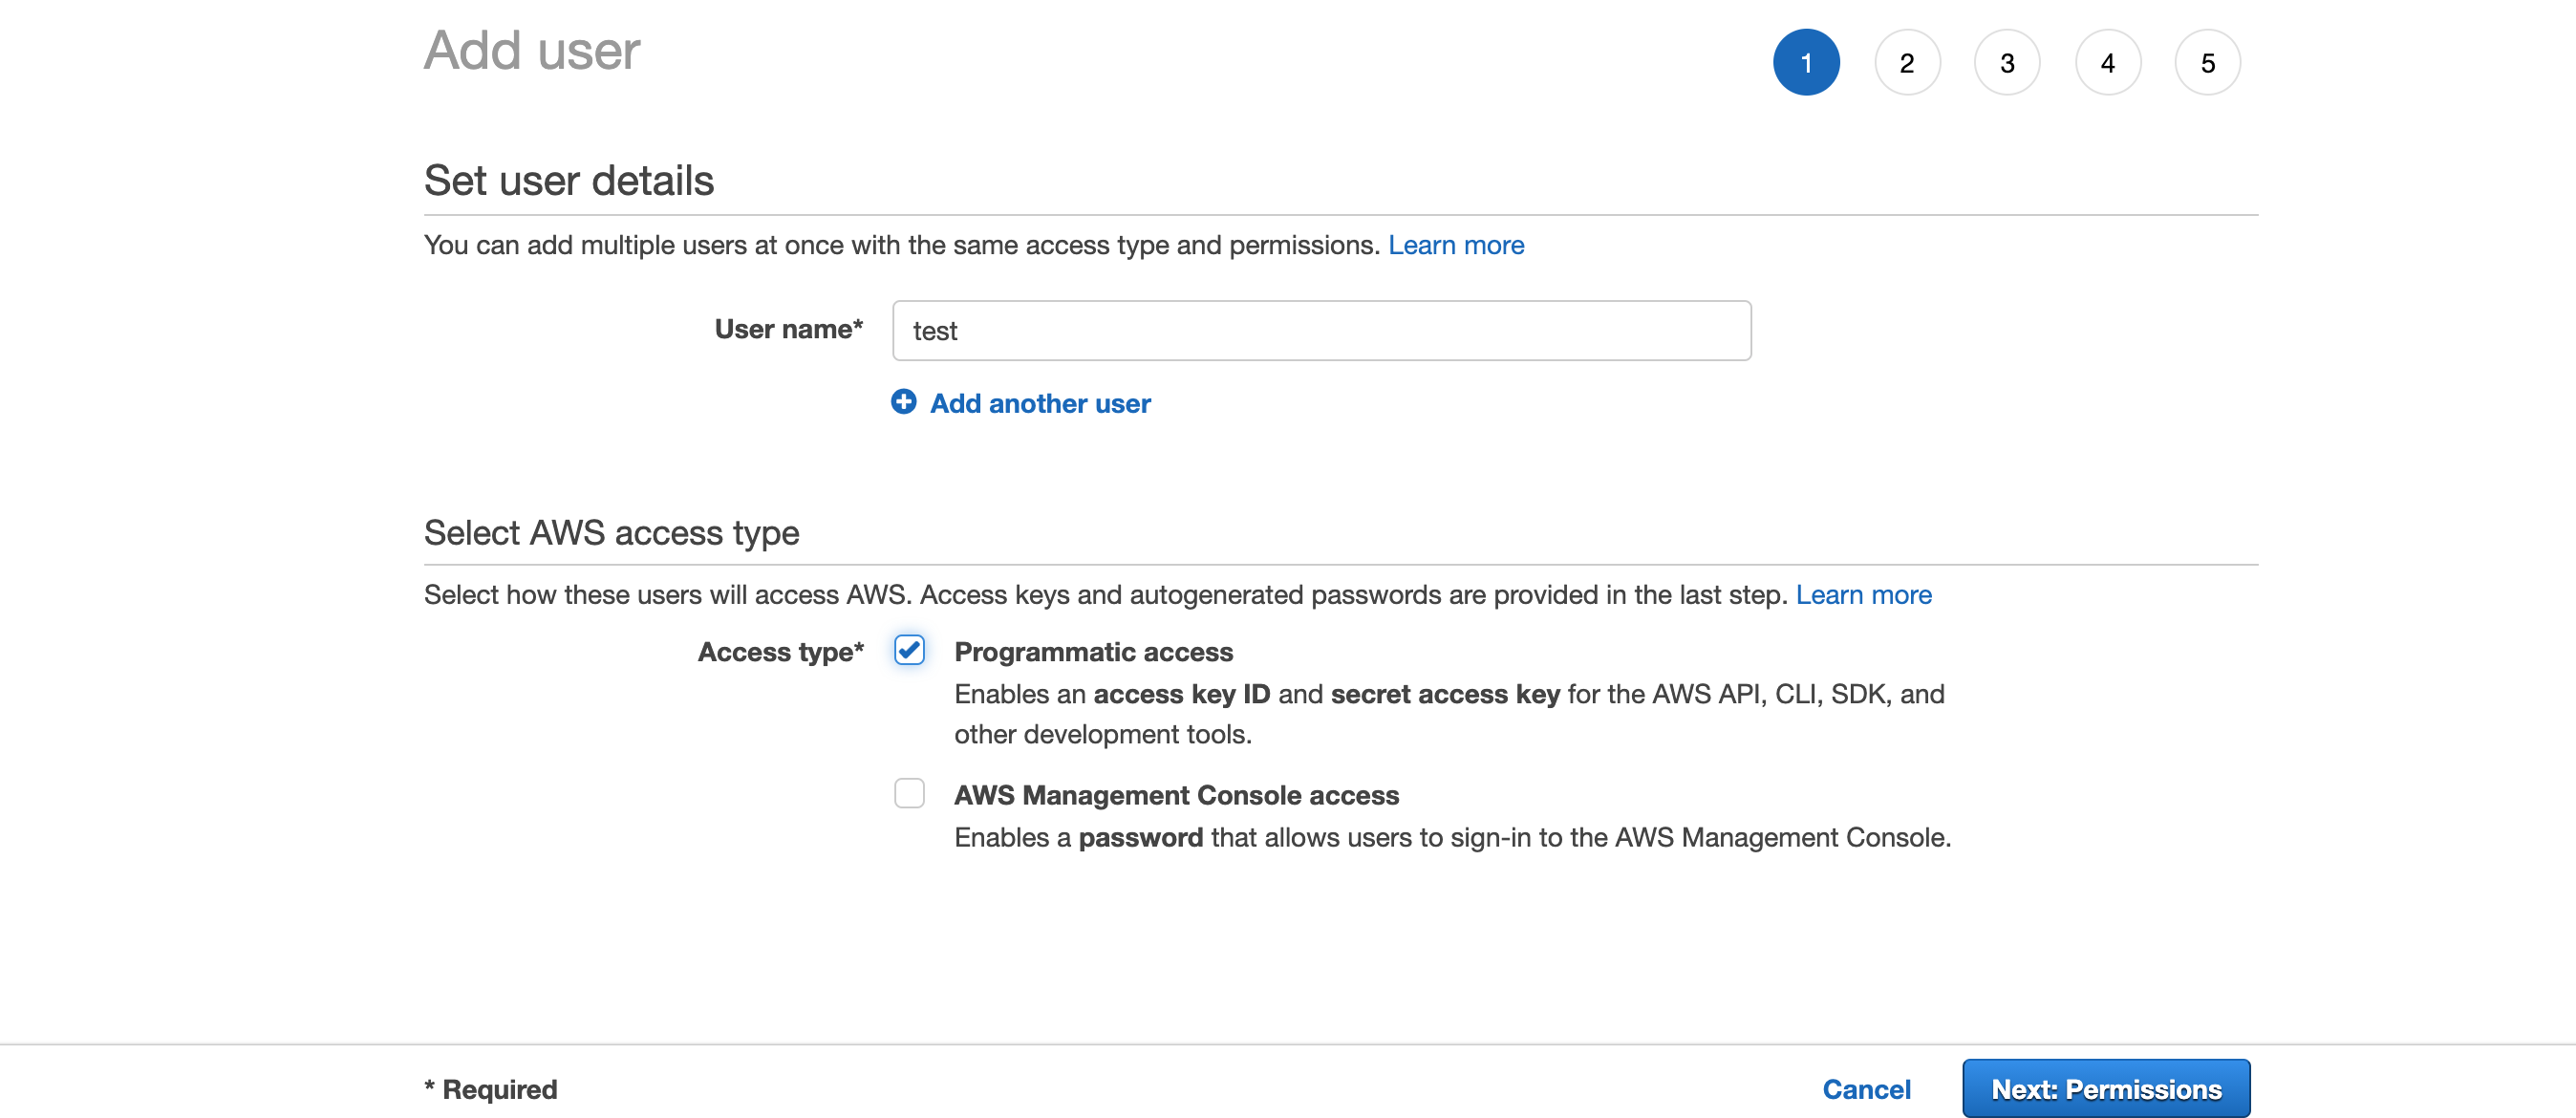
Choose a Username then select the “Programmatic access” checkbox.

Image Screenshot-2021-01-21-at-17.06.53-1-1024x266.png of Amazon Rekognition

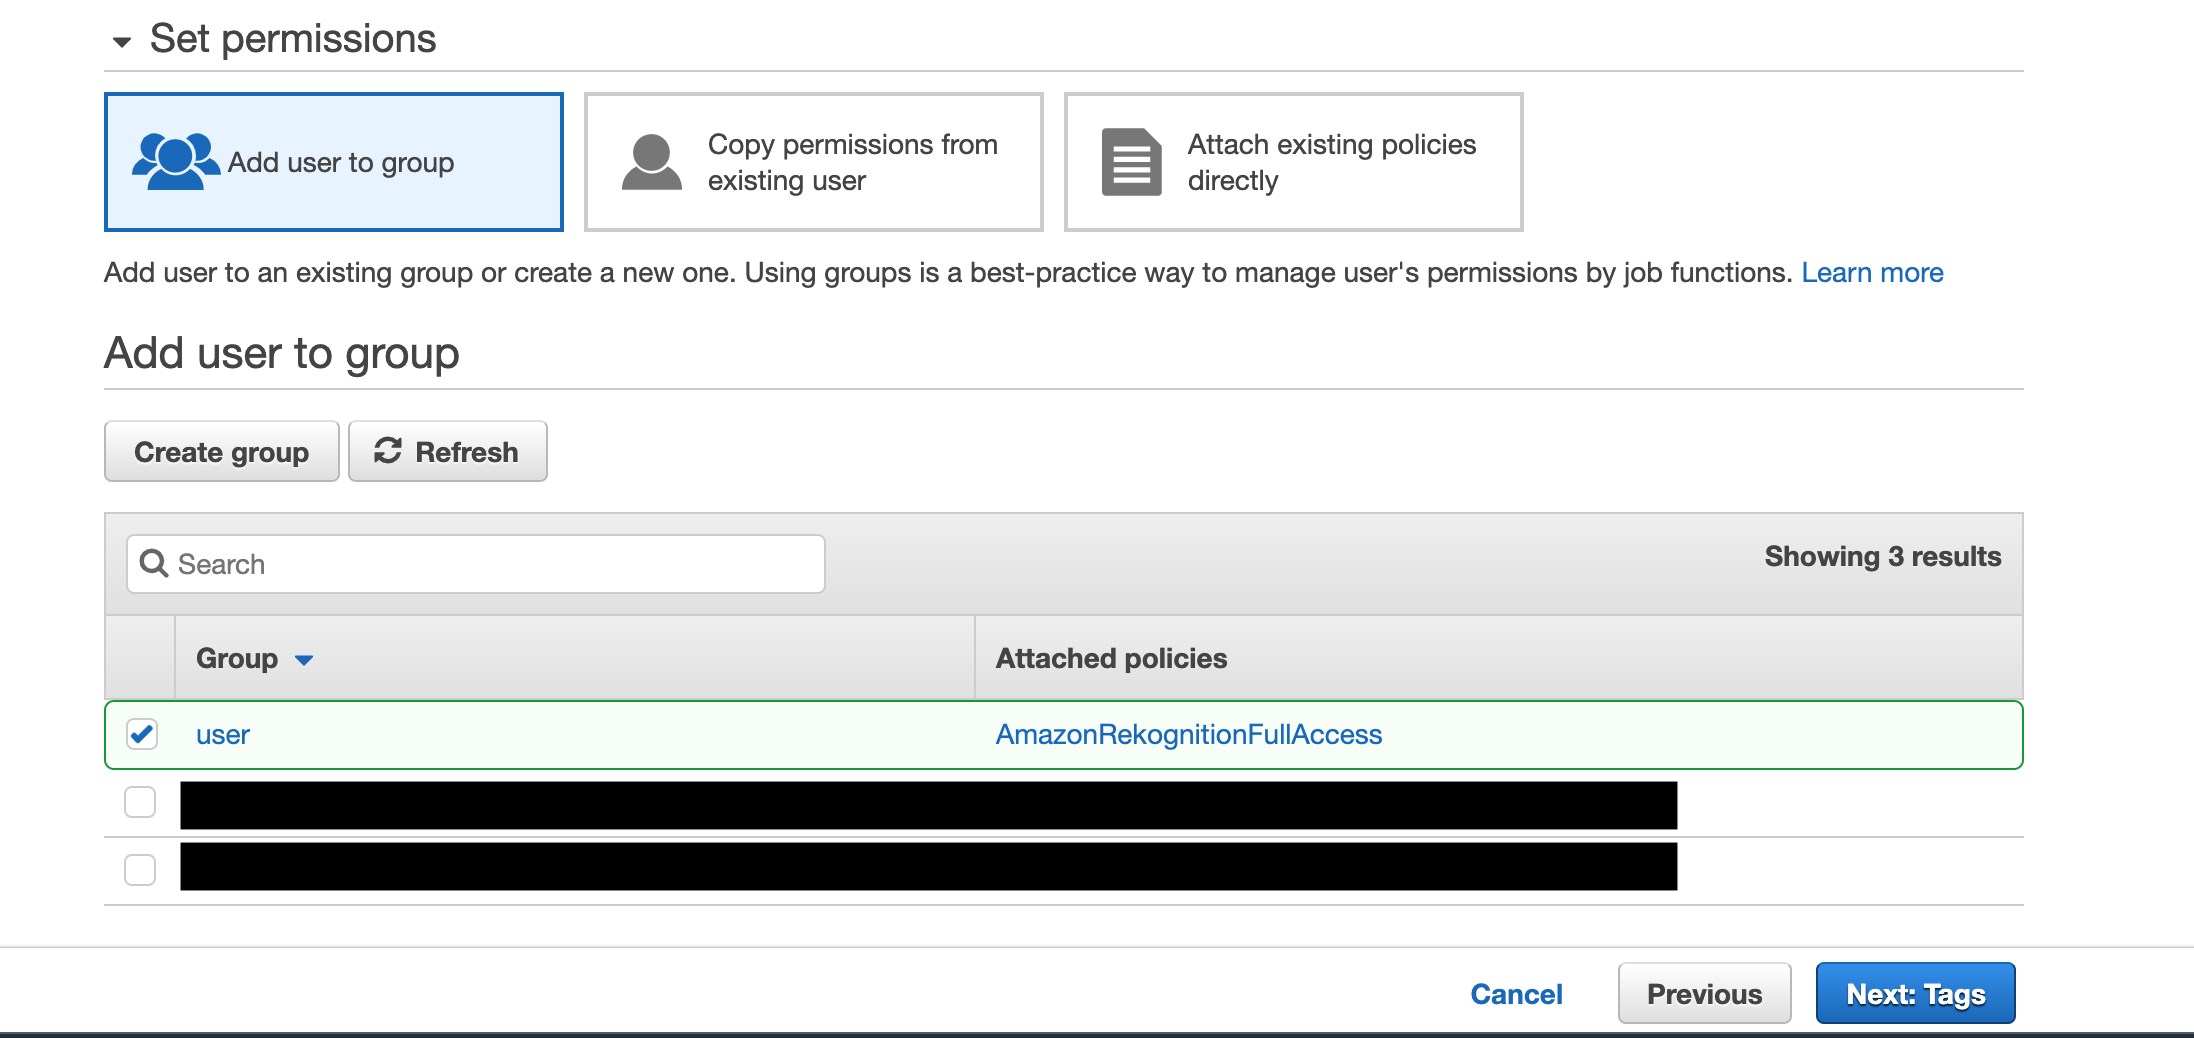
Select “Add user to group” and if one doesn’t already exist, click on “Create group”.

Image Screenshot-2021-01-21-at-17.08.15-1024x493.png of Amazon Rekognition

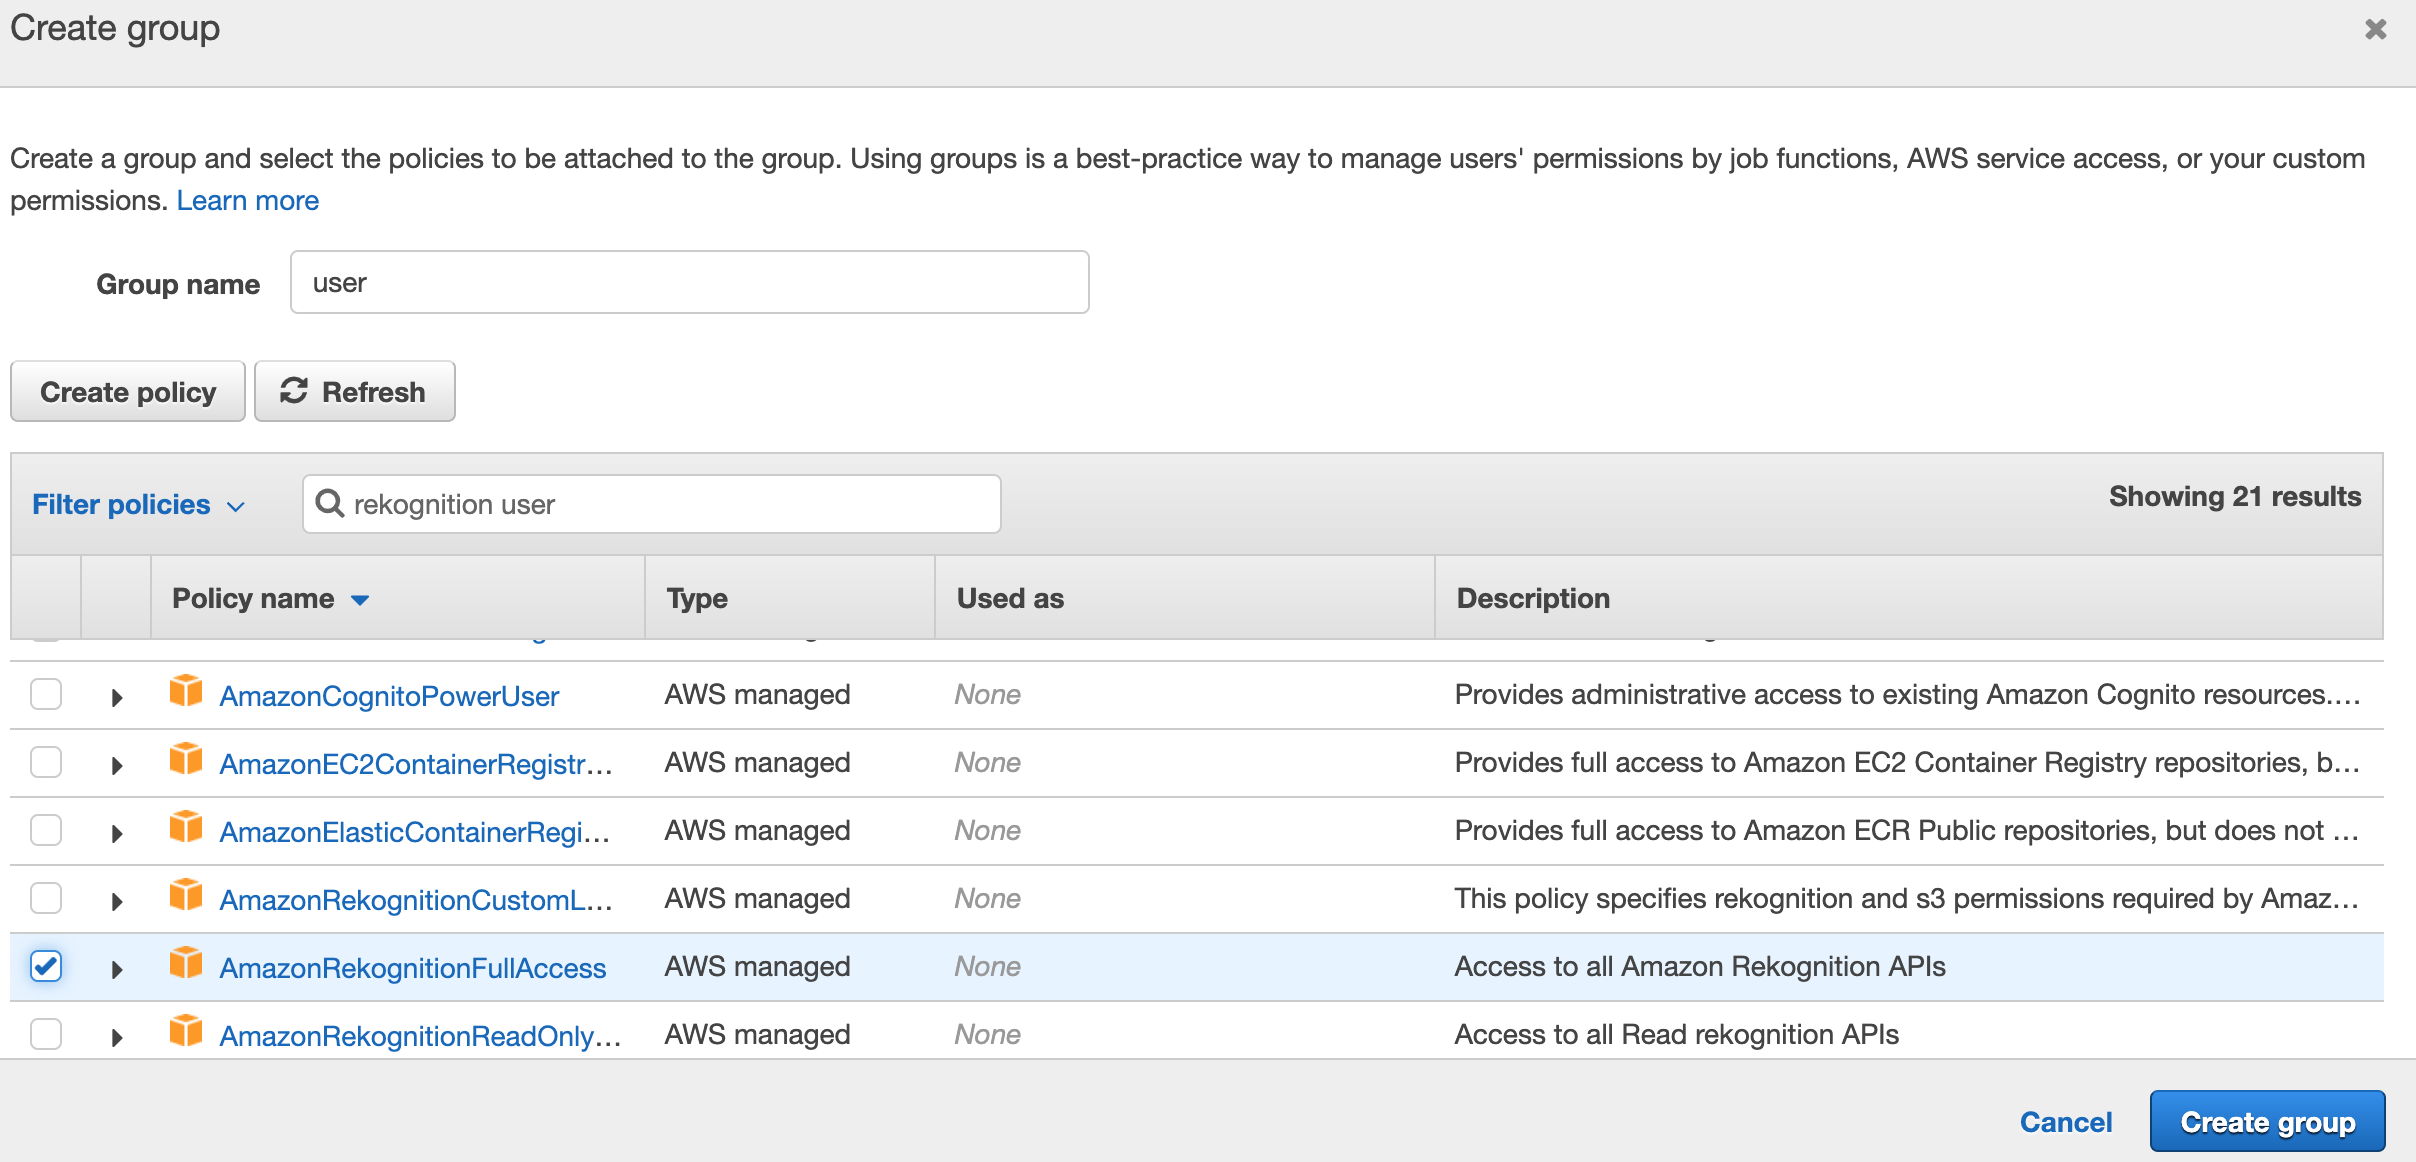
Choose a group name and type in rekognition user in the second search bar. Click on the “AmazonRekognitionFullAccess” checkbox.

Image Screenshot-2021-01-21-at-17.08.49-1-1024x484.png of Amazon Rekognition

Click on “Next: tags” after creating your group.

Image Screenshot-2021-01-21-at-17.09.13-1024x357.png of Amazon Rekognition

You can just leave this field blank.

Image Screenshot-2021-01-21-at-17.09.37-1024x485.png of Amazon Rekognition

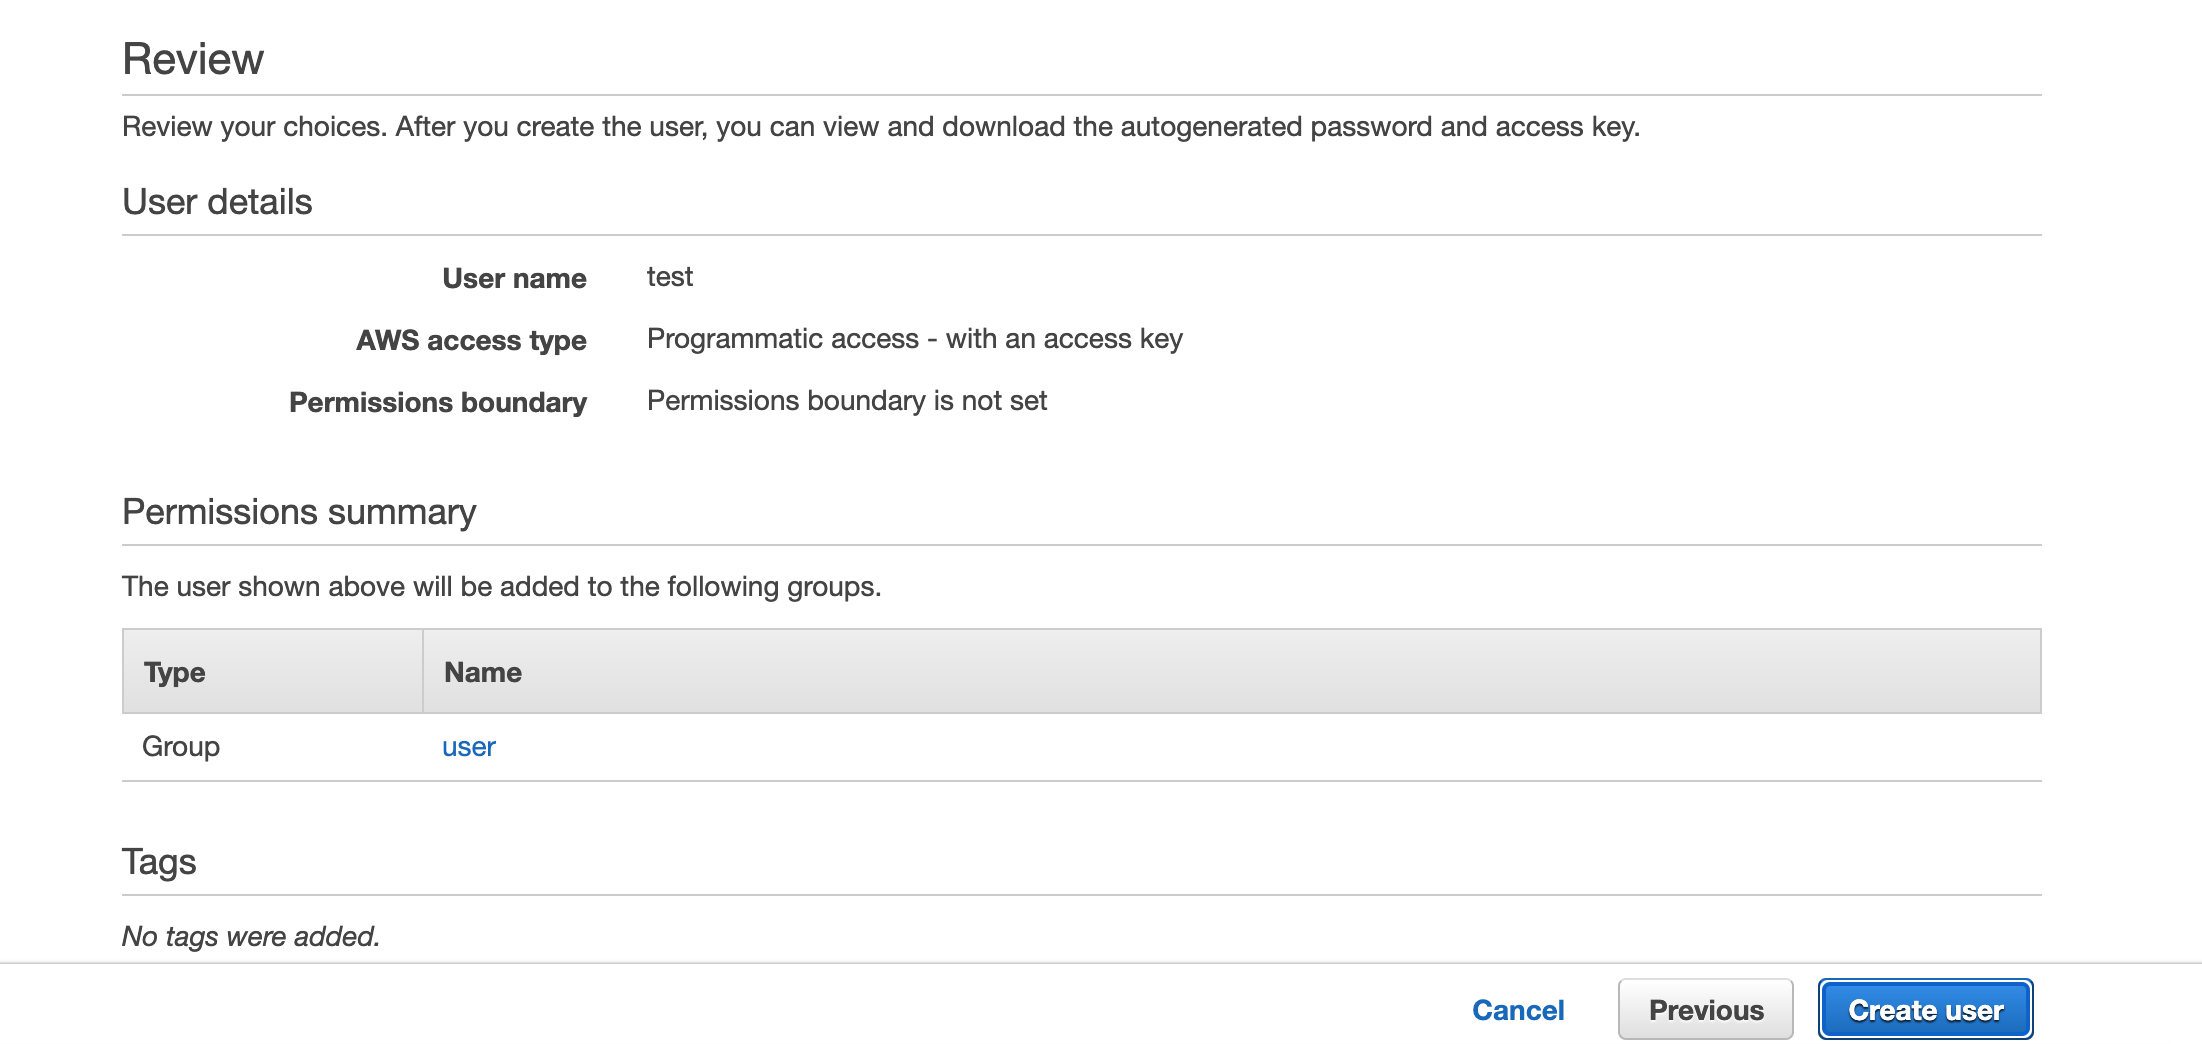
Click on “Create user”.

Image Screenshot-2021-01-21-at-17.09.59-2-1024x328.png of Amazon Rekognition


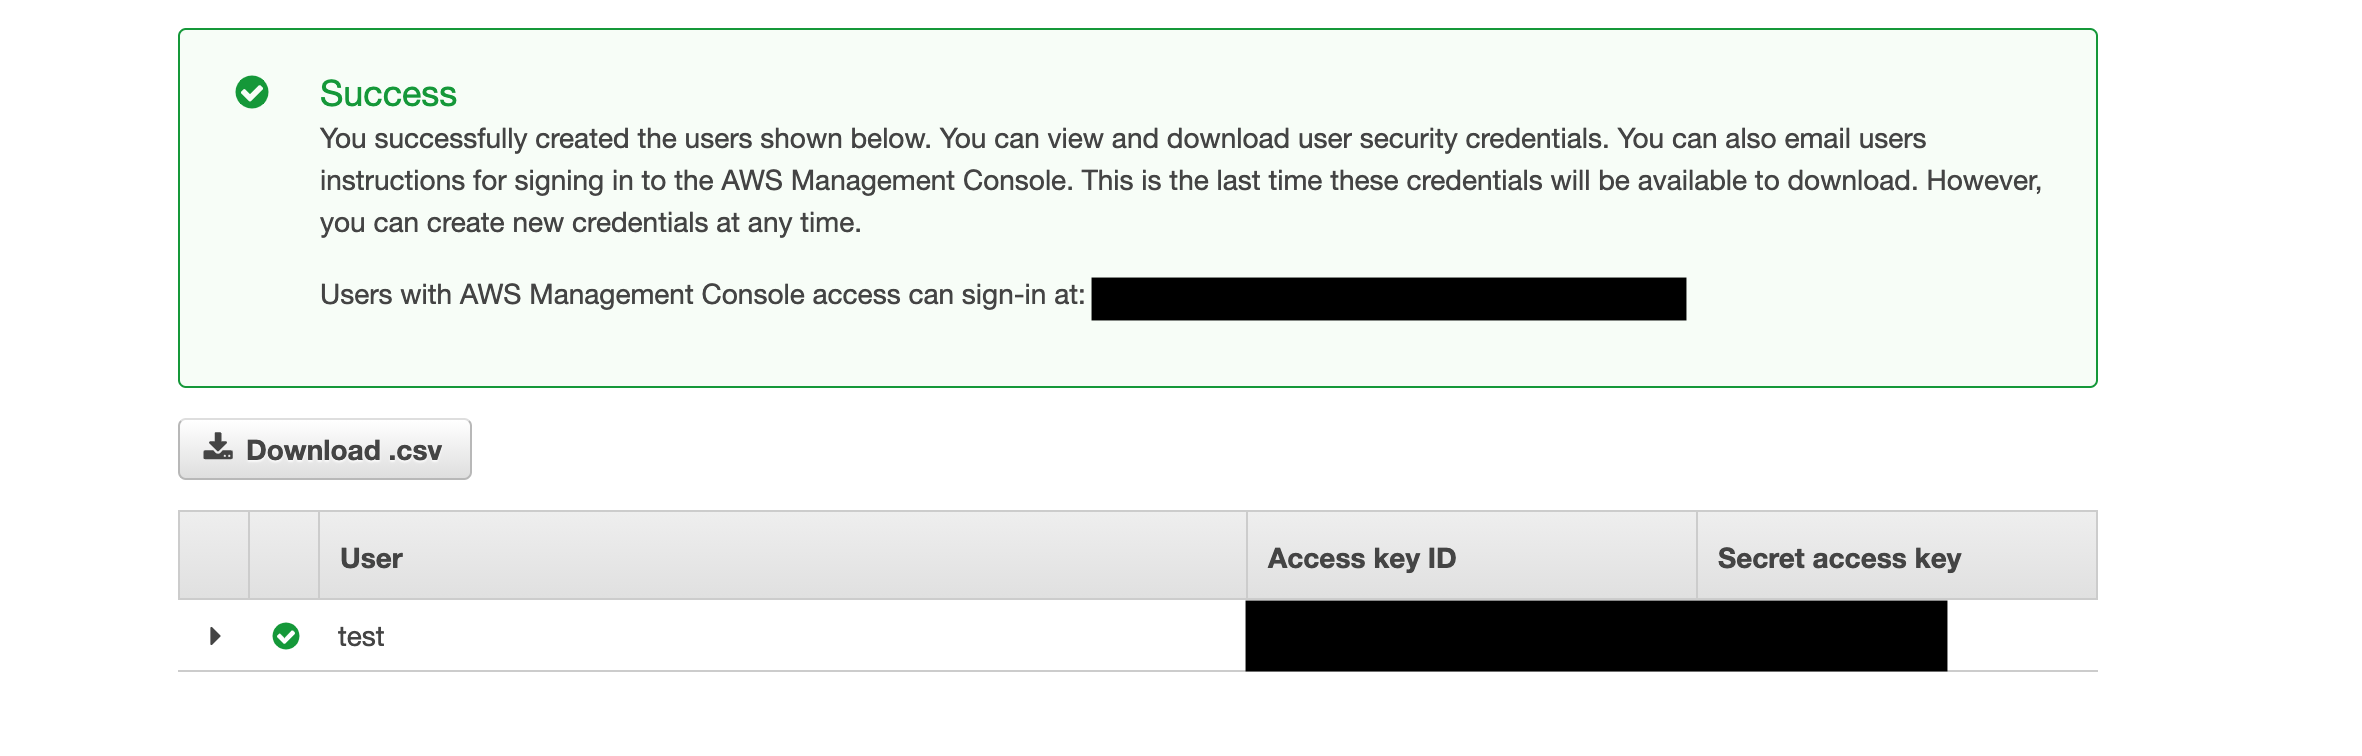
You should see this page after creating the user.


Create an index

Image Screenshot-2021-01-21-at-17.28.39-1024x377.png of Amazon Rekognition

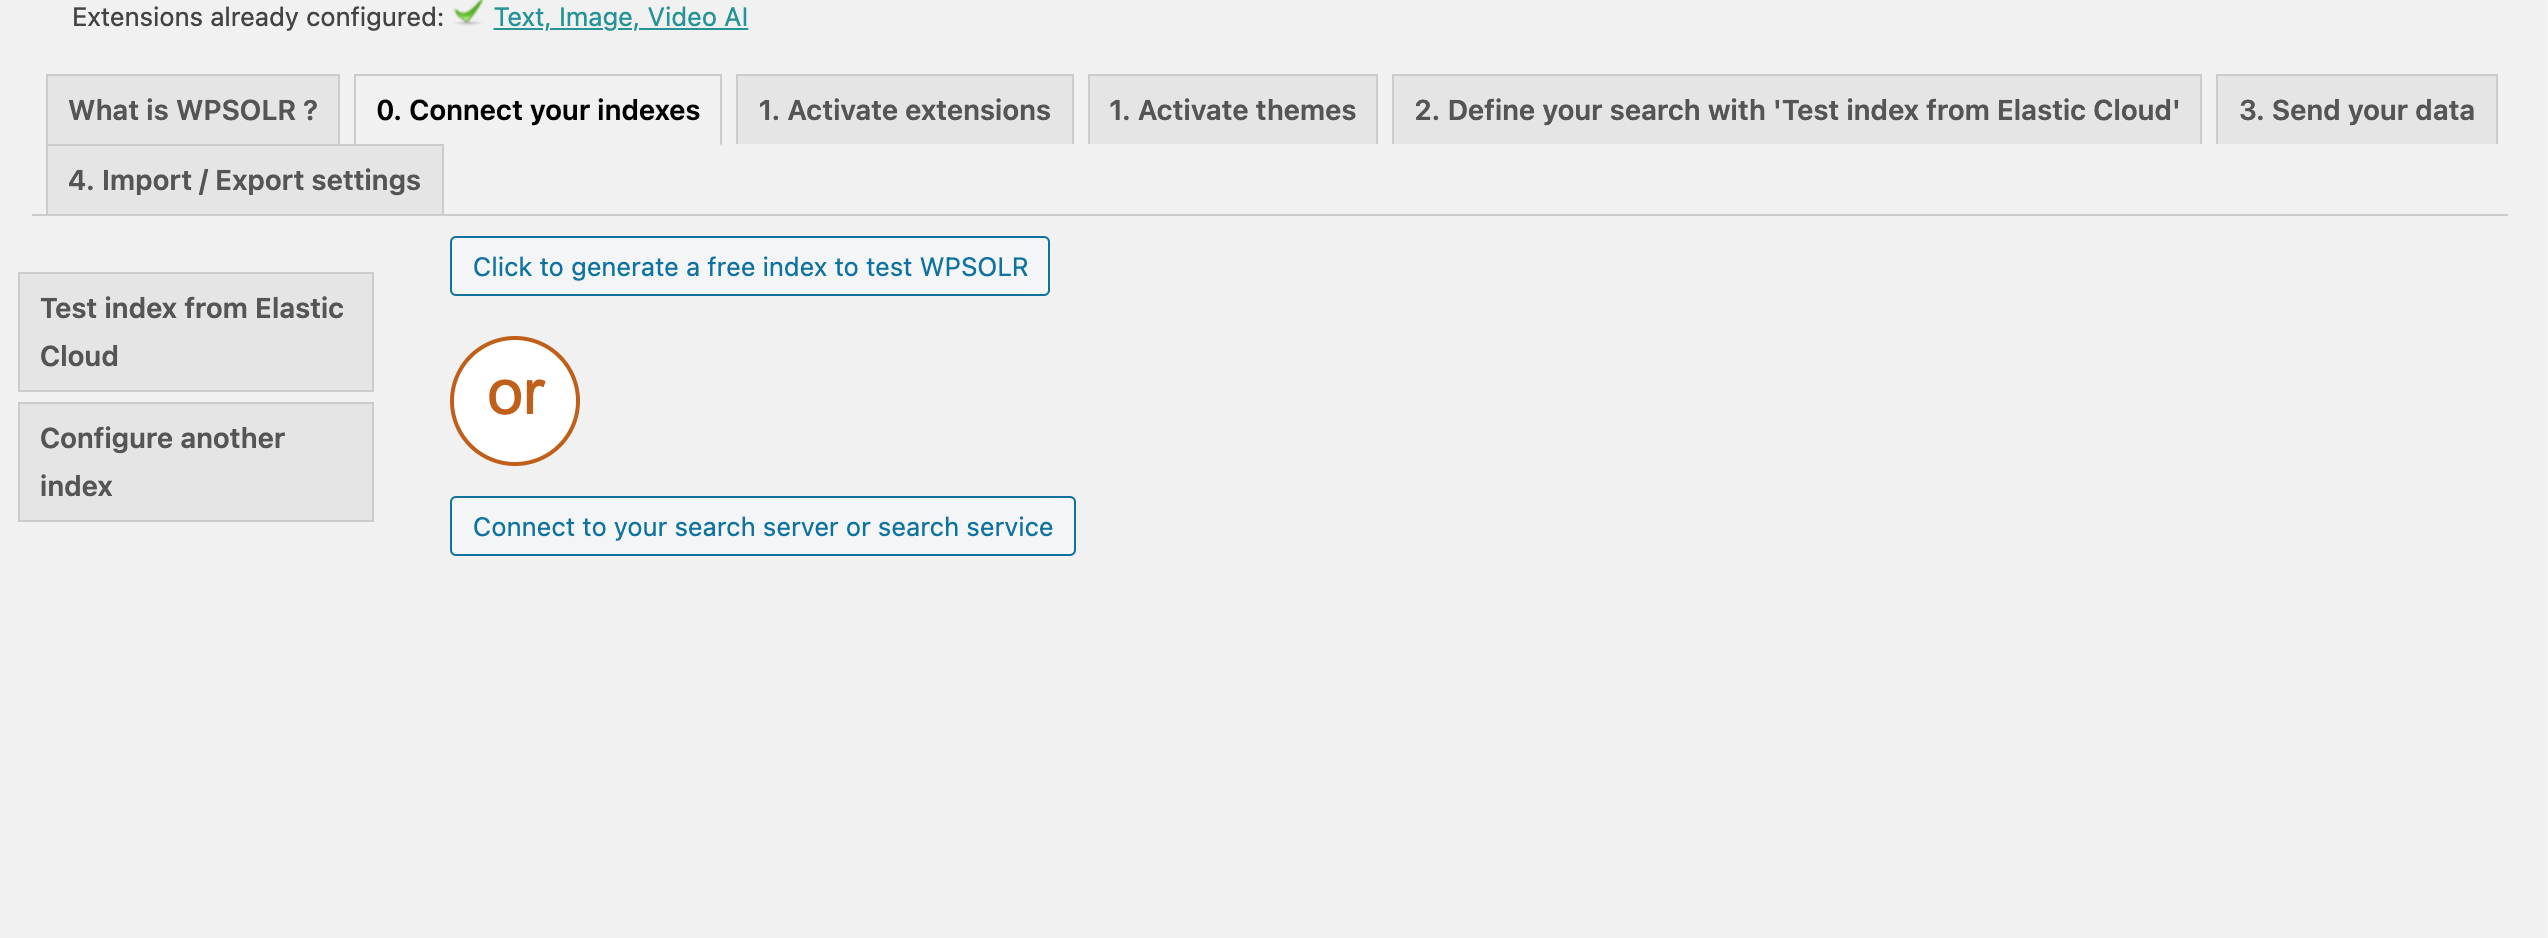
Click on “Connect your indexes” in WPSOLR admin, then choose one of the two options. Since i am on a test environment, i will select “Click to generate a free index to test WPSOLR”.

Image Screenshot-2021-01-21-at-17.28.46-1024x243.png of Amazon Rekognition

Select “Create a free test index”. Then click “Save”.


Activate the WPSOLR Vision API extension

Image Screenshot-2021-01-21-at-17.32.08-1-1024x711.png of Amazon Rekognition

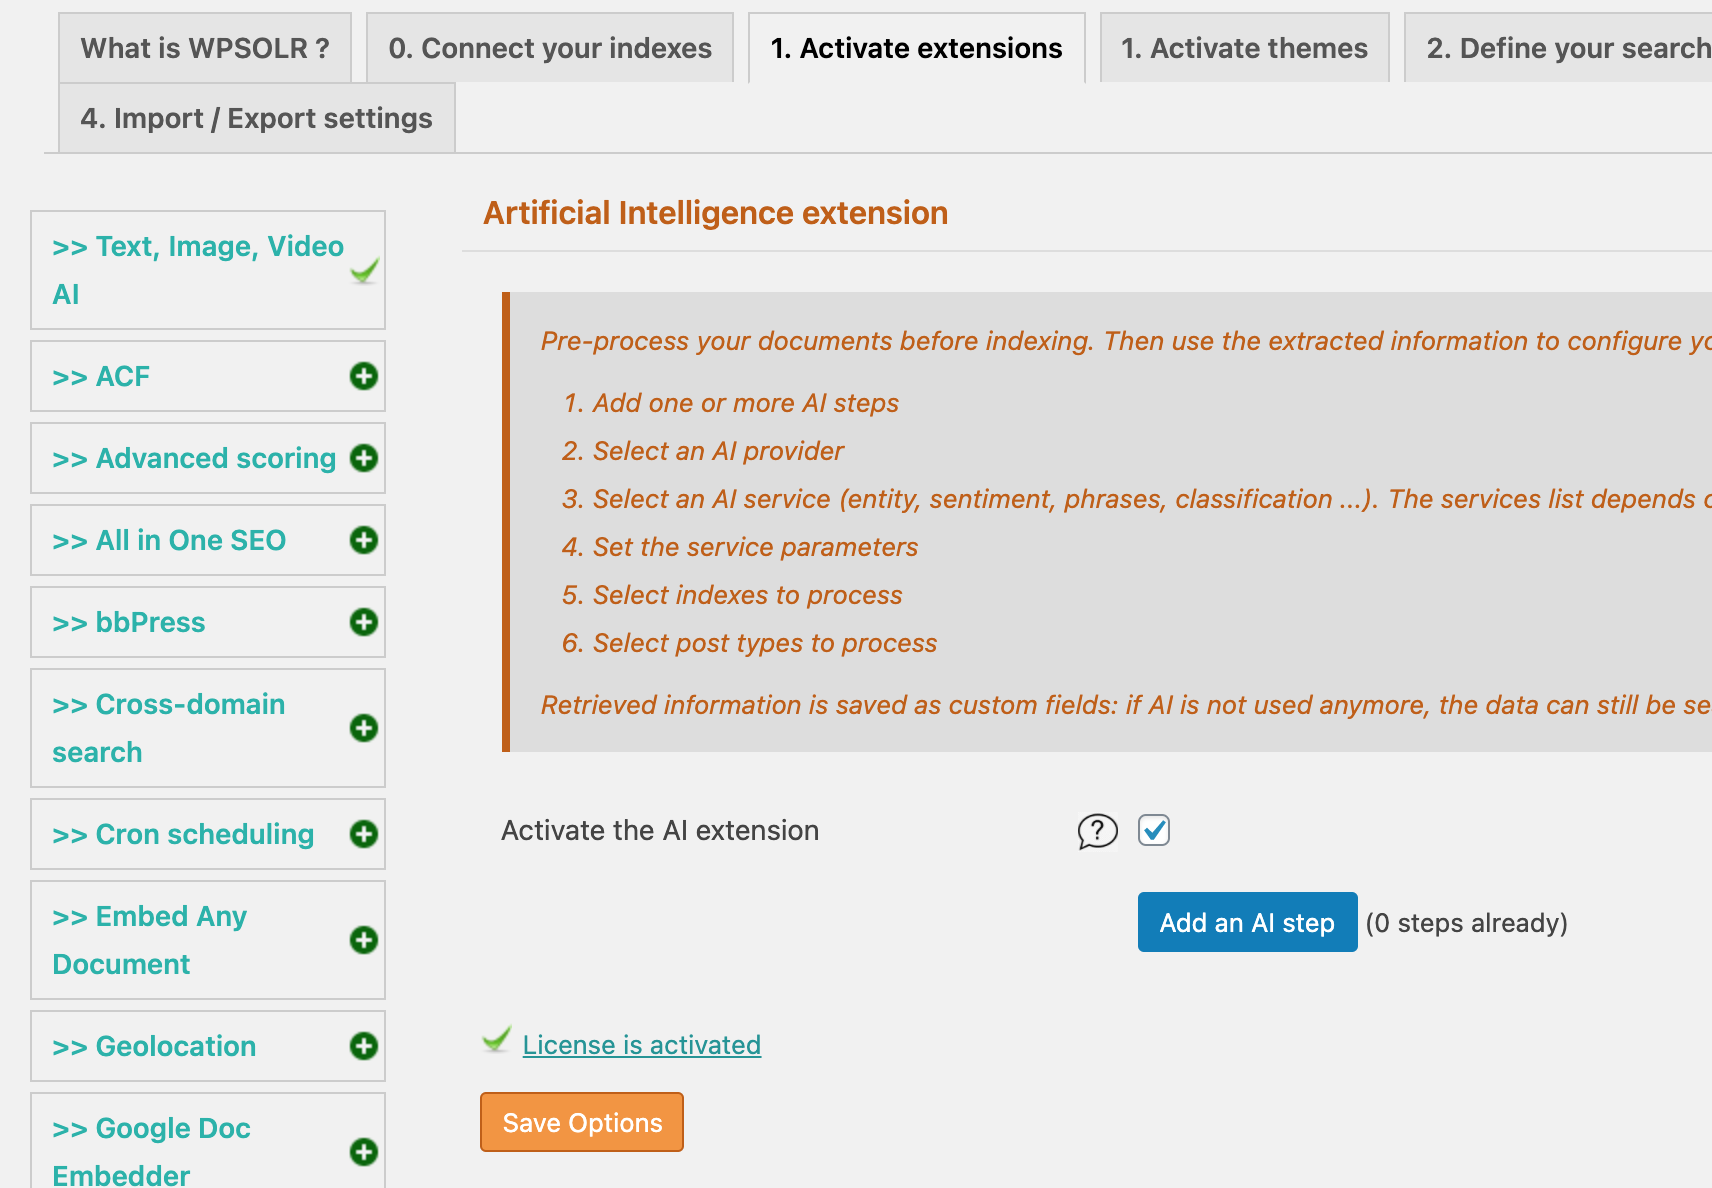
Go to “Activate extensions” and click on “Text, Image, Video AI” in the sidebar. Click on “Activate the AI extension” and save your options.


Configure the Amazon Rekognition API

Image Screenshot-2021-01-21-at-17.33.56-1024x523.png of Amazon Rekognition

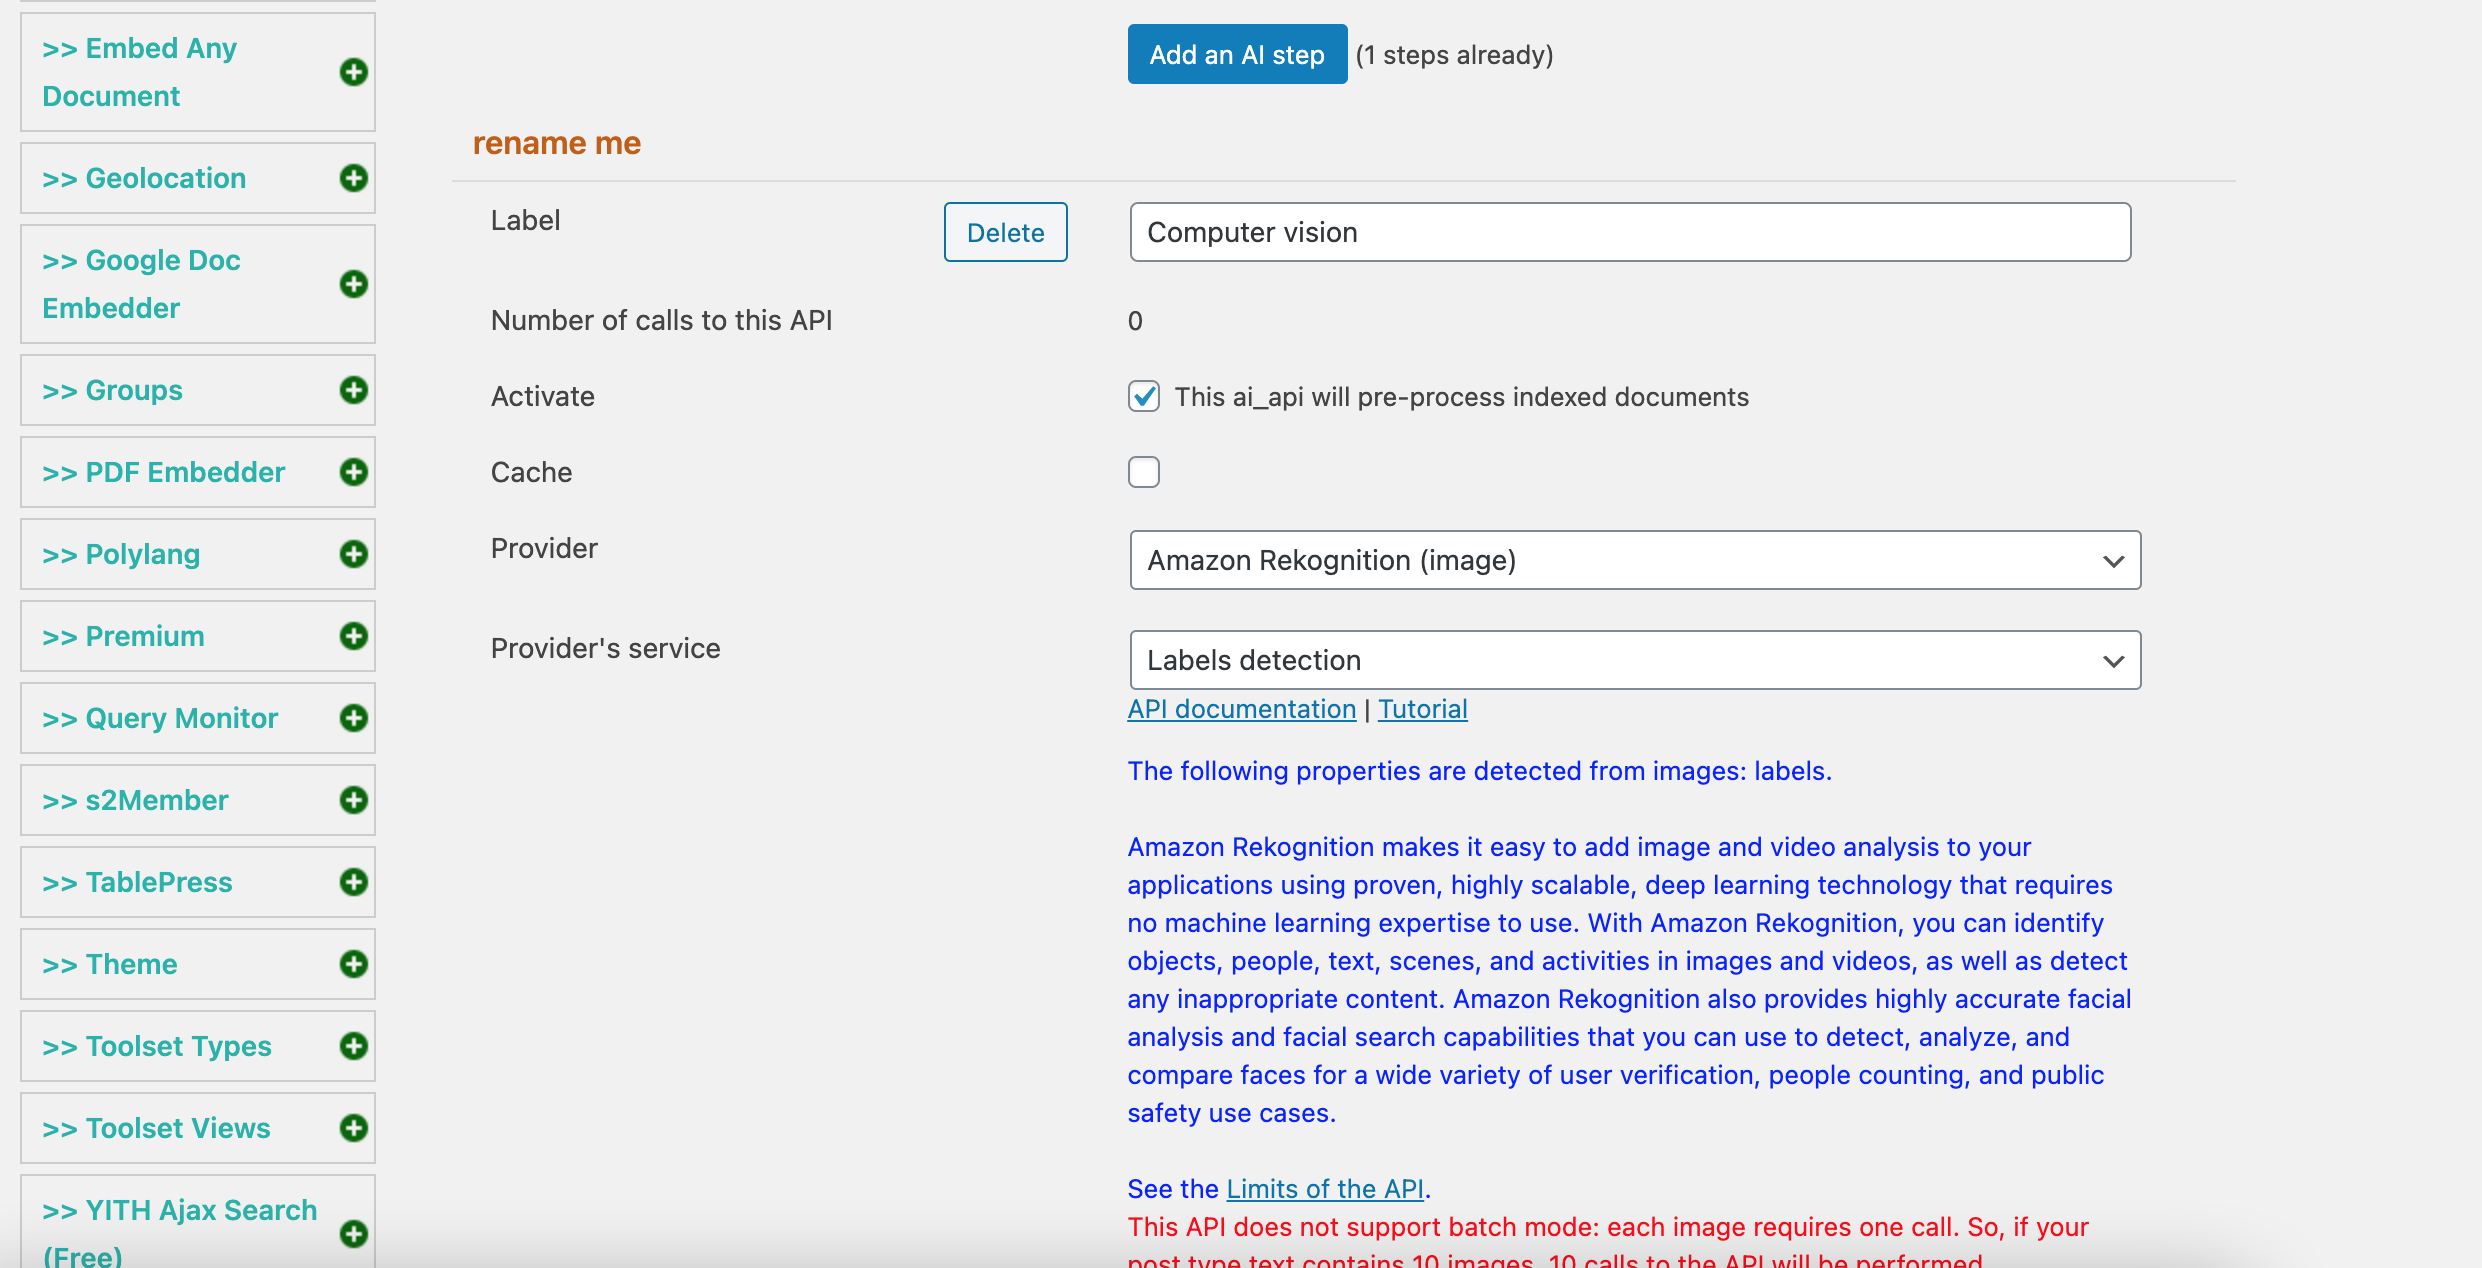
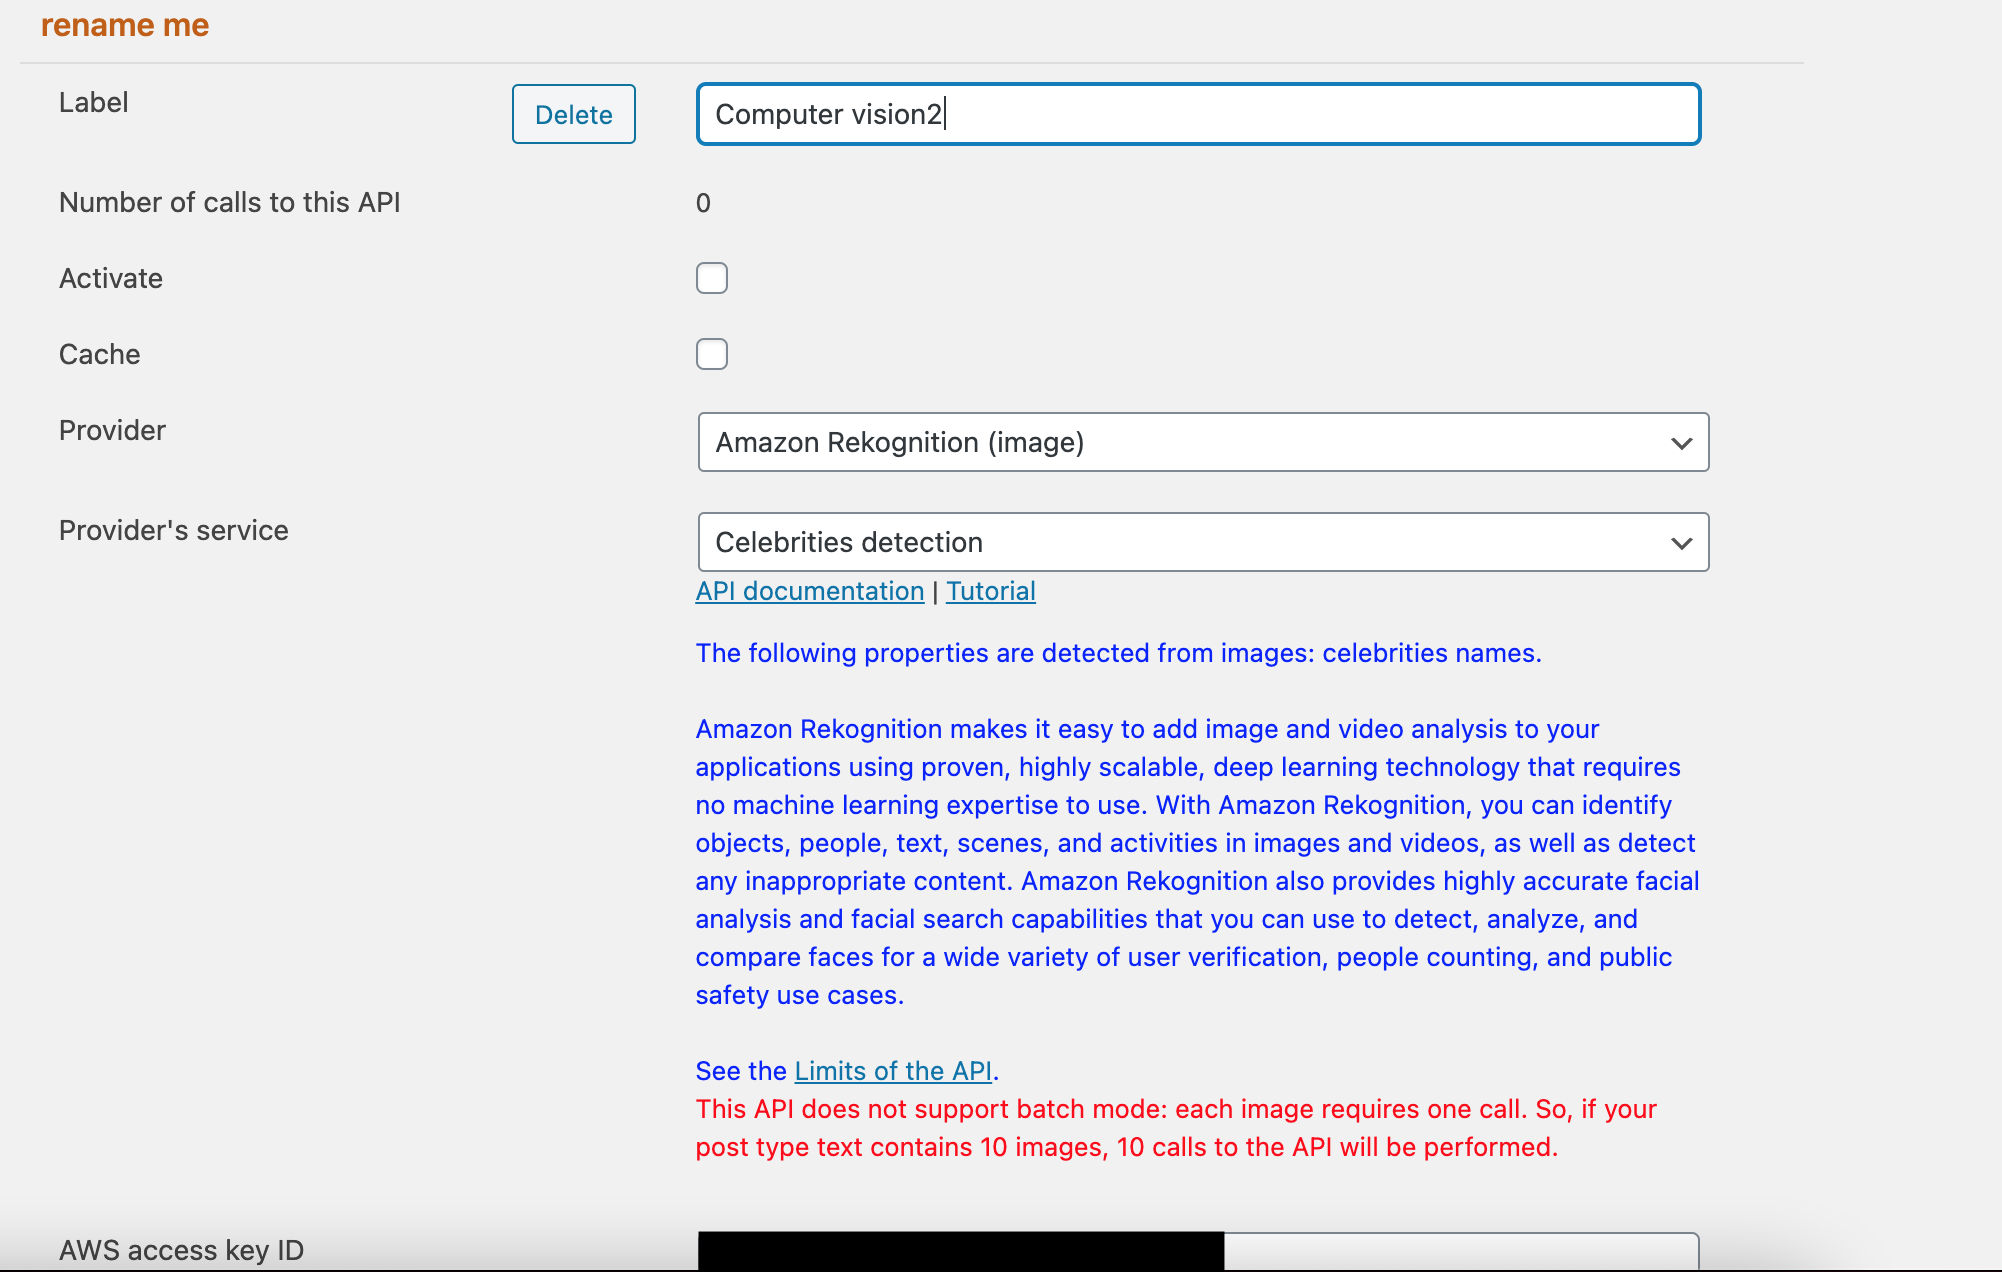
Then click on the “Add an AI step” button and fill in the fields that appear. Add a name in the “Label” field then click on the “Activate” checkbox. Choose Amazon Rekognition in the “Provider” section. and then choose one of the options in the “provider’s service” dropdown list. they each provide a difference service like celebrity detection or labels detection.

Image Screenshot-2021-01-21-at-17.35.00-1024x623.png of Amazon Rekognition

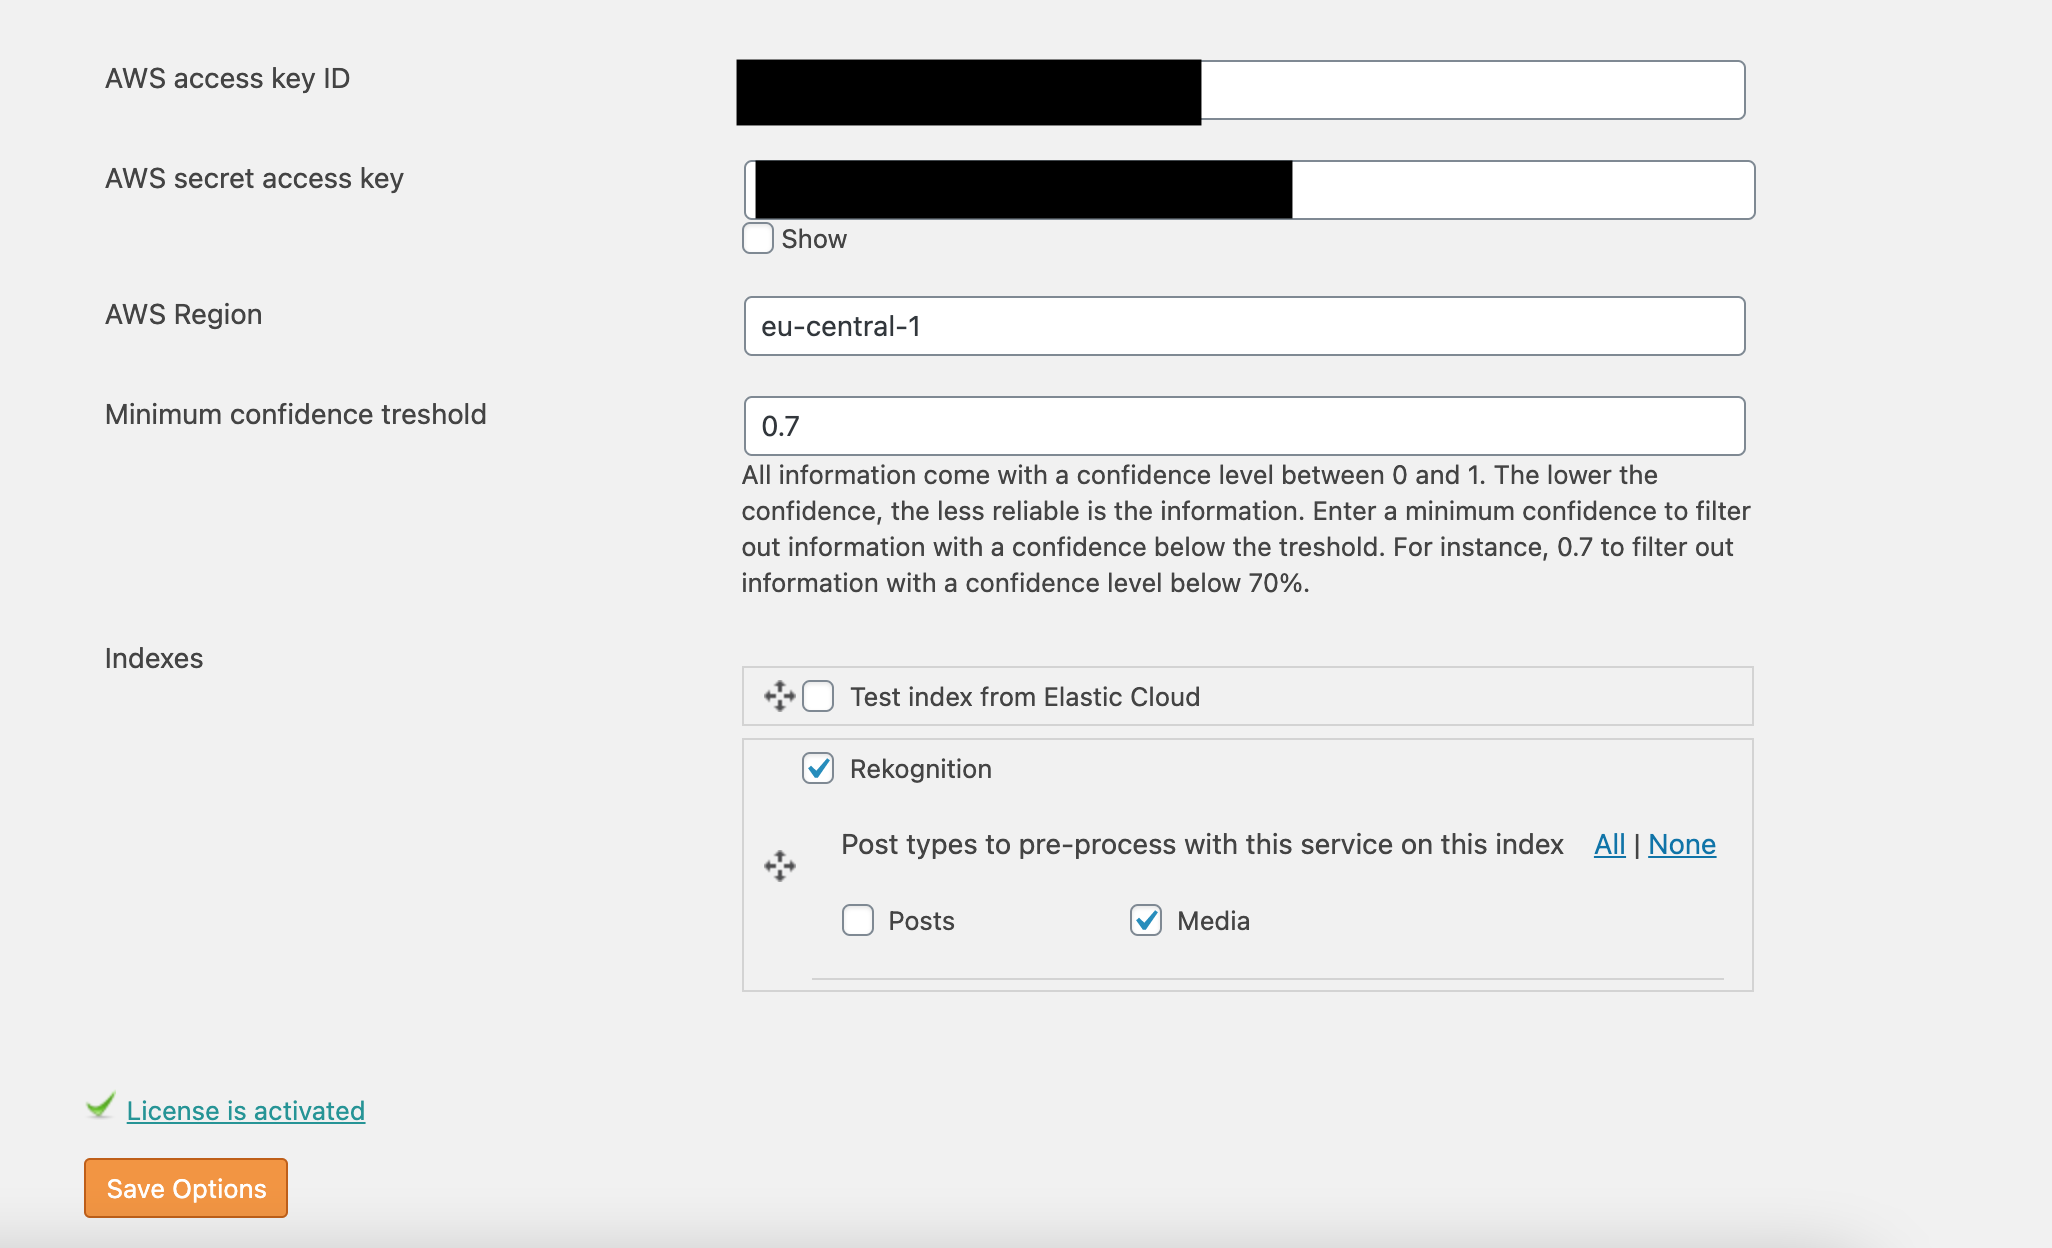
Next enter the AWS access key and the secret access key from earlier. Enter a region and a minimum confidence threshold. if you have a problem with your search filters later, you may need to change you minimum confidence threshold to a 0(zero).  Choose the index you want the settings to apply to, and the type of content which will be affected by it. You can choose “Media” so amazon will process your photos or “Posts”. If you choose the second option the photos in your posts will be processed by the API whether they be featured images, images or even photos from external websites that are linked to your posts.

Image Screenshot-2021-01-22-at-09.53.11-1-1024x651.png of Amazon Rekognition

If you press on the “Add an AI step” button again you can add another configuration for a service in Amazon Rekognition. When you’re done, save your changes.


Configure the WPSOLR search

Image Screenshot-2021-01-21-at-17.35.26-1024x297.png of Amazon Rekognition

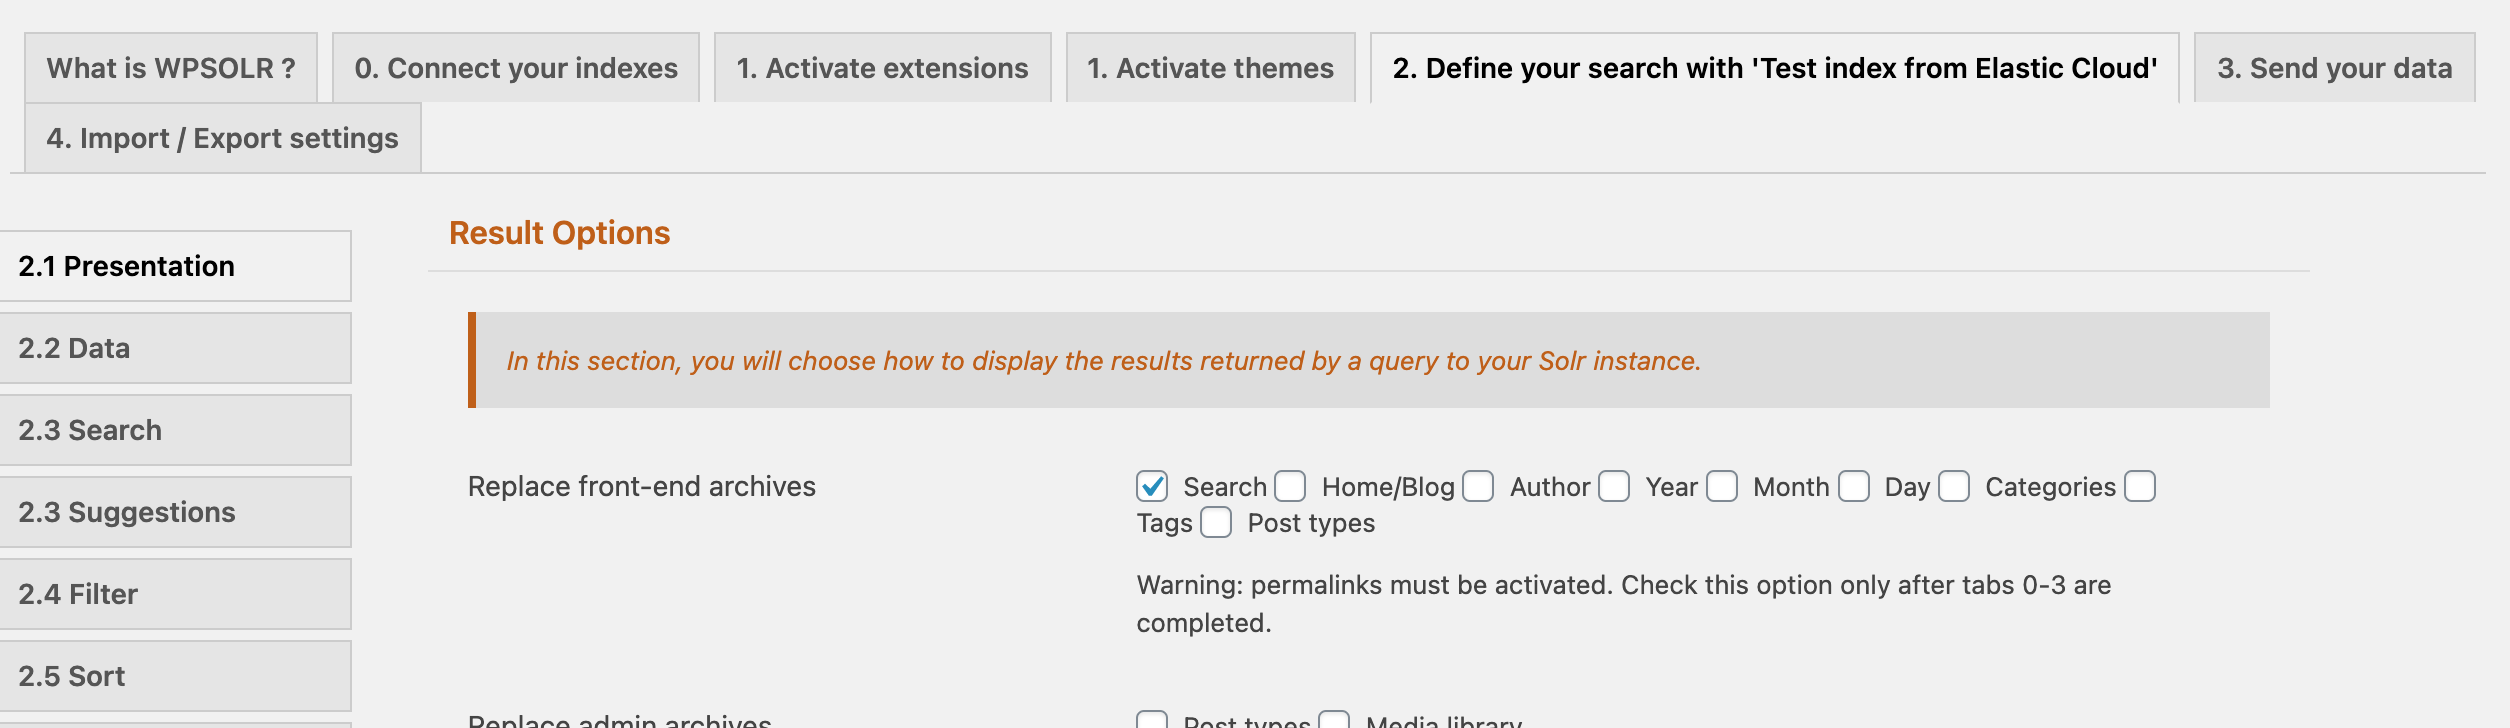
Select “Define your search with ‘Test index from Elastic Cloud'”, then “Presentation” and click on the “search” checkbox. Then save your changes.

Configure the Amazon Comprehend fields to index

Image Screenshot-2021-01-22-at-08.52.17-1024x447.png of Amazon Rekognition

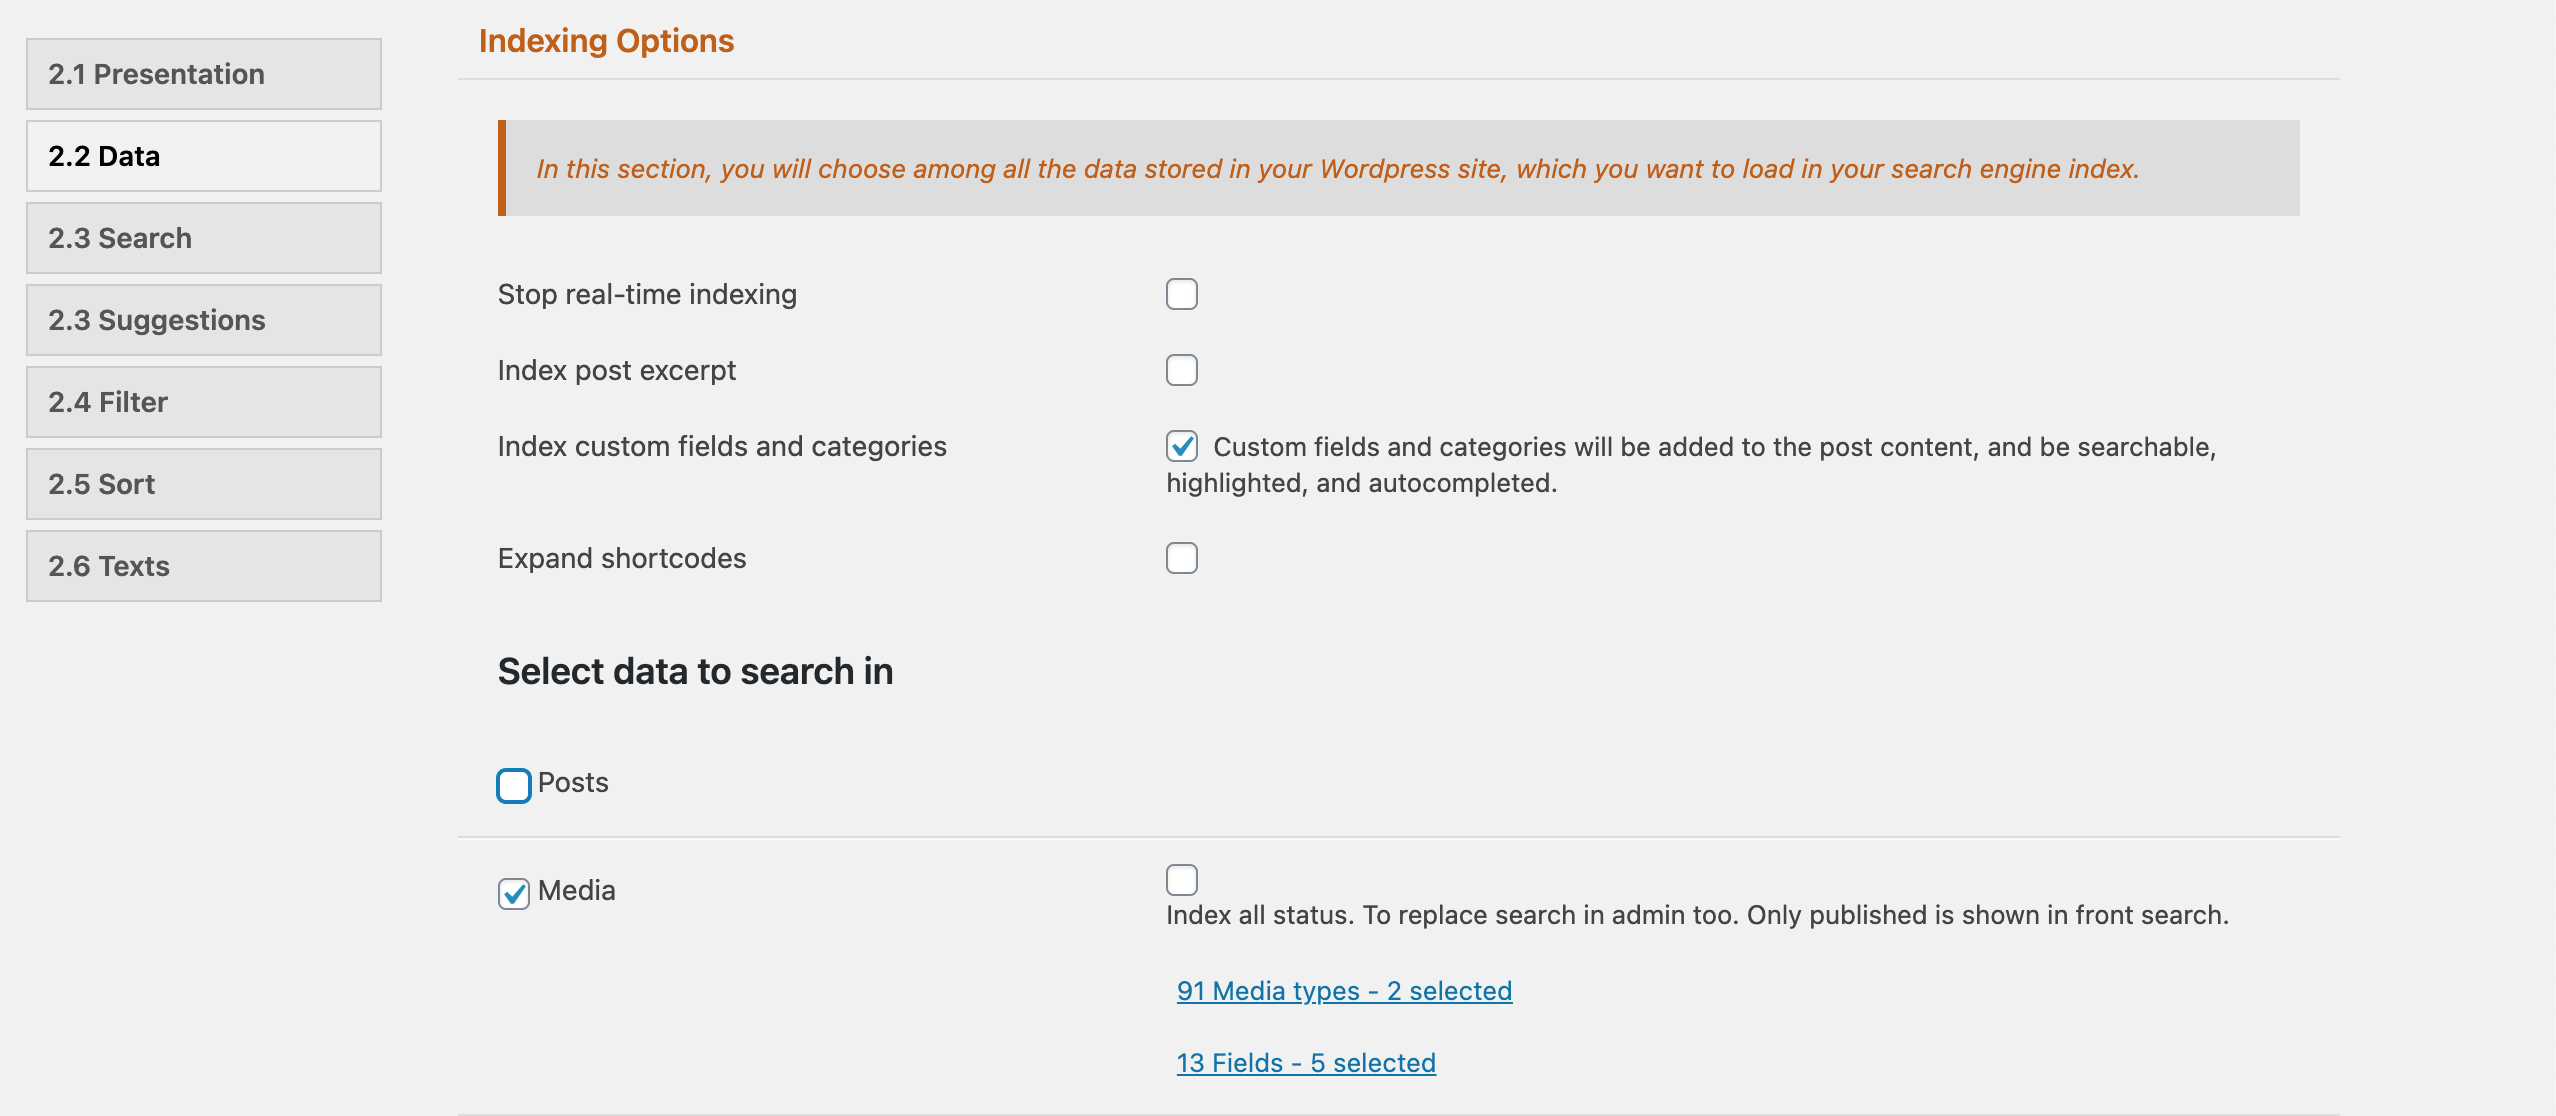
Select “Data” in the sidebar, then click on “Media”.

Image Screenshot-2021-01-22-at-08.53.53-1024x155.png of Amazon Rekognition

Choose the type of content you want to index. The media type supported are jpeg, jpg and png.

Image Screenshot-2021-01-22-at-09.20.26-1024x320.png of Amazon Rekognition

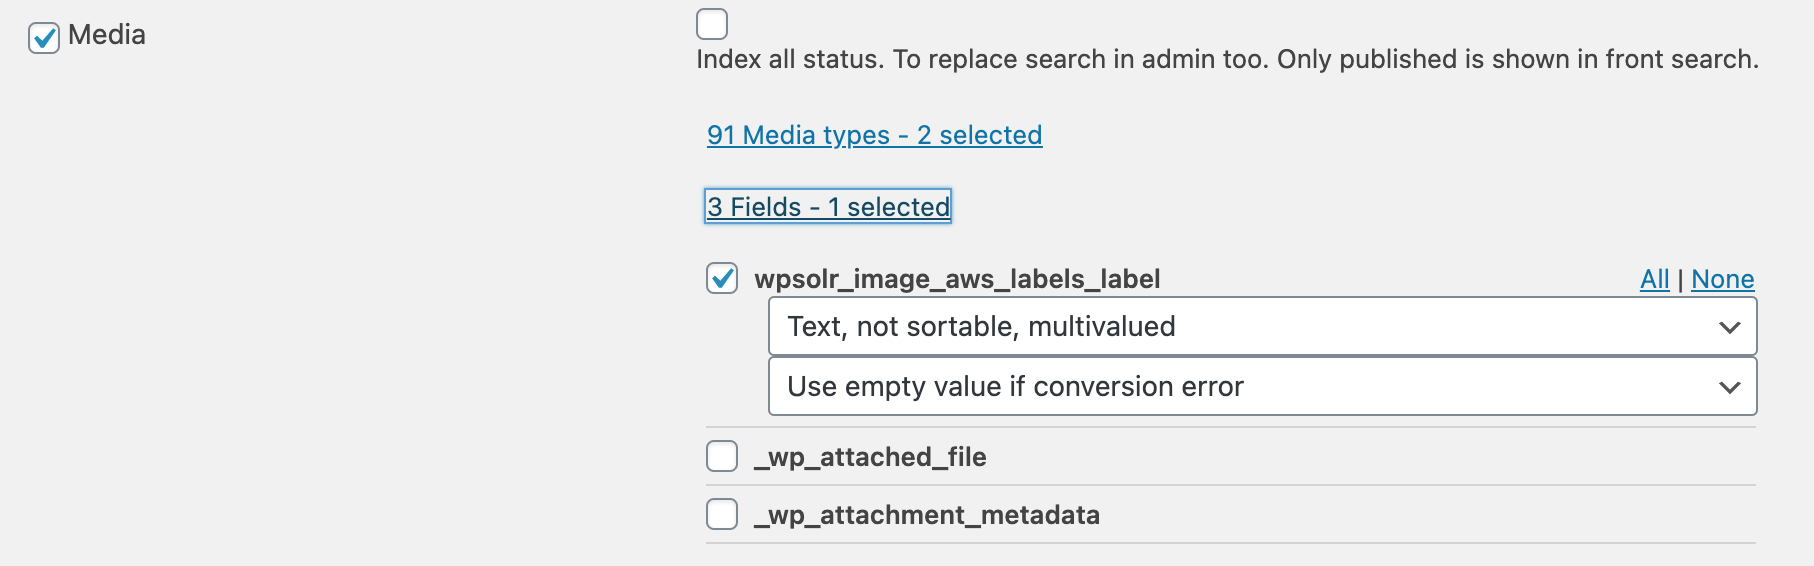
Choose the fields corresponding to the services you chose earlier.

Configure the Amazon Rekognition fields to use as filters

Image Screenshot-2021-01-22-at-09.21.43-1024x418.png of Amazon Rekognition

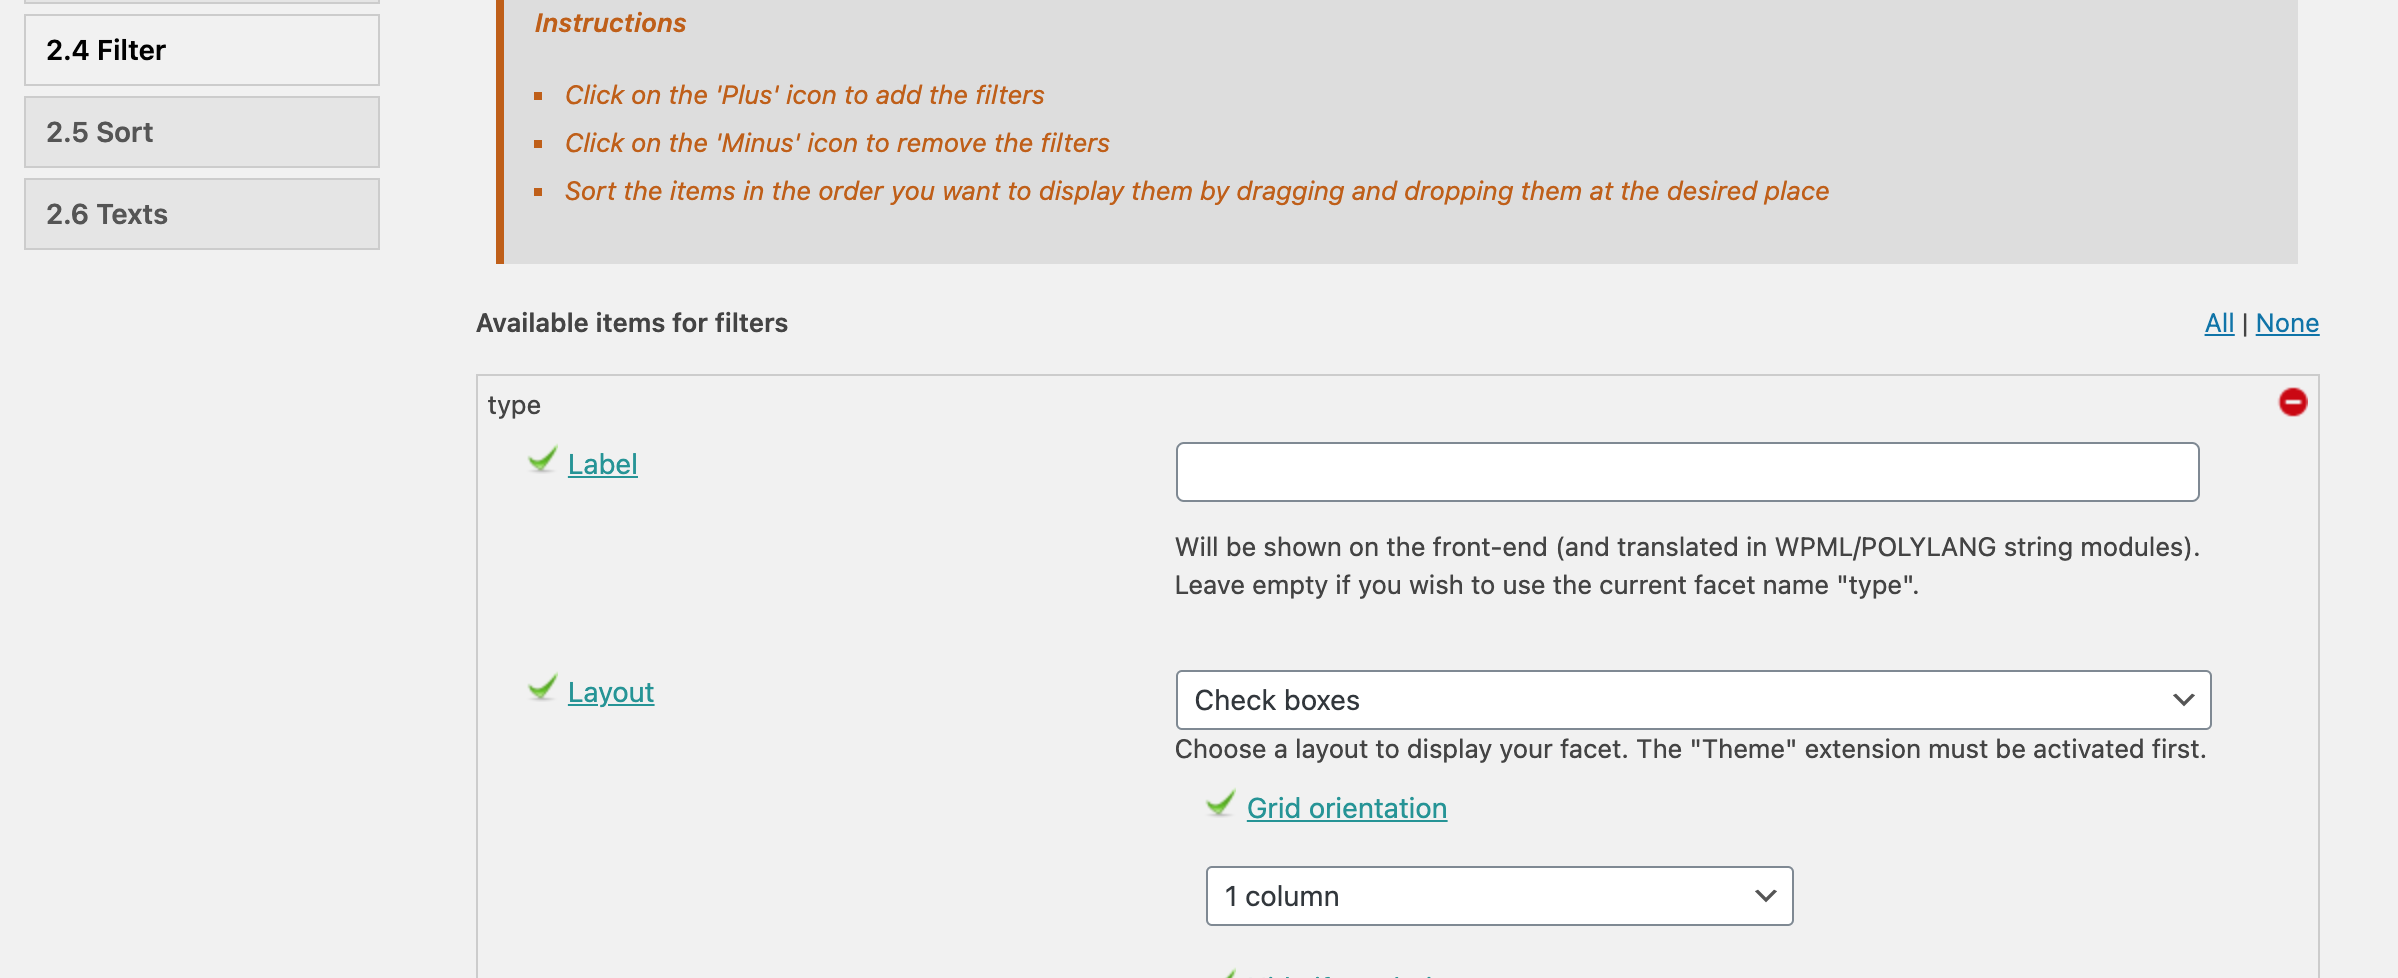
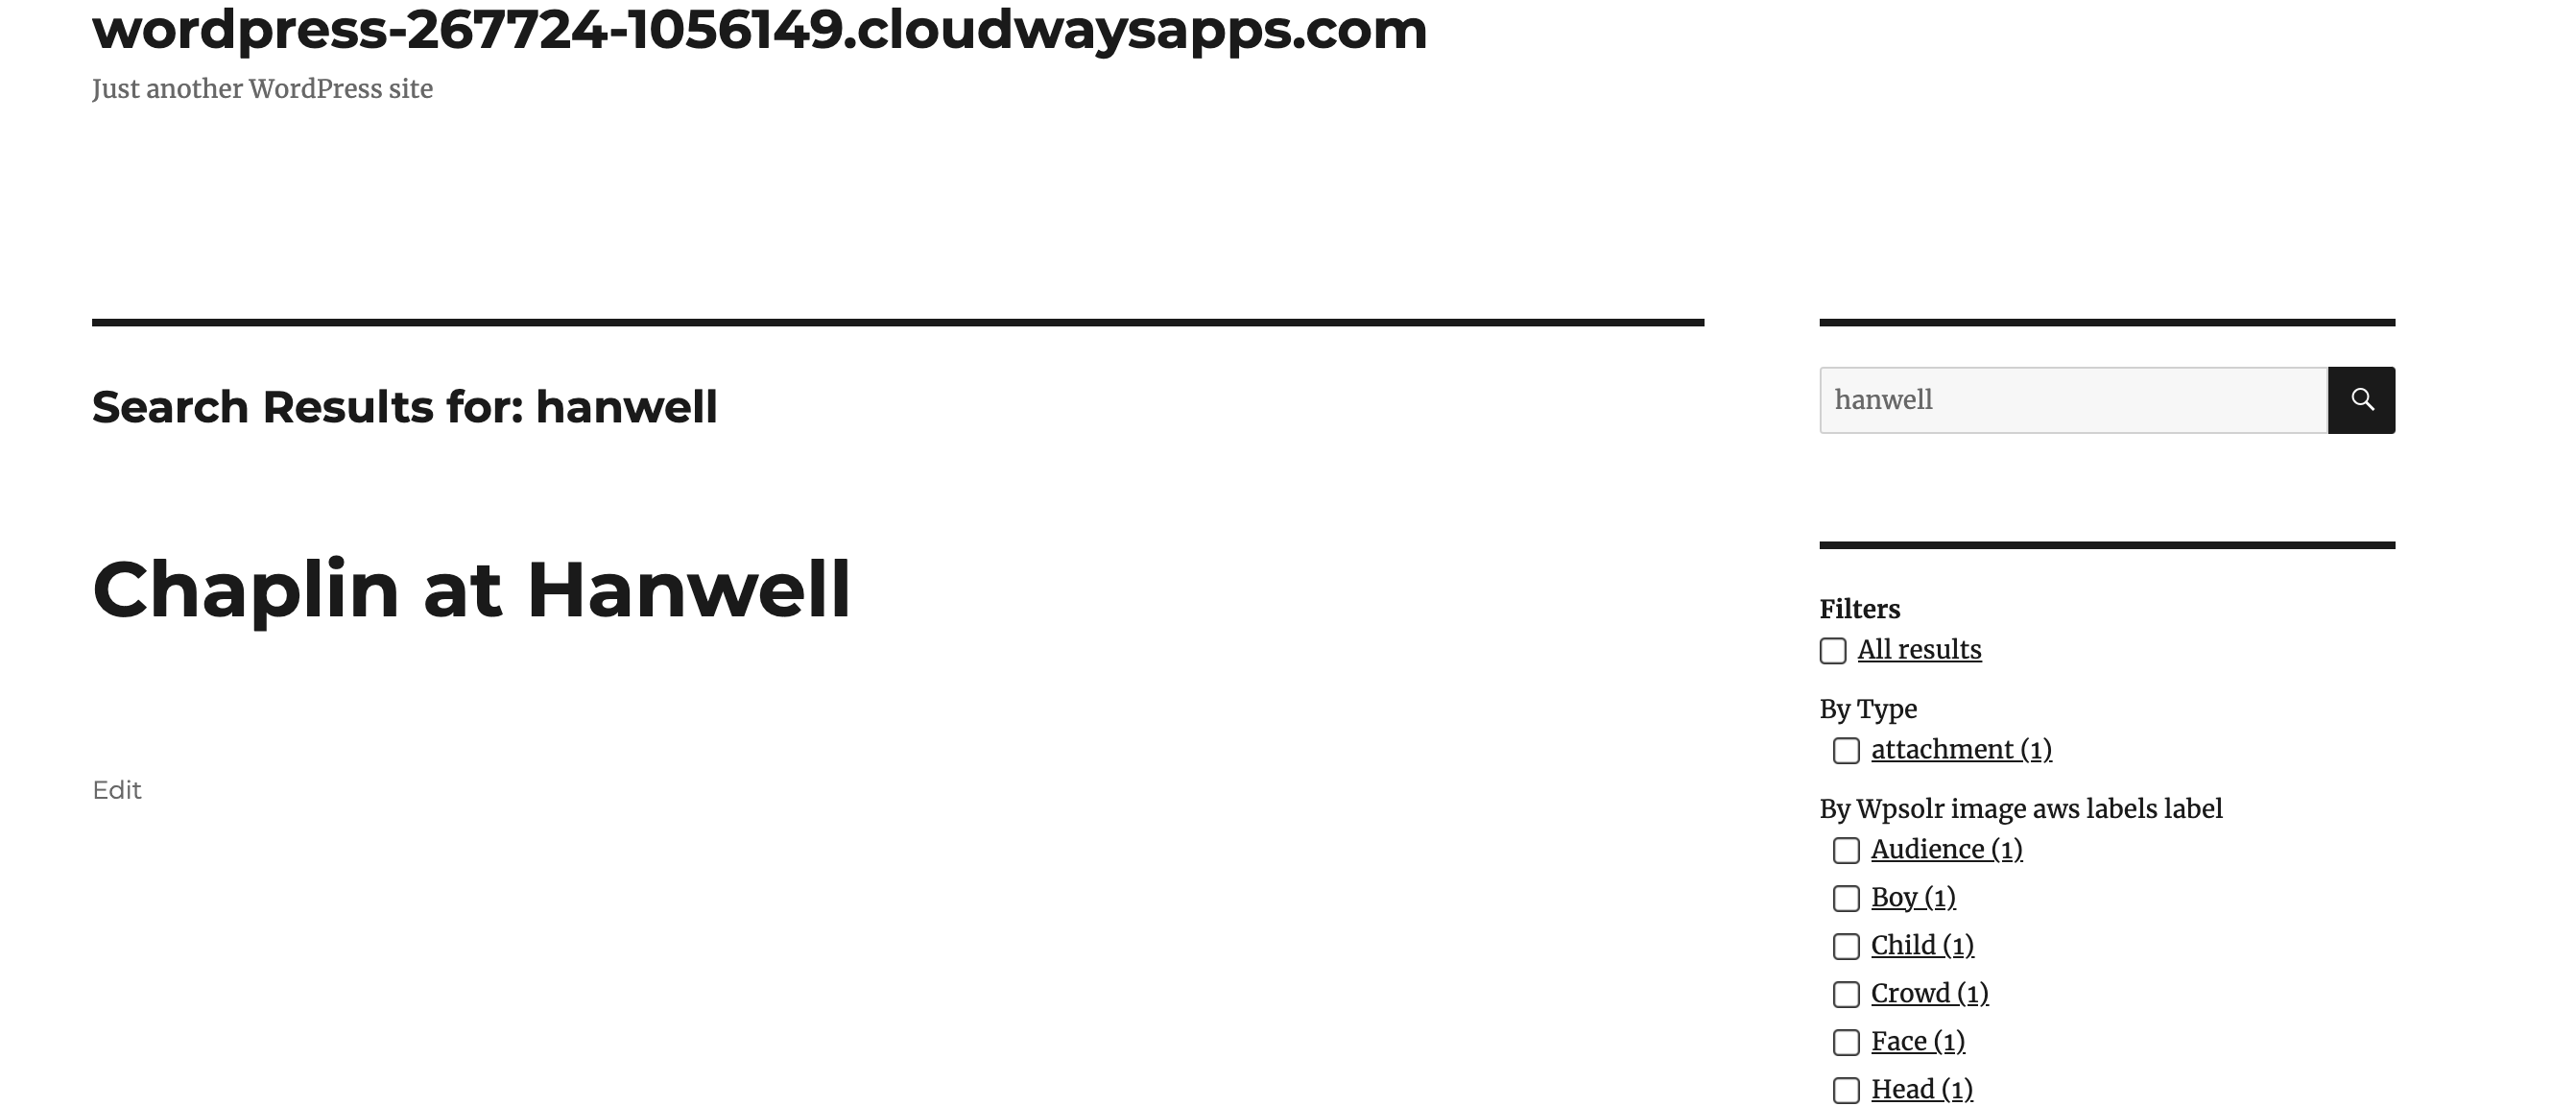
click on “Filter” in the sidebar and select the filters you wish to display.

Add WPSOLR facets widget to your search sidebar

Image Screenshot-2021-01-22-at-08.56.29-1024x214.png of Amazon Rekognition

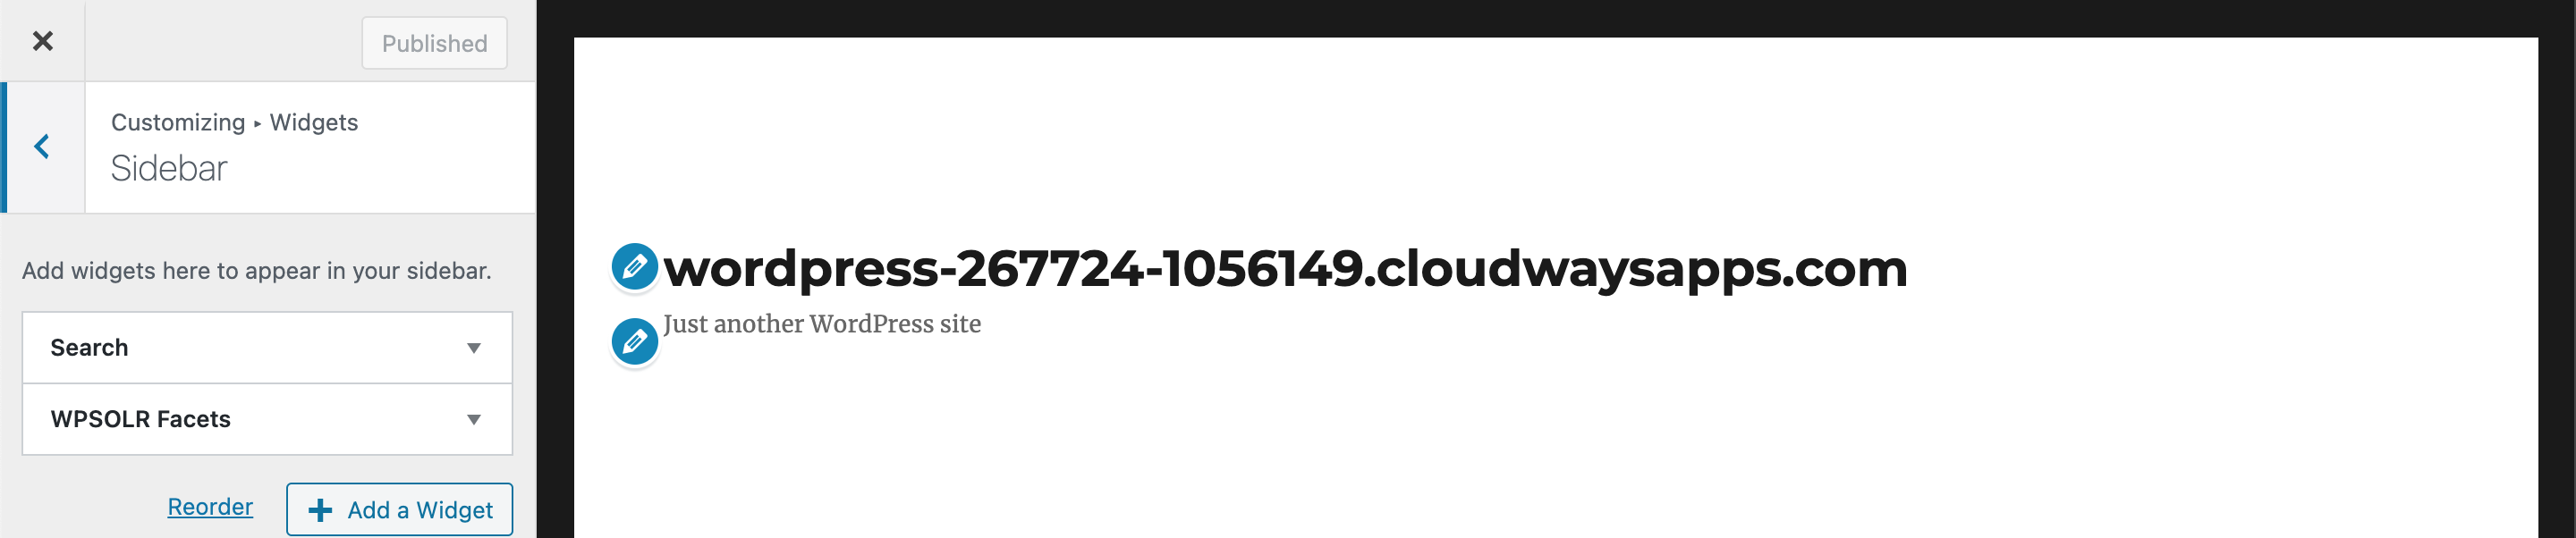
Add the WPSOLR facets widget


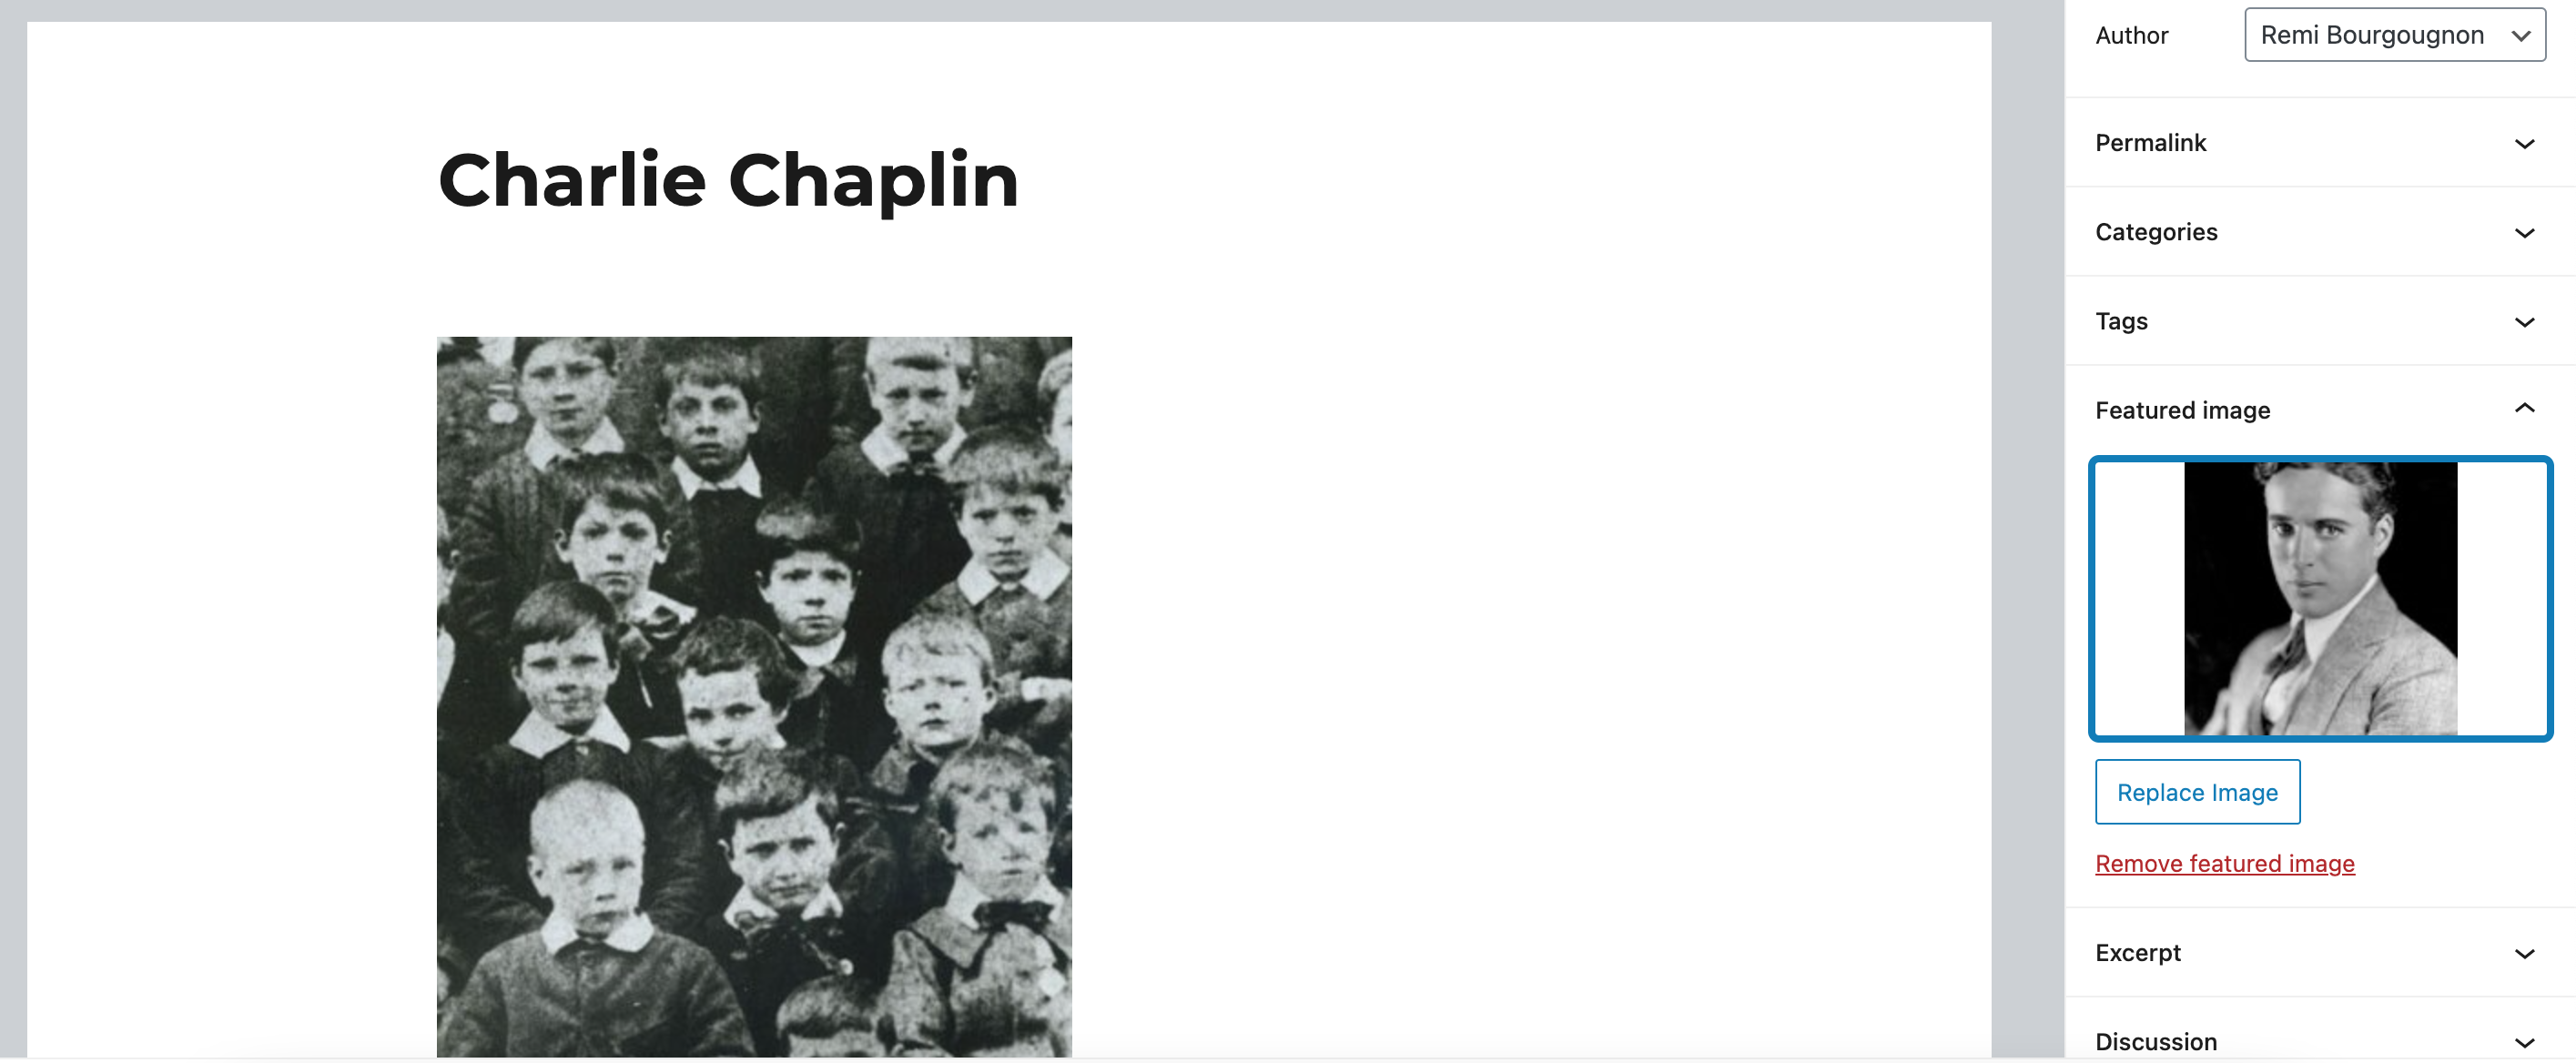
Create a post with some interesting text to extract

Image Screenshot-2021-01-22-at-09.13.12-1024x423.png of Amazon Rekognition

Image Screenshot-2021-01-22-at-09.13.22-1024x360.png of Amazon Rekognition

Create an index

Image Screenshot-2021-01-22-at-09.23.02-1024x602.png of Amazon Rekognition

Select “Send your data” at the top, then click on “Index selected post types in index ‘your_index_name'”.


Make a search and use extracted fields as filters

Image Screenshot-2021-01-22-at-10.22.32-1024x440.png of Amazon Rekognition

Was this helpful?

Yes  No
Related Articles
  • Create an Amazon AWS OpenSearch index
  • Listable add-on
  • MyListing add-on
  • YITH WooCommerce Ajax Search add-on
  • Embed Any Document add-on
  • PDF Embedder add-on
Expand All Collapse All
  • What is it WPSOLR ?
    • The standard WordPress SQL search
    • The WPSOLR search with Elasticsearch, Apache Solr, or Algolia
  • Your configuration journey, step by step
    • Install Apache Solr
    • Hosted Apache Solr and SolrCloud Services
    • Install Elasticsearch
    • Elasticsearch Hosting
    • Configure your indexes
      • Generate a test Apache Solr index
      • Generate a test Elasticsearch index
      • Create an Apache Solr index
      • Create a SearchStax SolrCloud index
      • Create an Elastic Elasticsearch index
      • Create an Amazon AWS OpenSearch index
      • Create an Algolia index
      • Create an Elasticsearch index
      • Create an Opensolr Solr index
      • Create a Qbox Elasticsearch index
      • Create an ElasticPress Elasticsearch index
      • Create an Aiven Elasticsearch or OpenSearch index
      • Create a Bonsai Elasticsearch index
      • Create an Amazon AWS Elasticsearch index
      • Create an ObjectRocket Elasticsearch index
      • Create a Cloudways Elasticsearch index
      • Create an Alibaba Cloud Elasticsearch index
      • Create a Compose Elasticsearch index
      • Connect to an Apache Solr index
      • Connect to an Elasticsearch index
    • Add-ons
      • bbPress add-on
      • YITH WooCommerce Ajax Search add-on
      • SEO add-ons
        • Yoast SEO add-on
        • All in One SEO add-on
      • Listable add-on
      • ACF add-on
      • Advanced Scoring add-on
      • Cron Scheduling add-on
      • Theme add-on
        • Filters layouts
          • Radiobox & Checkbox Layout
          • Numeric Range Layout
          • Colour Picker Layout
          • Range Slider Layout
        • Add Ajax to the current Theme
        • Collapse taxonomy hierarchies
        • Custom Facets CSS
      • WPML add-on
      • Premium add-on
        • Manage more than one Elasticsearch or Solr index
      • PDF Embedder add-on
      • Geolocation add-on
      • AI Natural Language APIs add-on
        • Amazon Comprehend
        • Google Natural Language
        • Aylien Text Analysis
        • MeaningCloud
        • Qwam Text Analytics
      • Toolset Types add-on
      • AI Image and OCR APIs add-on
        • Google Vision
        • Amazon Rekognition
      • Embed Any Document add-on
      • MyListing add-on
      • Polylang add-on
      • WooCommerce add-on
      • Cross-domain search add-on
      • Directory+ add-on
      • Toolset Views add-on
      • Listify add-on
      • Jobify add-on
      • Query Monitor add-on
  • Quick start
Login
Support
Privacy policy
  • Terms and Conditions
  • © 2020 wpsolr.com. All Rights Reserved.
Youtube
Roadmap