


One of the best ways of improving user experience on your WordPress websites is to have a speedy and accurate search. While the default search can be quite effective on websites with limited amounts of data, it’s speed can become problematic (slow) as traffic and data increases. This is why, in this case, you should replace your WordPress search with a high performance search engine. But where do you start? Opensearch is an easy choice, since it is probably the one with the best price to performance ratio.Opensearch
Opensearch text and vector search stack for WPSOLR
You can install our fully functional Opensearch text and vector search stack from GitHub, ready to work with WPSOLR.

What is Opensearch ?
While the default WordPress search (and many other search plugins such as Relevanssi or Ivory search) use simple SQL queries to find matching posts in the WP database, Opensearch is optimized for information retrieval tasks.
As you can see in the chart above, a search engine is a far more scalable solution when there is high traffic and amount of data (in this case, WPSolr is a search plugin that for the purpose of this speed test made use of Elasticsearch).
So it is no surprise that you would want to equip your website with a Opensearch for little to no extra cost.
Integrate a locally installed Opensearch server into your WordPress
1. Install Opensearch
We are going to use docker containers to host the different applications. To install the docker engine, use the following link : https://docs.docker.com/engine/install/.
Also, don’t forget to install docker-compose.
For more detailed Opensearch installation and configuration instructions, you could check out our guide.
Create the following “docker-compose.yml” file :
version: '3.9'

services:
    opensearch:
    image: opensearchproject/opensearch:latest
    environment:
      - "discovery.type=single-node"
      - "DISABLE_INSTALL_DEMO_CONFIG=true"
      - "DISABLE_SECURITY_PLUGIN=true"
    ports:
      - 9200:9200 # REST API
      - 9600:9600 # Performance Analyzer
And start the container using :
docker-compose up -dYou can check if the the container was correctly created using :
docker psYou can now connect to the Opensearch service :
curl https://localhost:9200If it works it should return something like the following :
{
  "name" : "b2055e3fd3ae",
  "cluster_name" : "docker-cluster",
  "cluster_uuid" : "EsJhKh-GScibWj9HB6Ix9w",
  "version" : {
    "distribution" : "opensearch",
    "number" : "2.9.0",
    "build_type" : "tar",
    "build_hash" : "1164221ee2b8ba3560f0ff492309867beea28433",
    "build_date" : "2023-07-18T21:23:29.367080729Z",
    "build_snapshot" : false,
    "lucene_version" : "9.7.0",
    "minimum_wire_compatibility_version" : "7.10.0",
    "minimum_index_compatibility_version" : "7.0.0"
  },
  "tagline" : "The OpenSearch Project: https://opensearch.org/"
}
Setup WordPress (Optional)
If you don’t already have an active WordPress server, you can set it up locally.
Simply edit the previously created “docker-compose.yml” file with the following modifications :
version: '3.9'

services:
  wp:
    image: wordpress:php8.2-apache
    ports:
      - 80:80
    environment:
      WORDPRESS_DB_HOST: db:3306
      WORDPRESS_DB_USER: wordpress
      WORDPRESS_DB_PASSWORD: wordpress
    networks:
      - backend-wpd
      - frontend-wpd
  db:
    image: mysql:8.4
    environment:
      MYSQL_ROOT_PASSWORD: somewordpress
      MYSQL_DATABASE: wordpress
      MYSQL_USER: wordpress
      MYSQL_PASSWORD: wordpress
    networks:
      - backend-wpd
  opensearch:
    image: opensearchproject/opensearch:latest
    environment:
      - "discovery.type=single-node"
      - "DISABLE_INSTALL_DEMO_CONFIG=true"
      - "DISABLE_SECURITY_PLUGIN=true"
    ports:
      - 9200:9200 # REST API
      - 9600:9600 # Performance Analyzer
    networks:
      - frontend-wpd

networks:
  frontend-wpd:
  backend-wpd:
Make sure that the WordPress & Opensearch server are in the same network so they can communicate with eachother.
If this is a production configuration, you should use volumes or bind mounts to save the data on your host machine. This ensures that there will be no critical data loss if anything happened to the container.
2. Add locally hosted Opensearch to your WordPress using WPSolr Free
WPSolr is a WordPress search plugin that powers up WordPress search using fast, accurate and scalable search engines. This means it can integrate Opensearch into any WordPress wesbite.
Since this is a locally installed Opensearch server, you can use the free version : WPSolr Free.
You can search for WPSolr in the WordPress plugins catalogue.
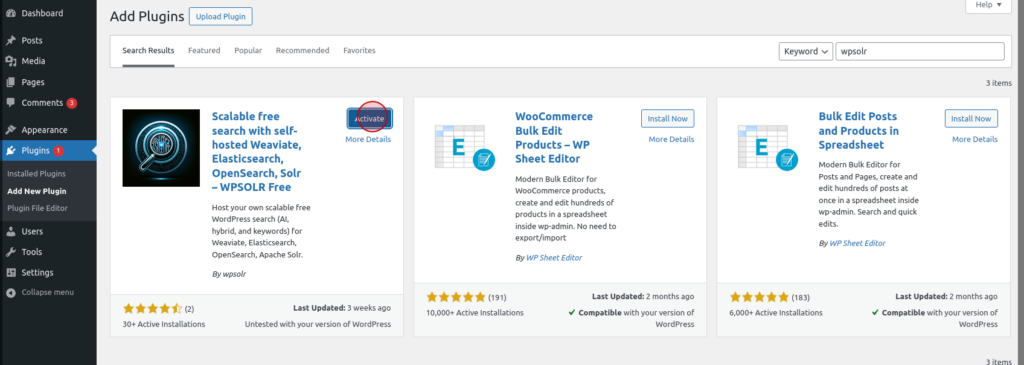
Click on the install and activate buttons for the WPSolr plugin.
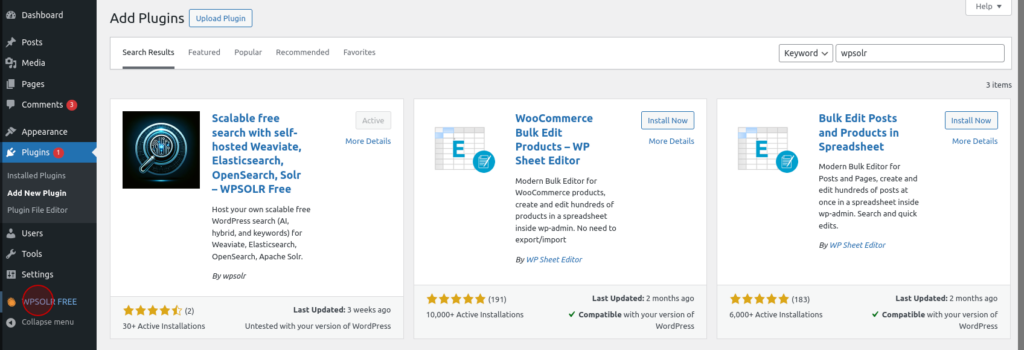
Once you have installed and activated the WPSolr Free plugin, you can configure it.
To do that you first need to open the WPSolr settings page.
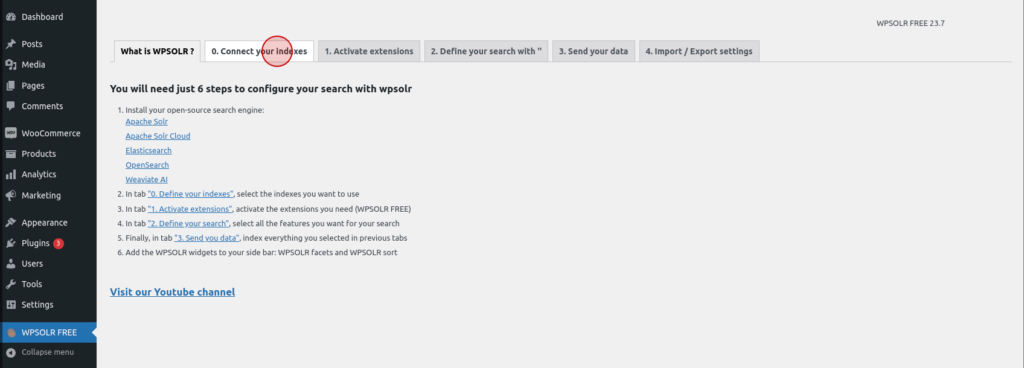
Create the Opensearch index
To add your WordPress data to your Opensearch server, you first need to create an index. You can do that directly from WPSolr.
This portion will teach you how to create your index on your locally installed Opensearch server.
Open the indexes tab in the WPSolr dashboard.
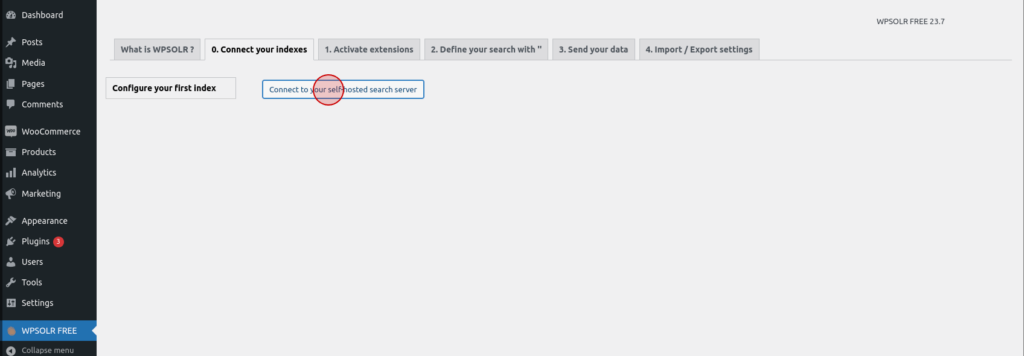
Create a new index.
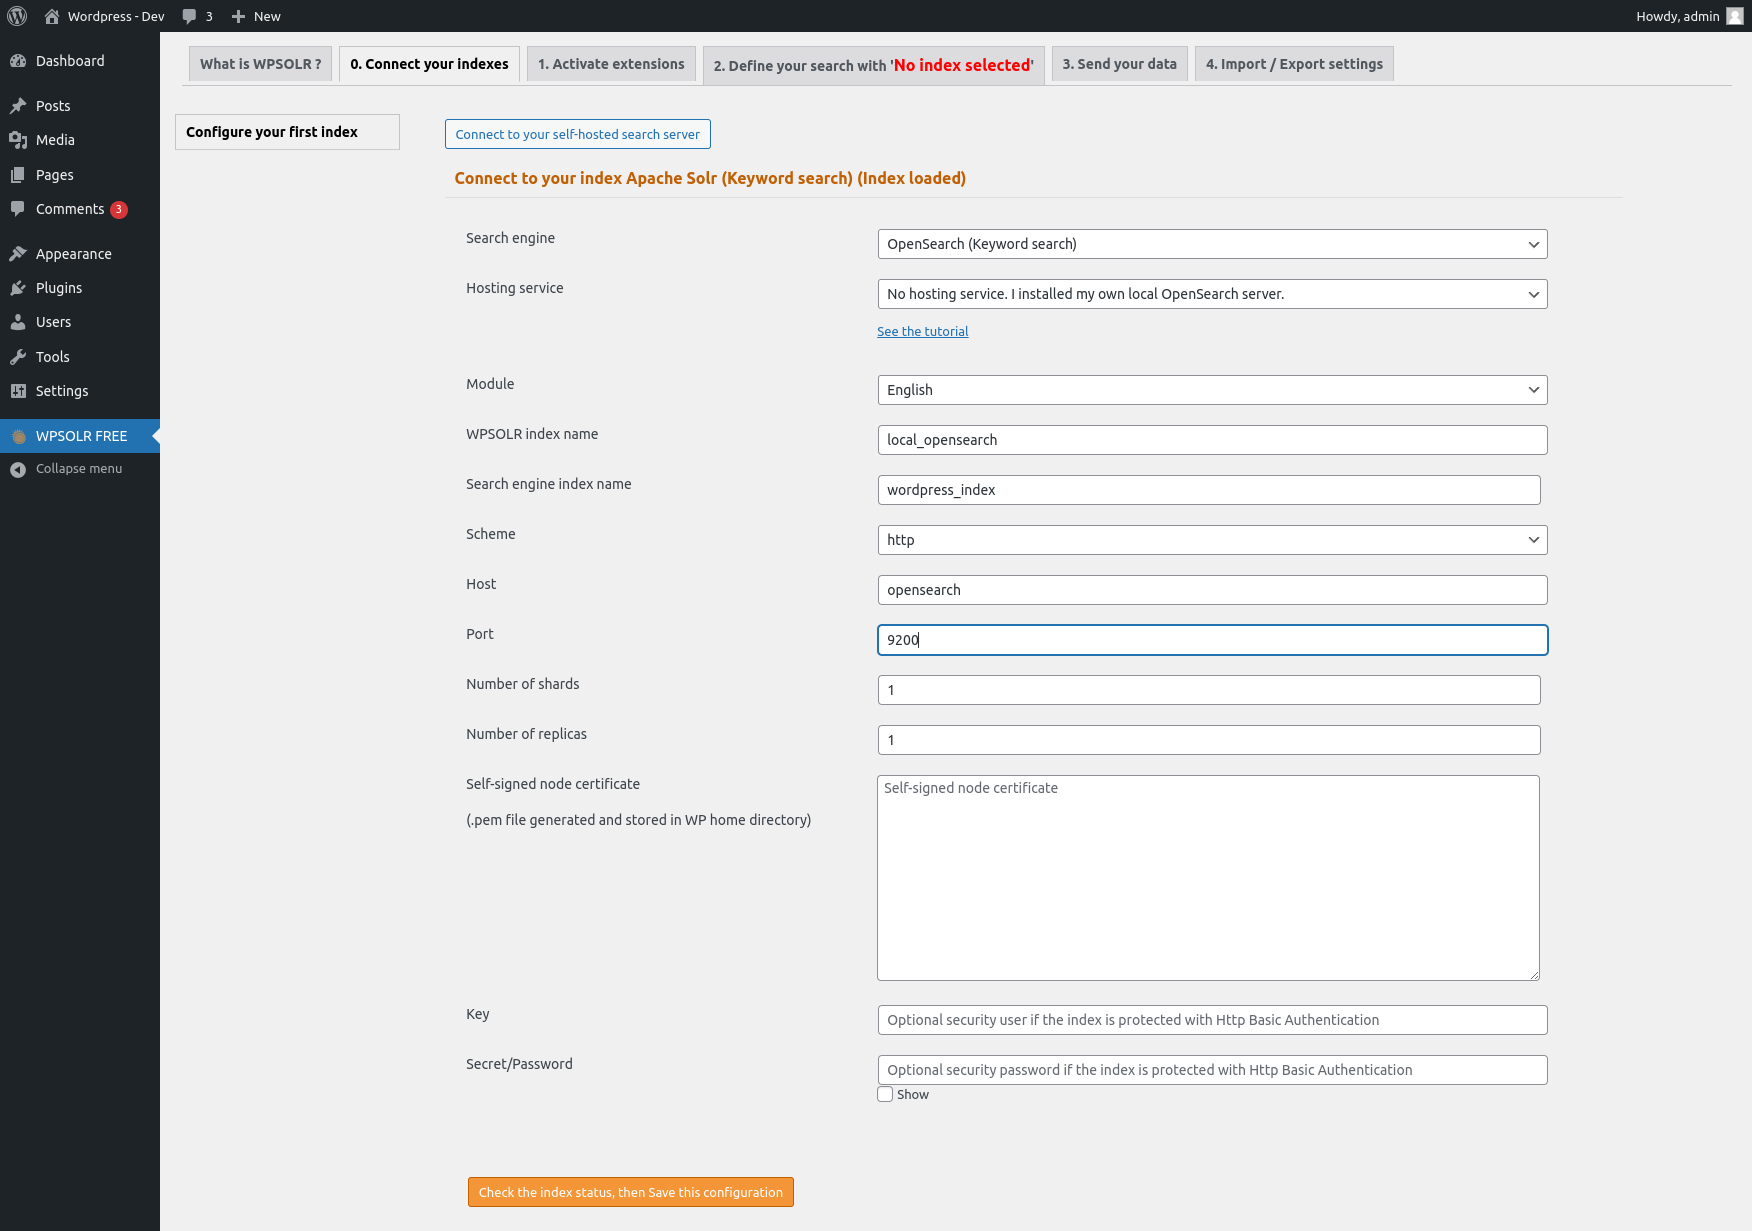
Create the index by doing the following :
- Select Opensearch search engine.
- Enter the name of the index that will be displayed in the WPSolr settings.
- Set the name of the index in the Opensearch server.
- Set the scheme as http.
- Set the Opensearch host :
- if the WordPress server is a container in the same docker network as Opensearch, you need to enter the name of the service (the one in the docker-compose.yml file). For this example, it should be “opensearch”.
- if the WordPress is on a separate server than Opensearch, you need to enter the ip address or hostname of the Opensearch server.
- Set the port of the Opensearch.
You can now save your index.
Index your data
Once you have created your index, you can click on “2. Define your search” tab.
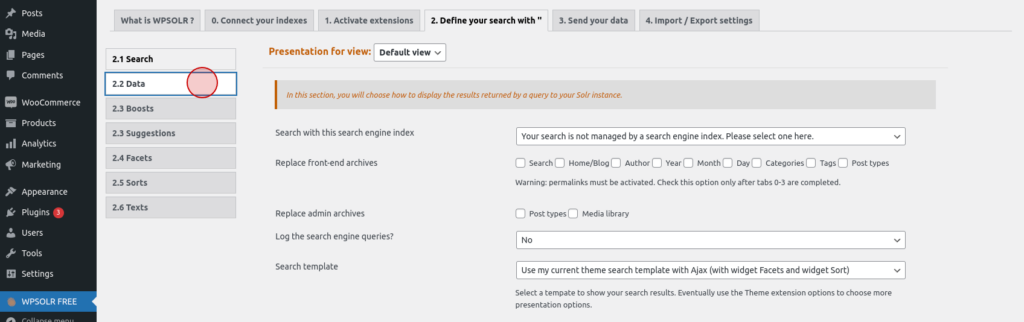
Click on the “2.2 Data” tab.
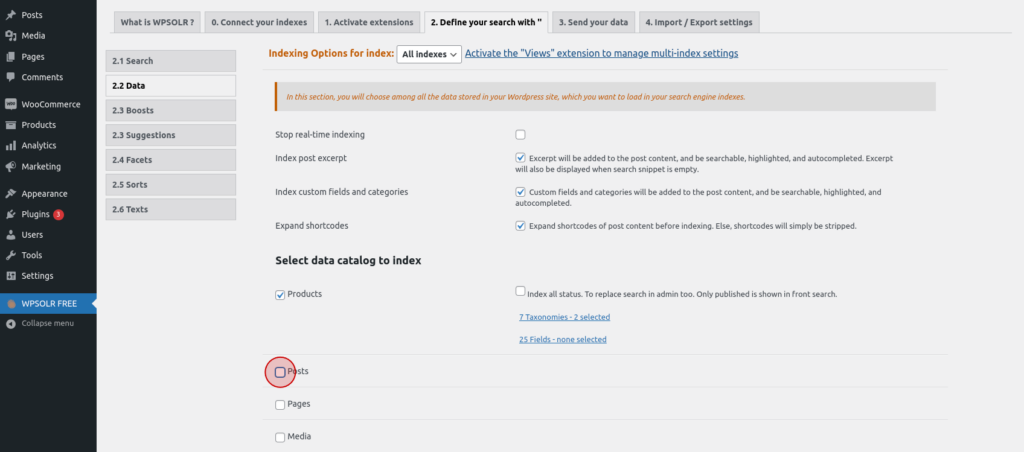
Select the data types you want to index. You can do that by simply checking the boxes.
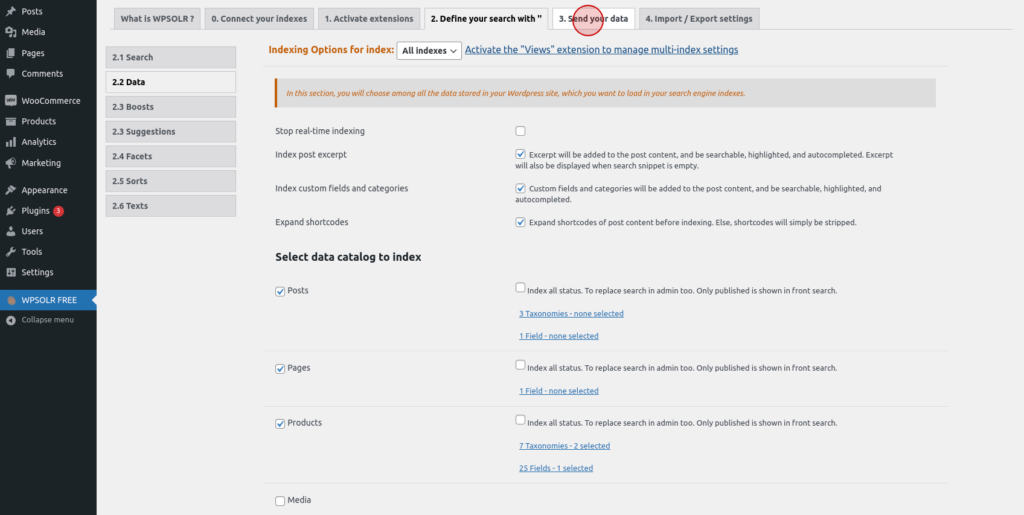
Click on the “3. Send your data” tab.
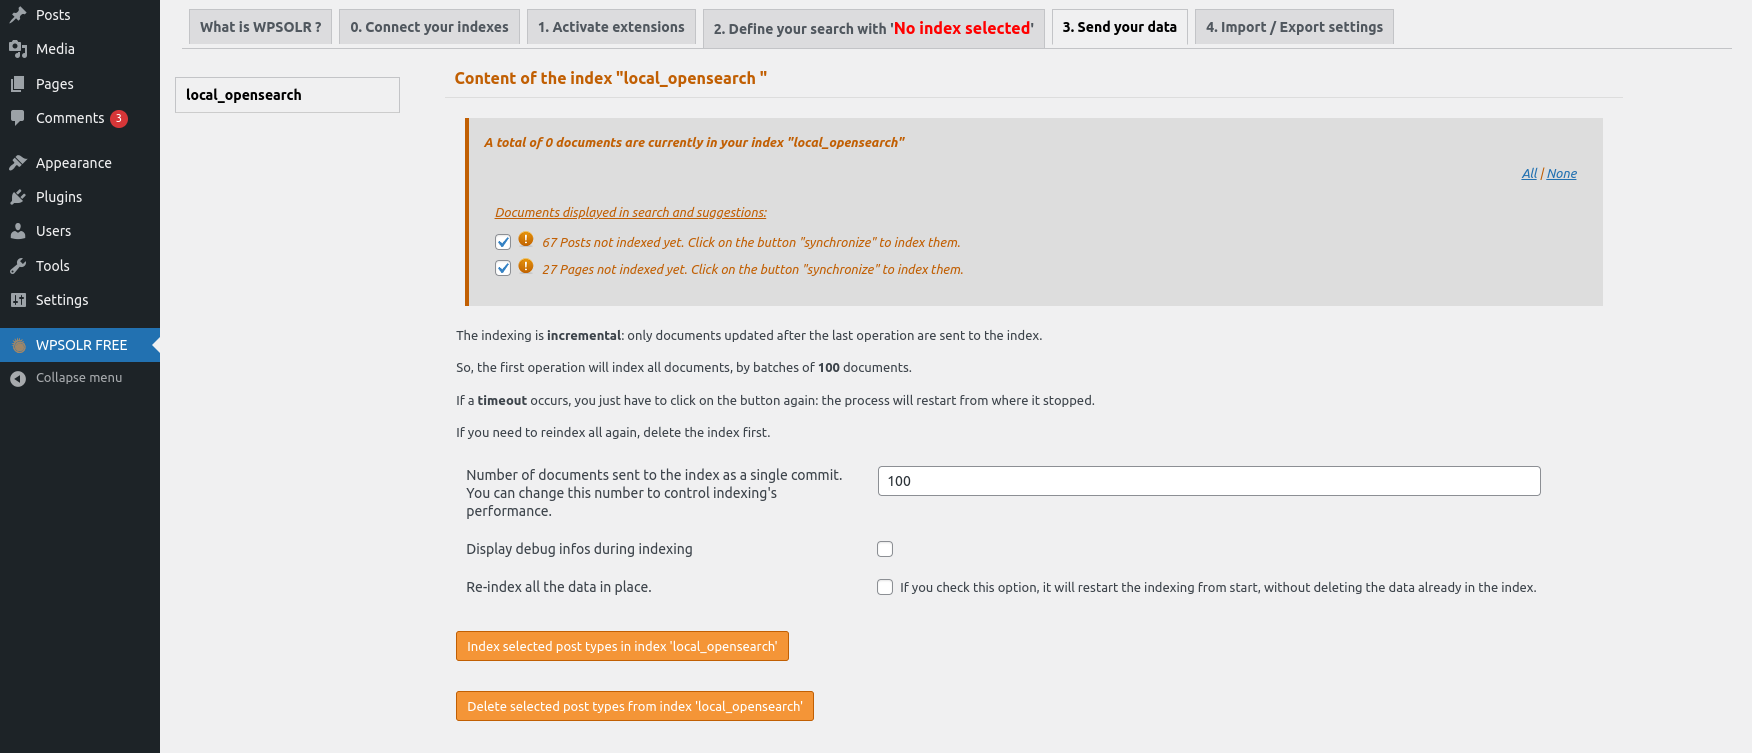
Check the boxes of the data you selected previously. You can then click on the “Index selected post types” button to index the data.
Configure your search
This section will focus on replacing the WordPress search with WPSolr search powered by your Opensearch server.
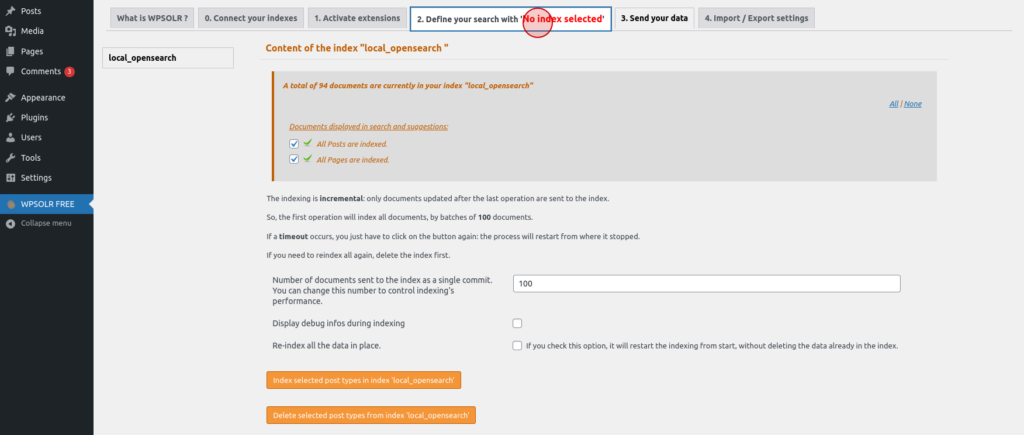
Click on the “2. Define your search” tab.
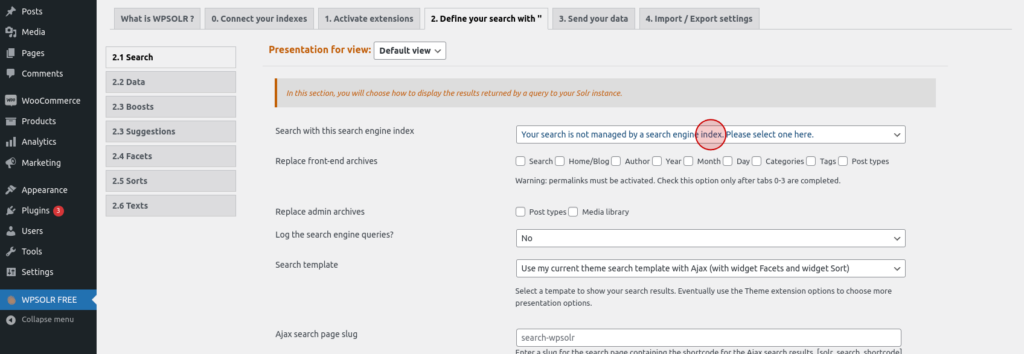
Select the index you created previously. In this example, “local_opensearch”.
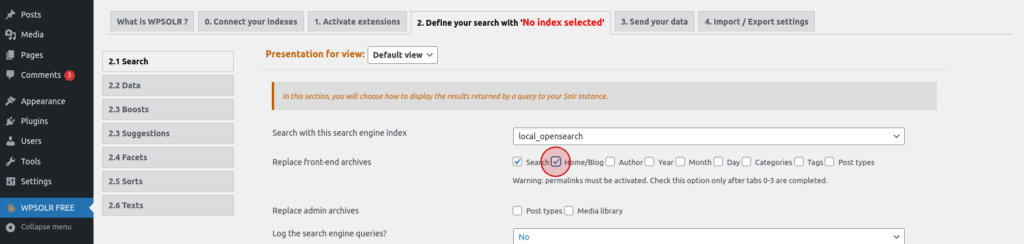
Select the archives to replace with WPSolr search. This means that the filtering sorting, etc… of content in the search pages and homepage will be handled by WPSolr and Opensearch.
Since you have selected “Search archive”, it should now be used whenever your use a search bar.
3. Add Facets and Ajax search to your WordPress
WPSolr Free can also add Ajax (live) search and facets powered by Opensearch to your WordPress websites.
Learn how to add ajax search using WPSolr.
Learn how to add facets using WPSolr.
Integrate Cloud Hosted AWS Opensearch into your WordPress
1. Create a managed Opensearch deployment.
You can learn how here.
2. Add fully managed Opensearch to your WordPress using WPSolr Pro
Adding AWS Opensearch to your WordPress requires the pro tier of WPSolr. You can easily start a free trial here.
Once you have started your trial you will receive 2 critical items : your license key and your WPSolr Pro zip file.
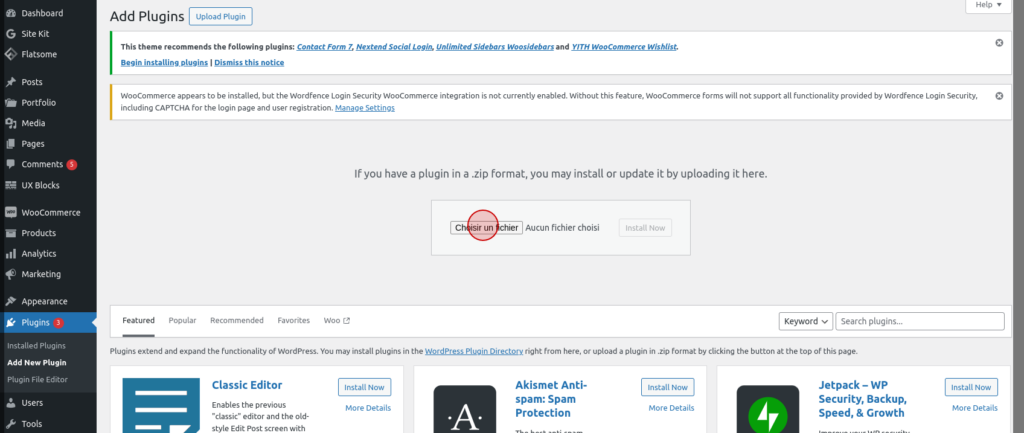
You can upload the zip file and install WPSolr Pro from the “Add plugins” page :
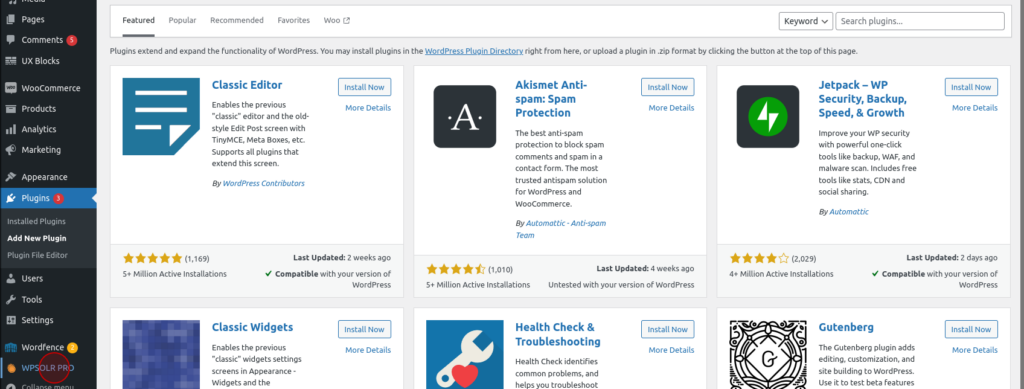
Once you have installed WPSolr Pro, you can open the WPSolr settings :
To use WPSolr Pro, you need to activate the license :

In the license pop-up window, simply enter the license key and click on the activation button :

Then, in the WPSolr Pro settings, you can create your first index :
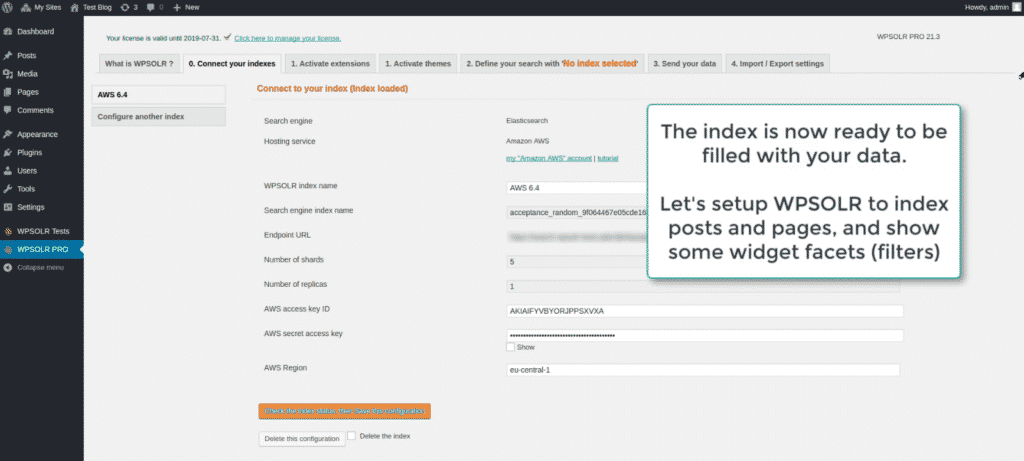
You need to enter the following values :
- Choose Opensearch as a search engine.
- Choose AWS as a hosting option.
- Set the index name that will be displayed in the WPSolr settings.
- Set the name of the index that will be created in the AWS Opensearch instance.
- Set the endpoint URL.
- Set the AWS user name and password.
Once you have created your Opensearch cloud index, the rest of the process is pretty much the same as with the locally installed Opensearch server. From then on, you can add search, live search and facets powered by Opensearch quite easily.
Conclusion
It is a good idea to integrate search engines like Opensearch and Apache Solr into WordPress to deliver a faster, more scalable and accurate search. You can do precisely that using WPSolr which can integrate a host of search engines into your WordPress and Woocommerce websites.