Setup WPSOLR and Google Retail search

From WPSOLR 22.6.
You will learn how to create a Google Retail search API index for WooCommerce with a few clicks.
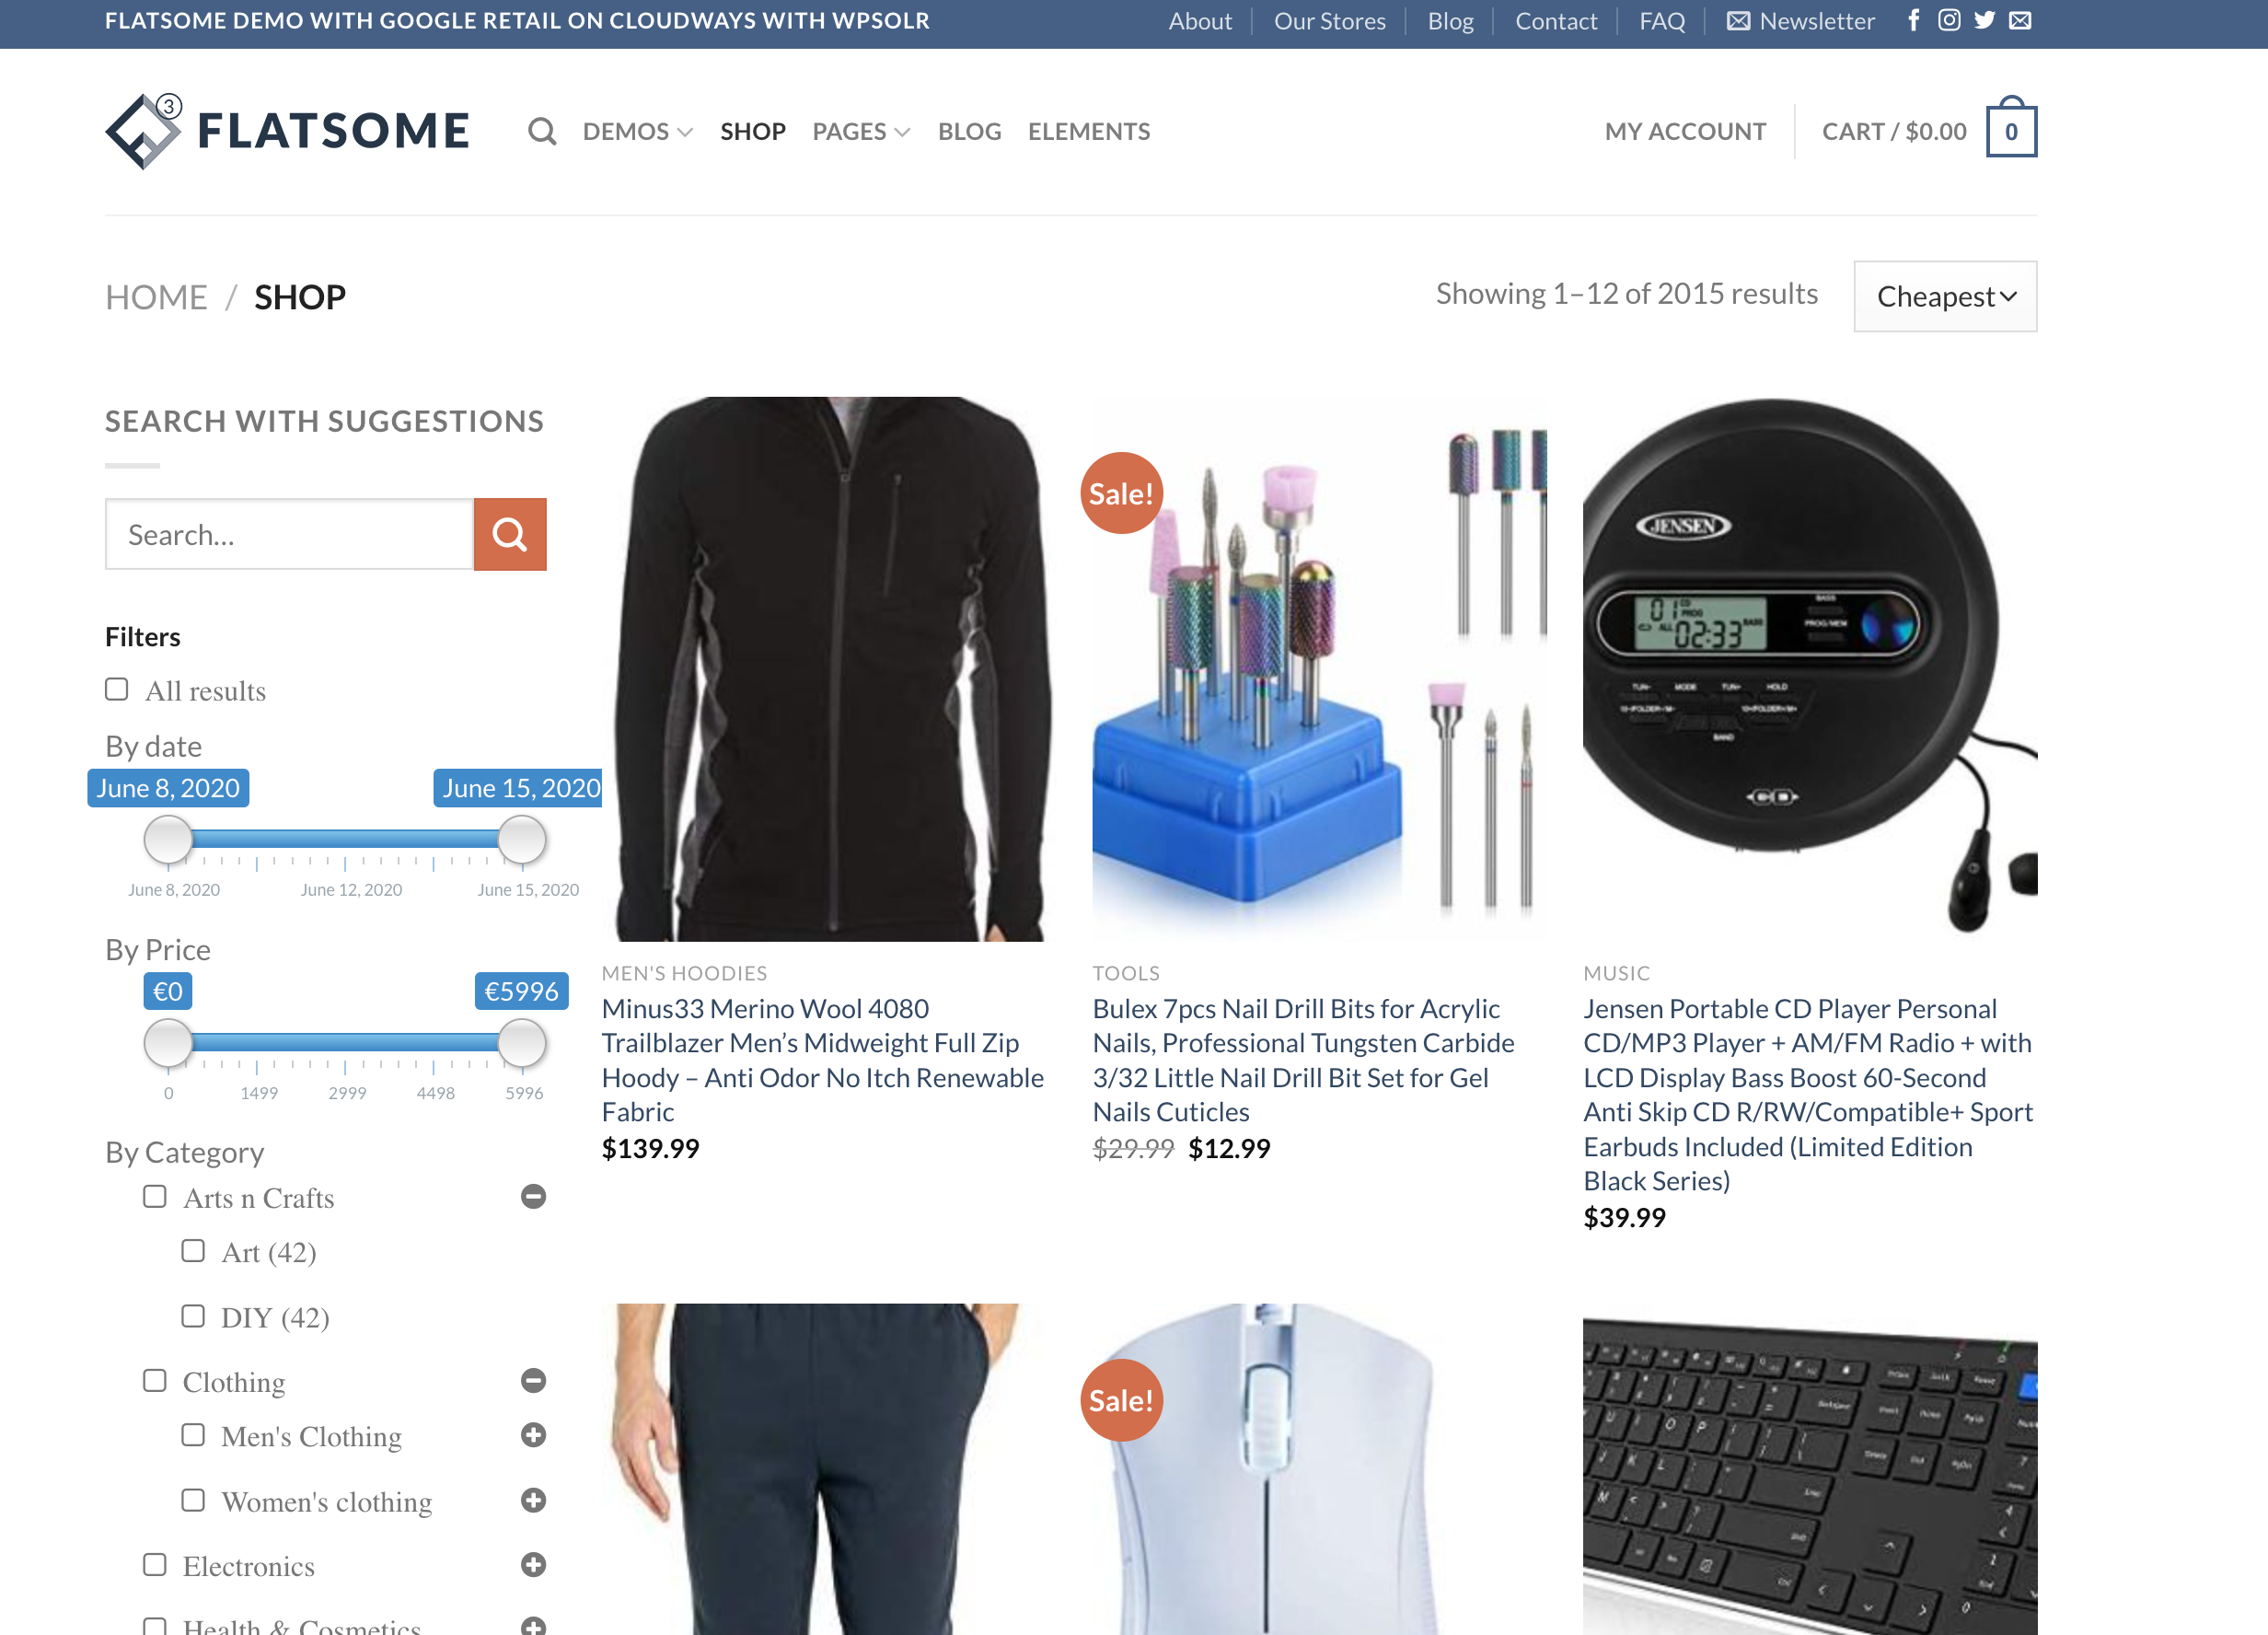
Google Retail search demo
You can try our live demo of Google Retail search with 2 thousand WooCommerce products
What is Google Retail search?
“The Retail API is a suite of solutions built to help you implement personalized search and recommendations, based on machine learning models, across your websites and mobile applications”.
WPSOLR implements the Retail search, not the Retail recommendations, nor the Retail personalization. Because the AI models that learn from the user behaviour to predict the best recommendations or personalization require a huge quantity of user events (2 millions in the last 90 days for search), that most of WooCommerce sites simply cannot provide. Contact us if you’d like us to implement it for you.
Create a GCP project with Retail search API authorization
Before starting, check out the Google Retail pricing.
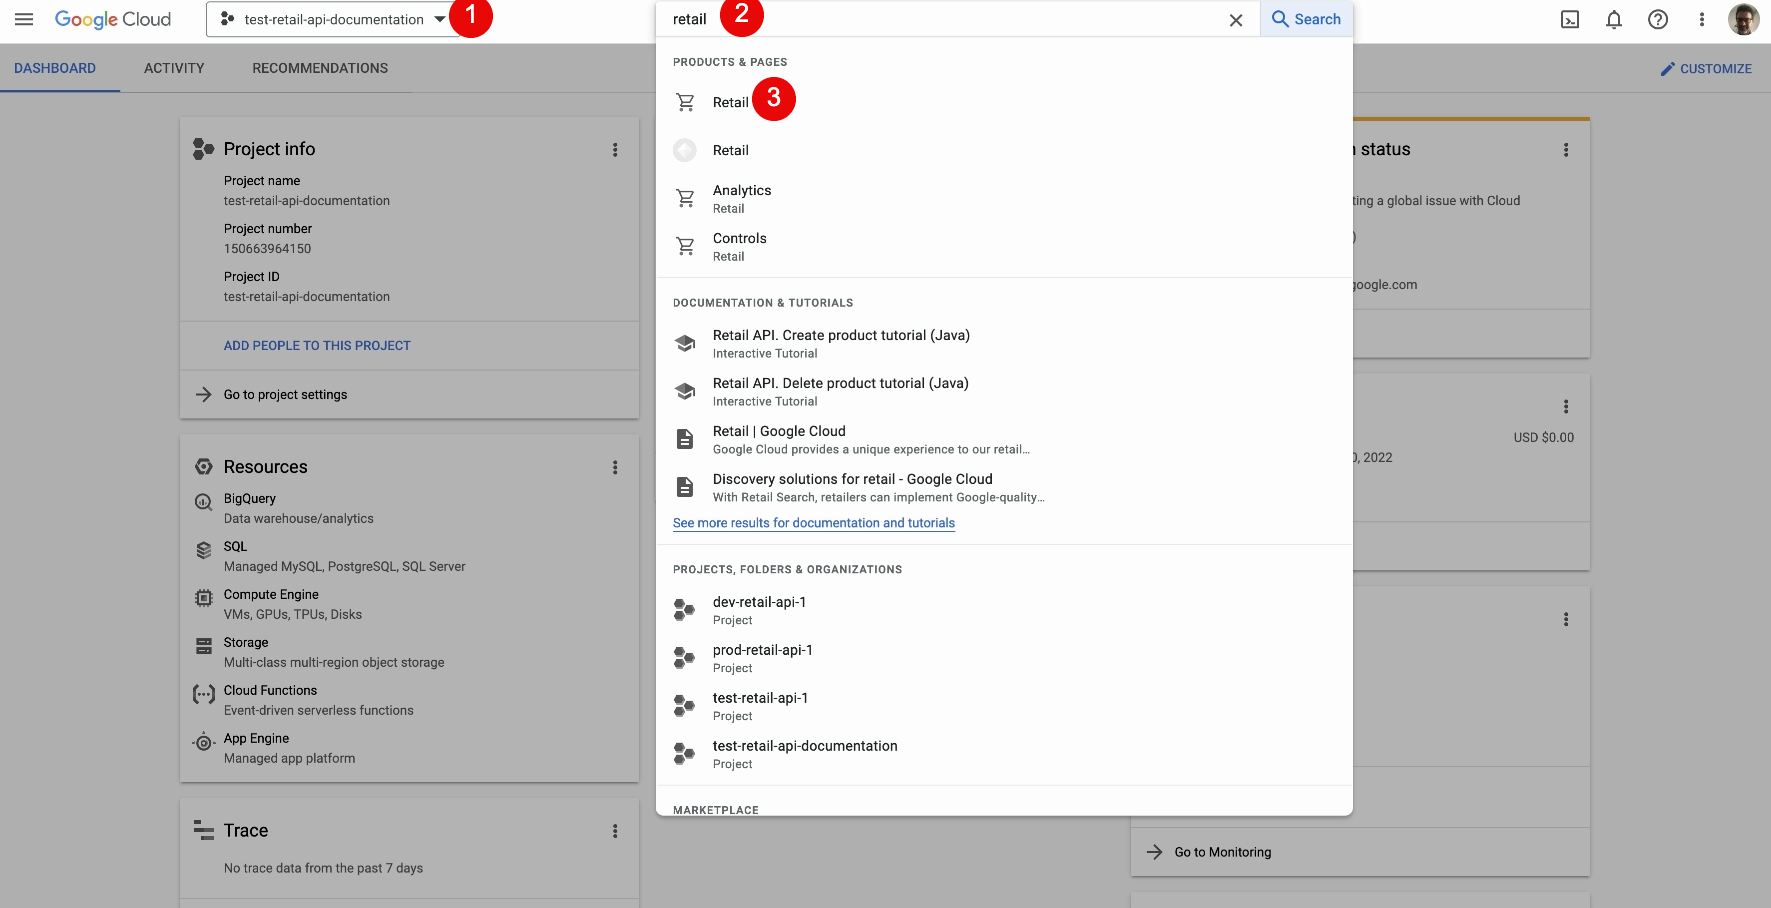
- Select your GCP projet
- Enter “retail” in the search bar
- Select “Retail” with the small shopping icon
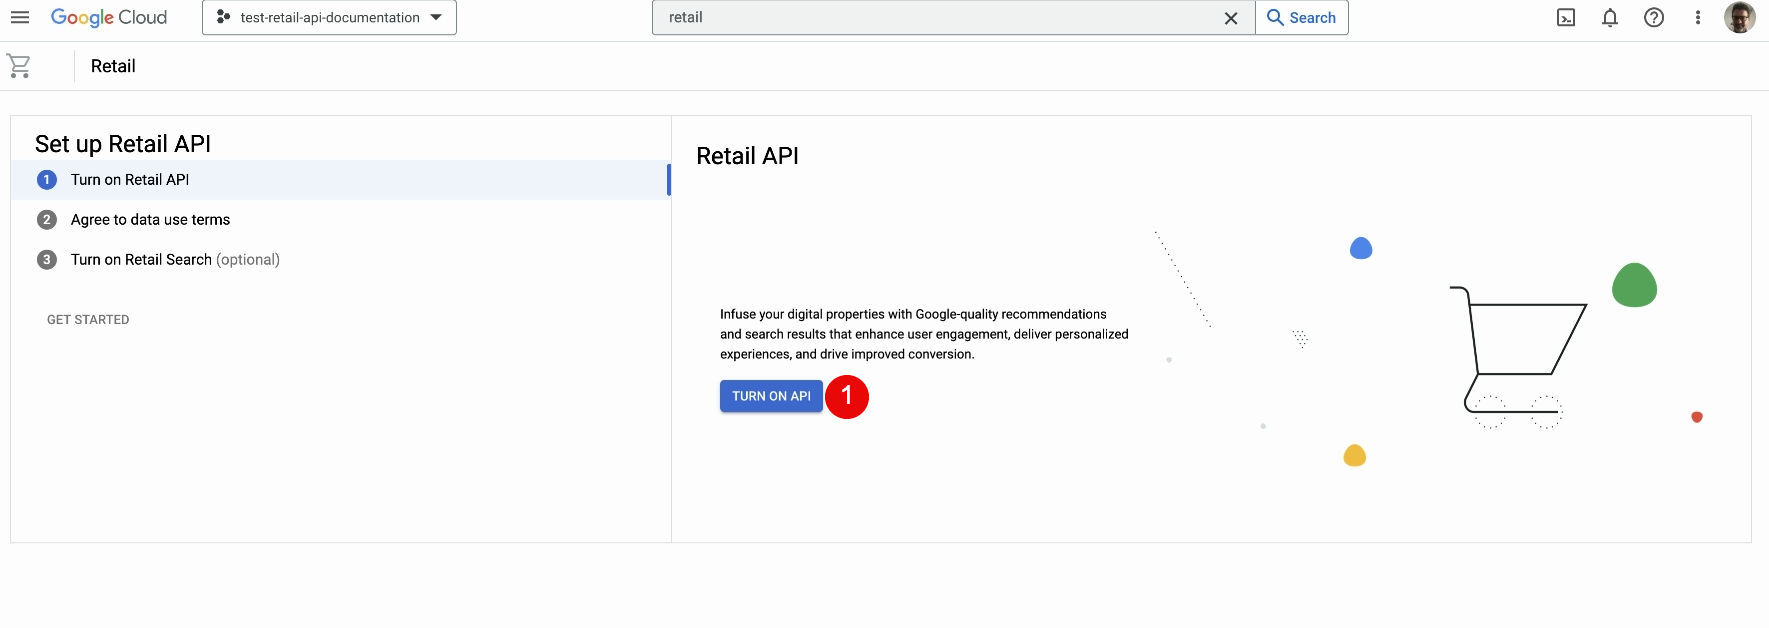
- Click “Turn on API” to activate the Retail API in your project (billing must be activated before)
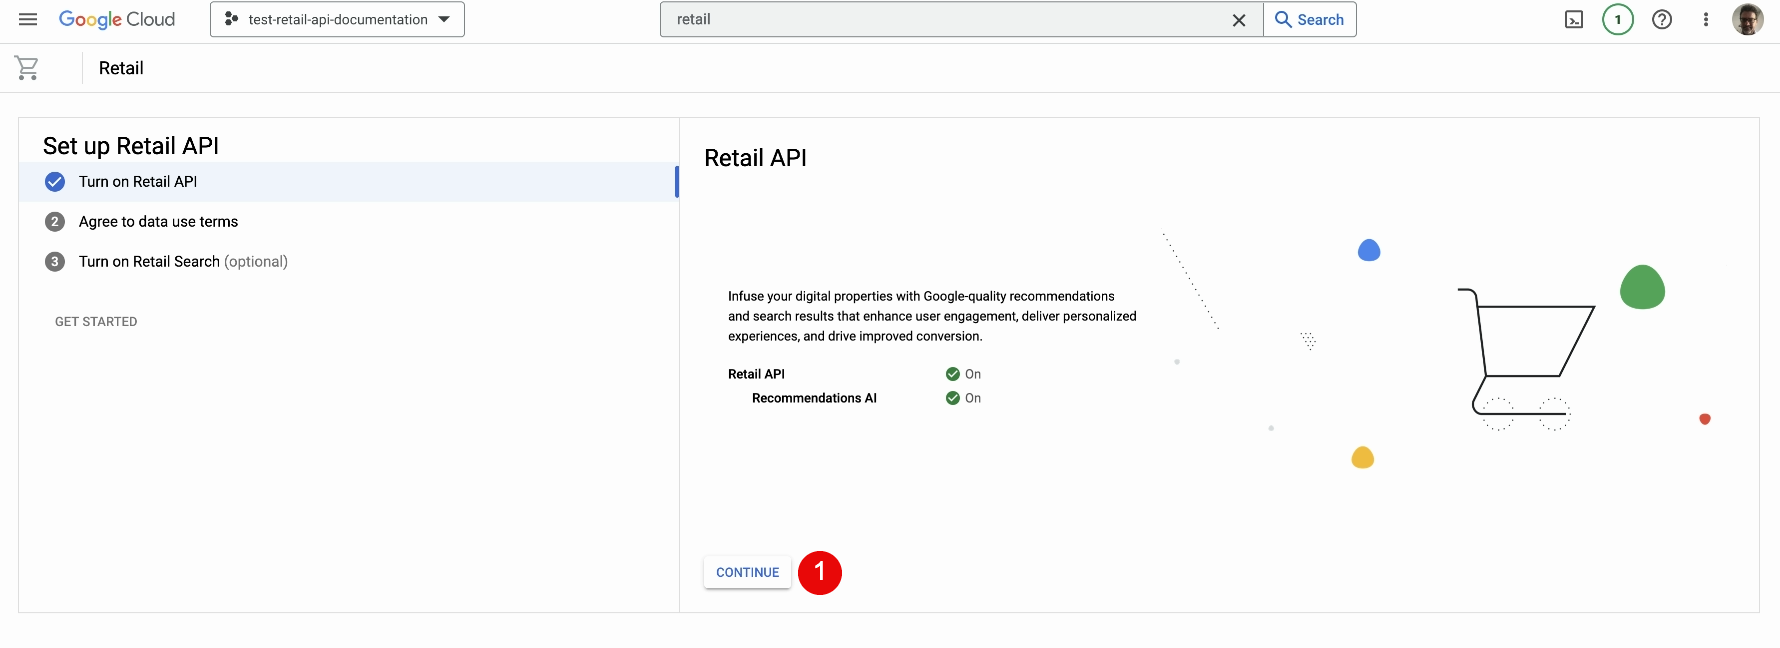
- Click “Continue”

- Click “Accept” to accept term (read theme carefully before)
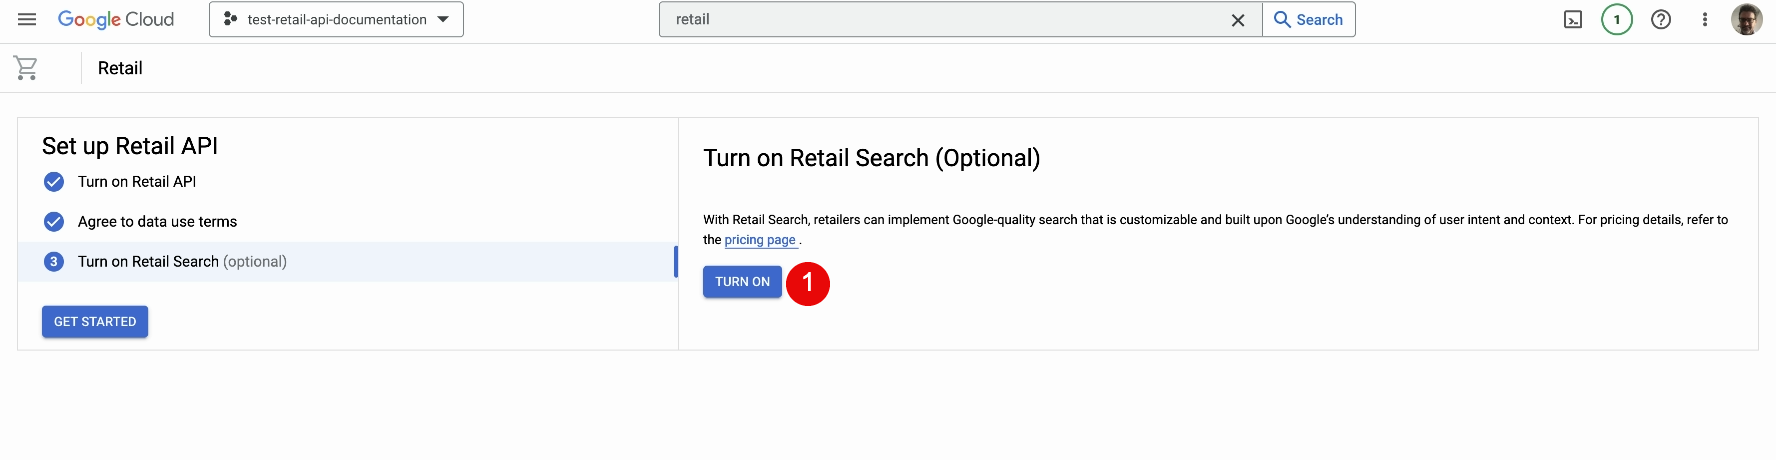
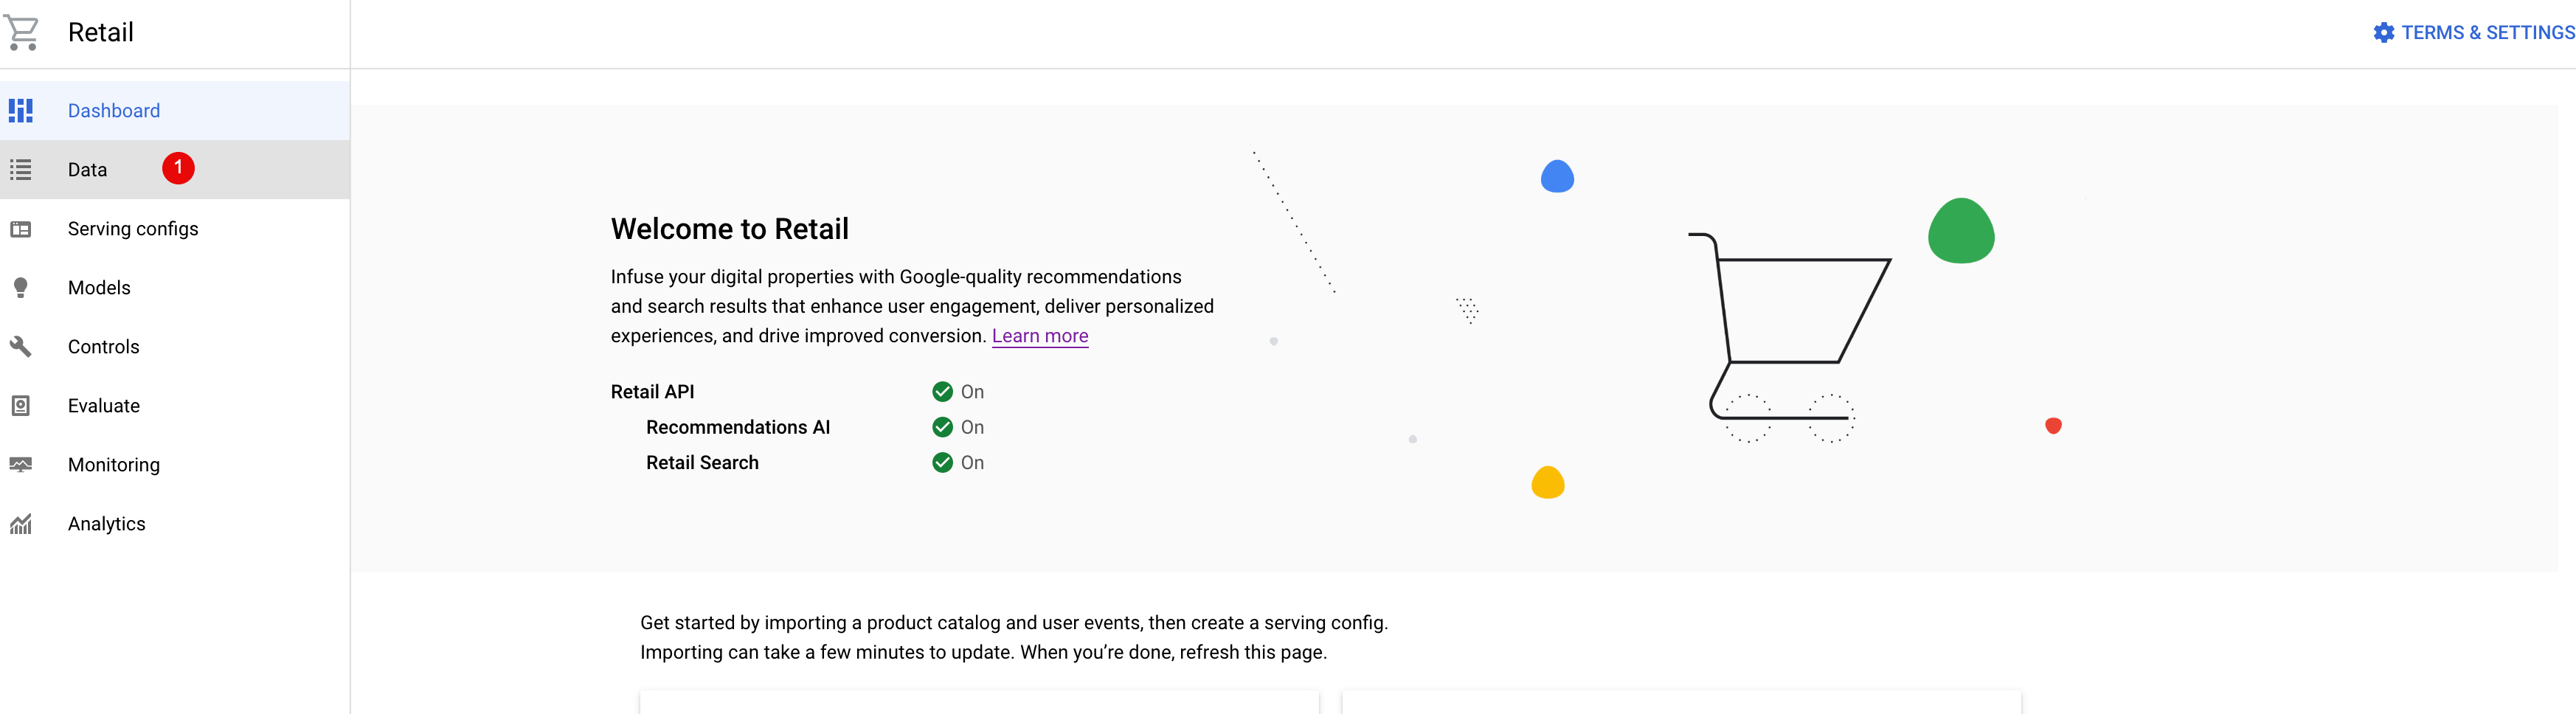
- Click on “Turn on” to activate Retail search (if you decline, only Retail recommendation are active, and integration with WooCommerce search will not work)

- Click on “Get started” to display the retail dashboard
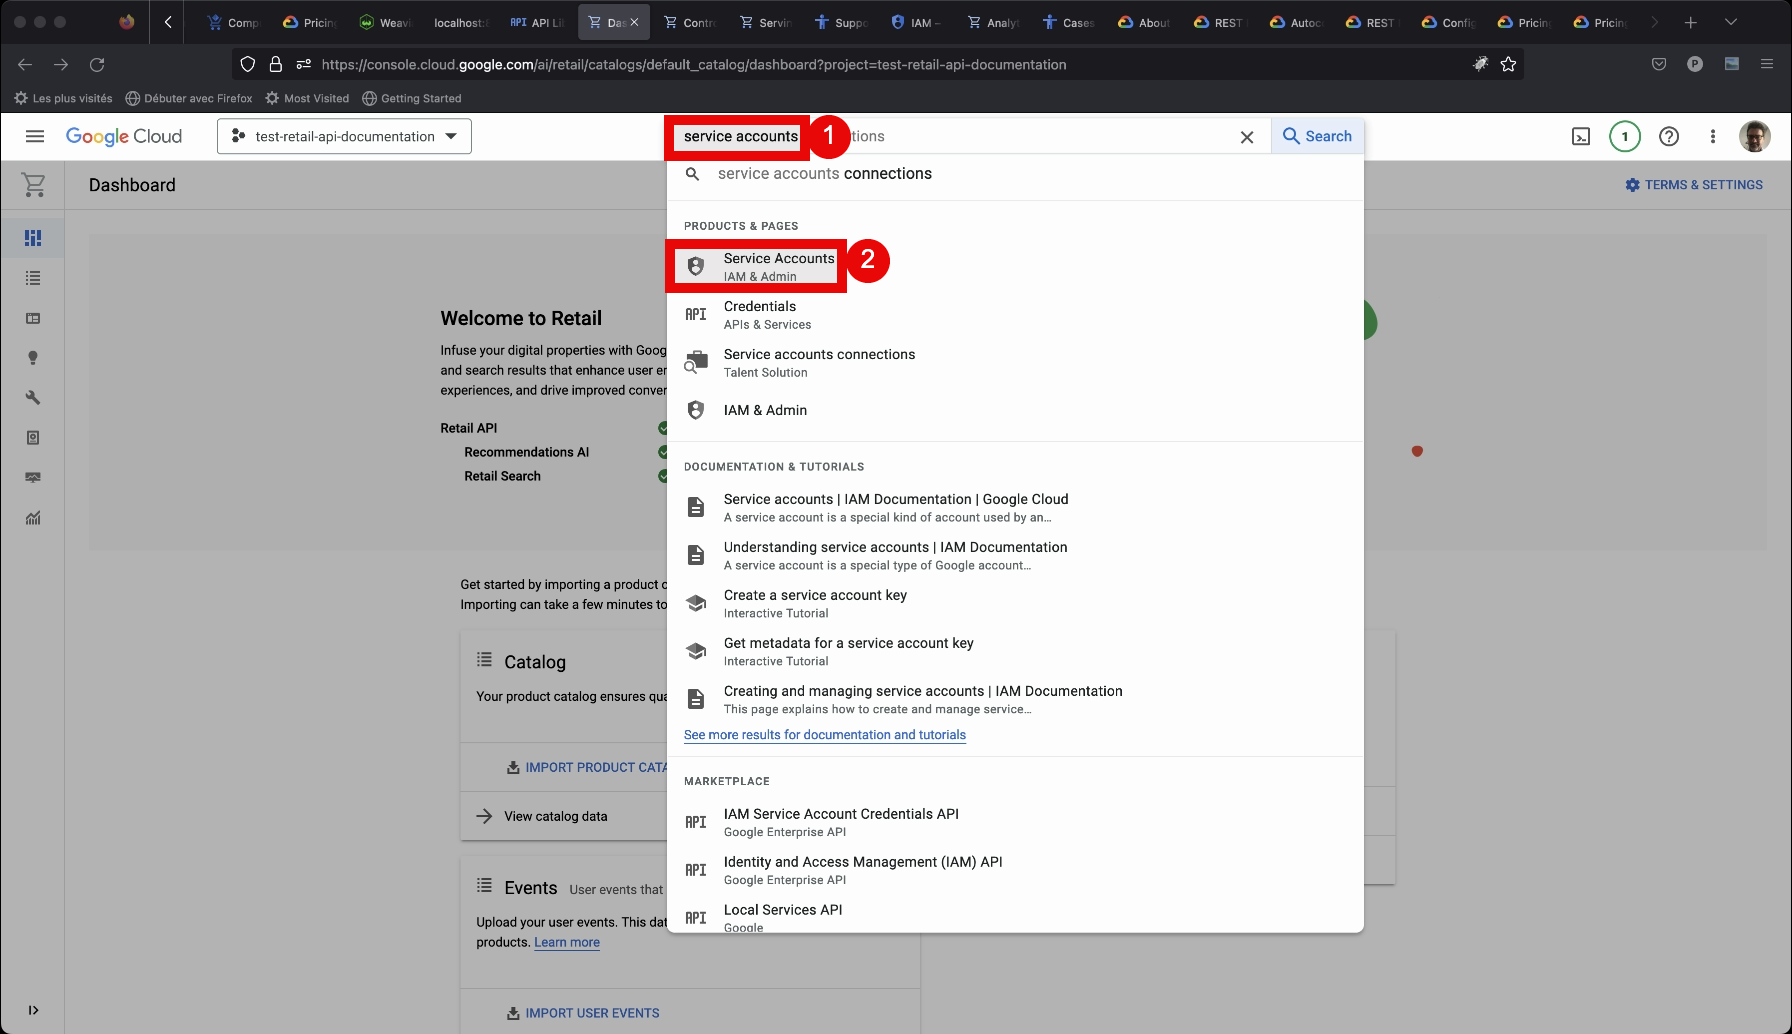
- select menu “Service Accounts” after typing “service accounts” in the to search bar
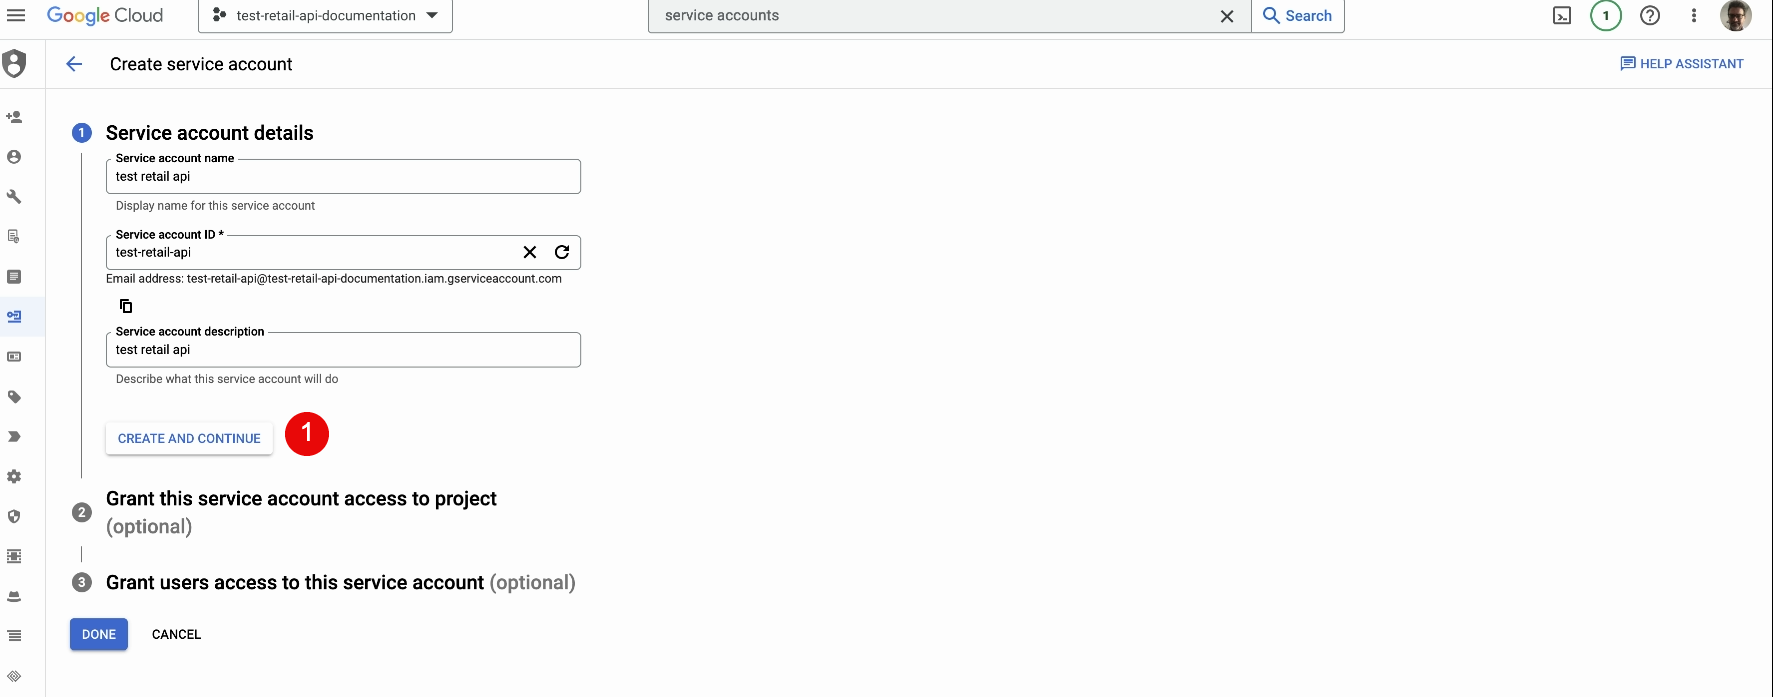
- Enter the new service account name
- Enter the new service account details
- Click on “Create and continue”
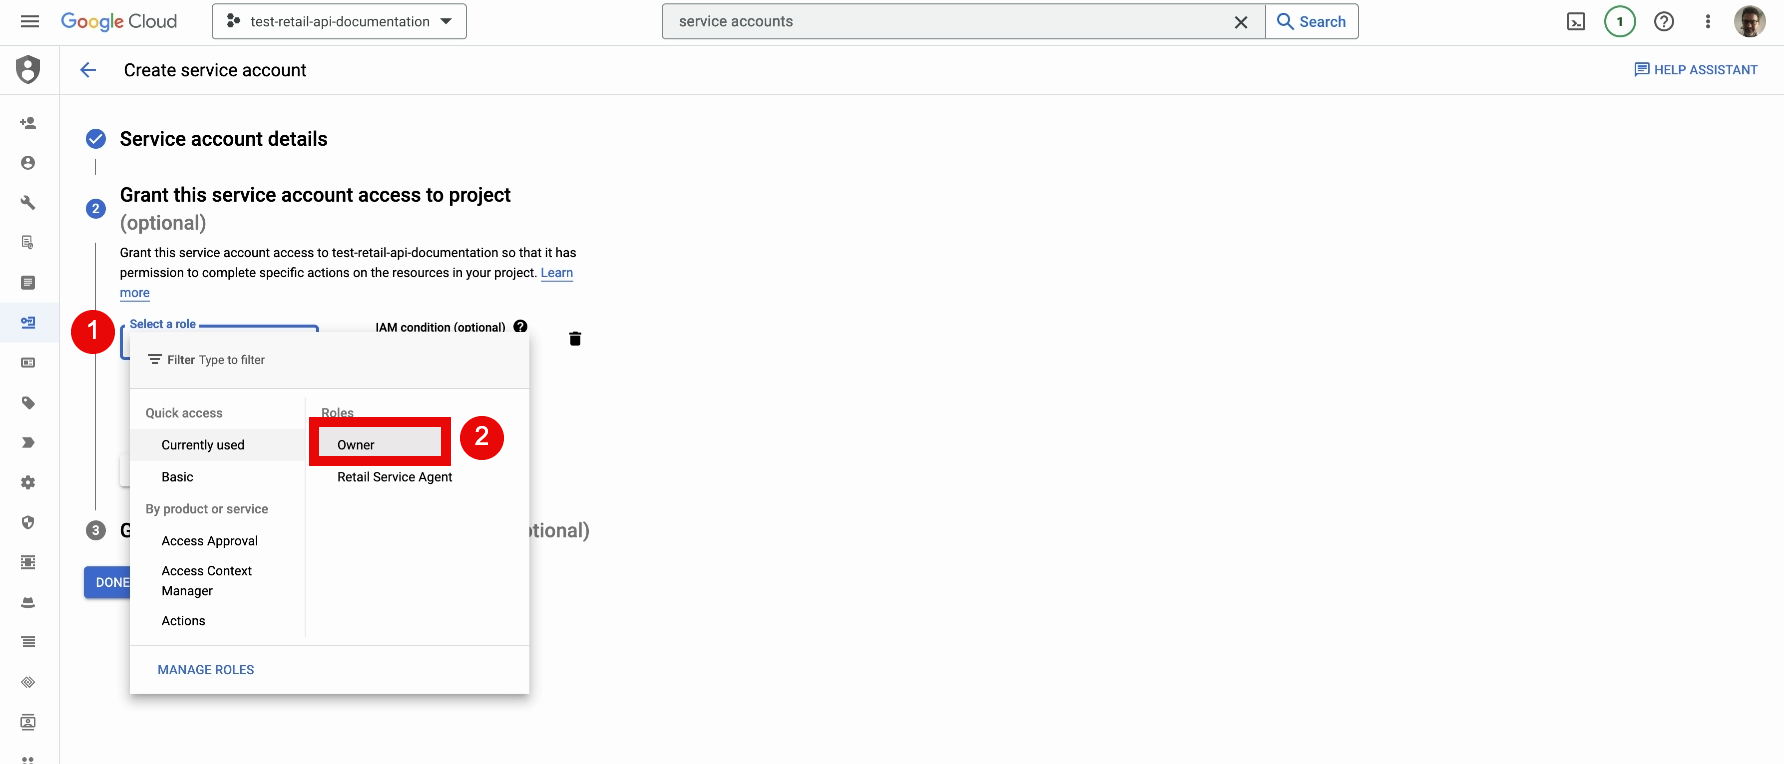
- Click on “Role”
- Select your role
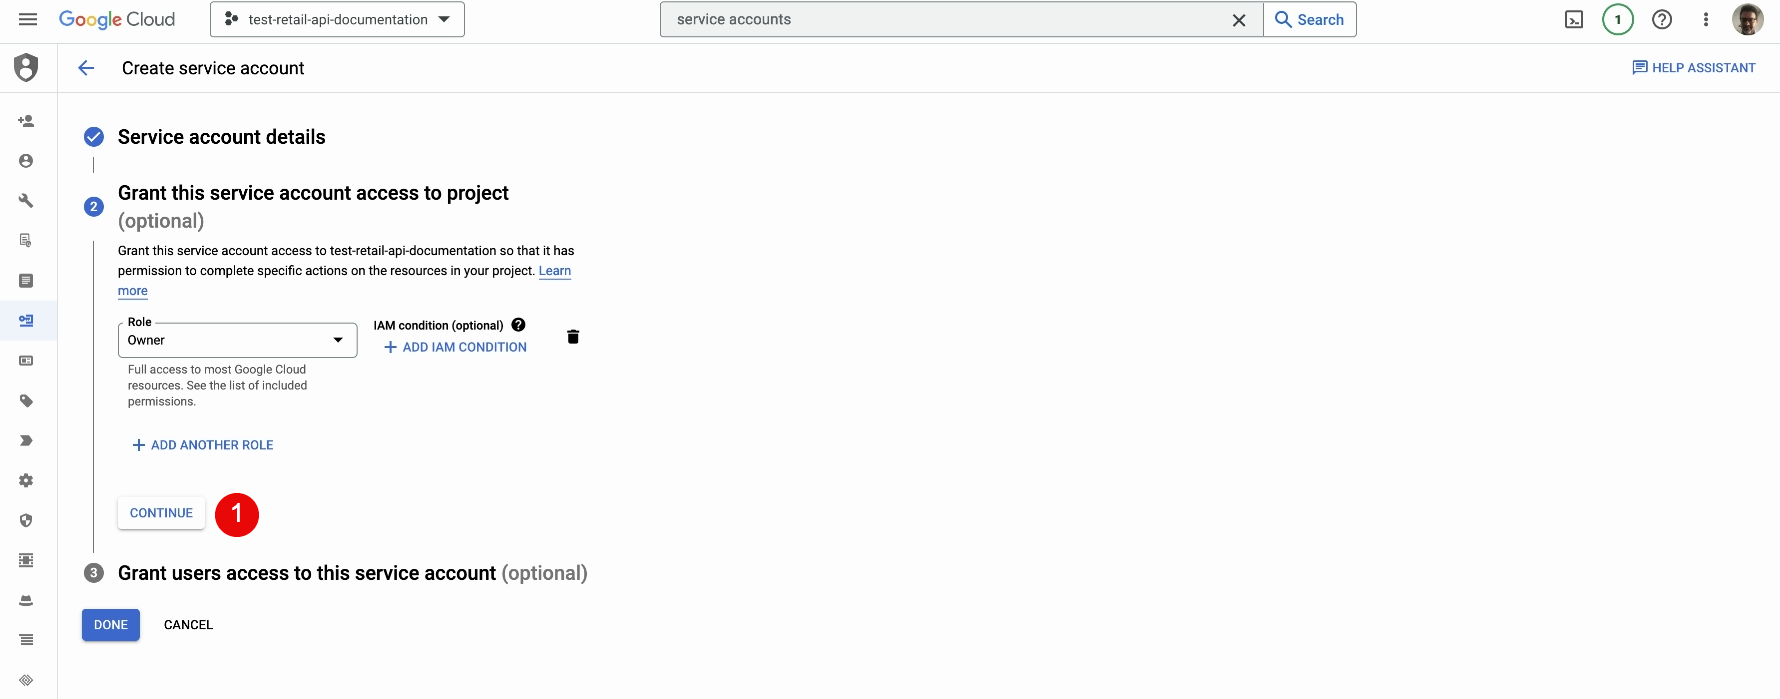
- Click on “Continue”

- Just click on “Done”
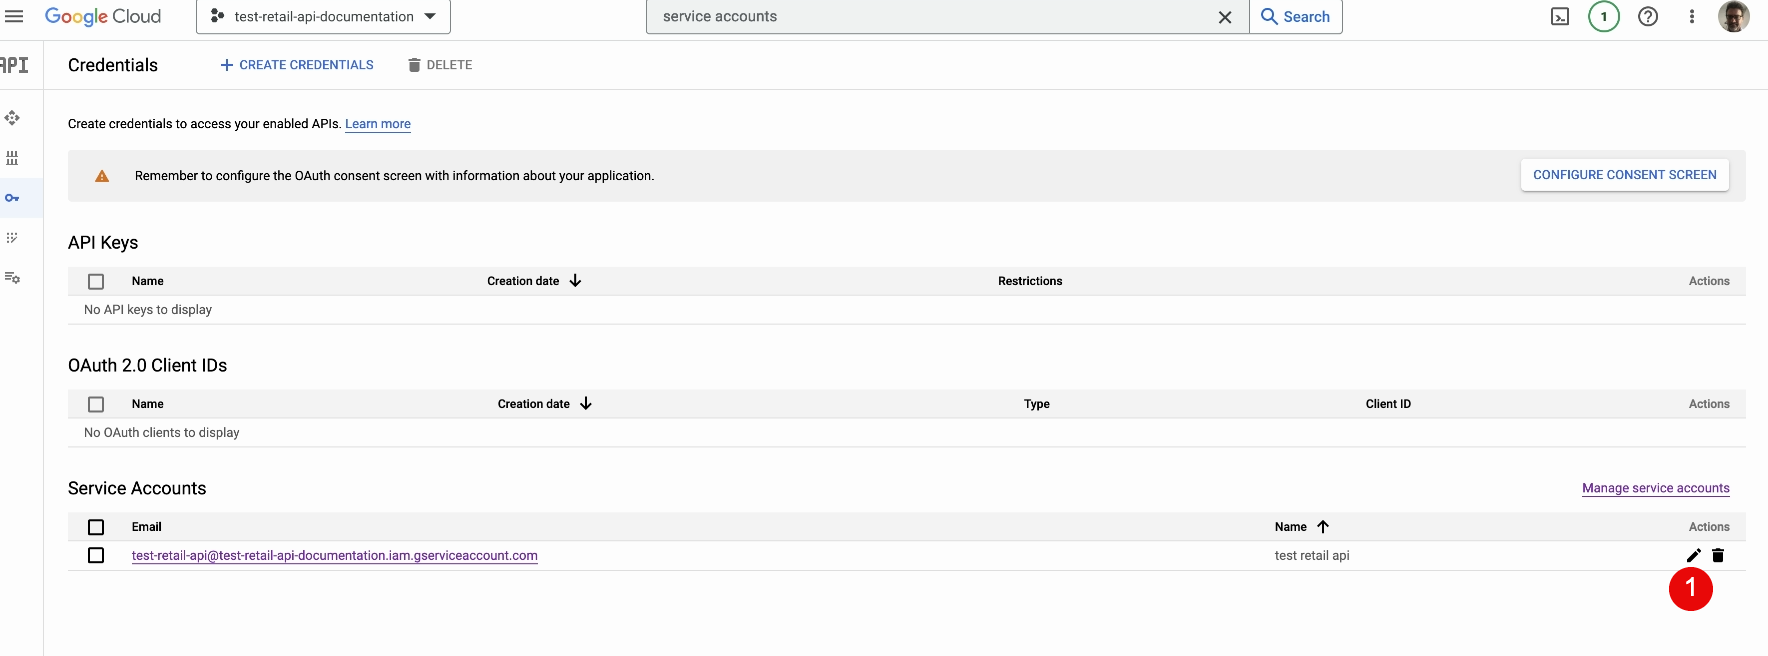
- Edit the new service account to create an access encrypted key
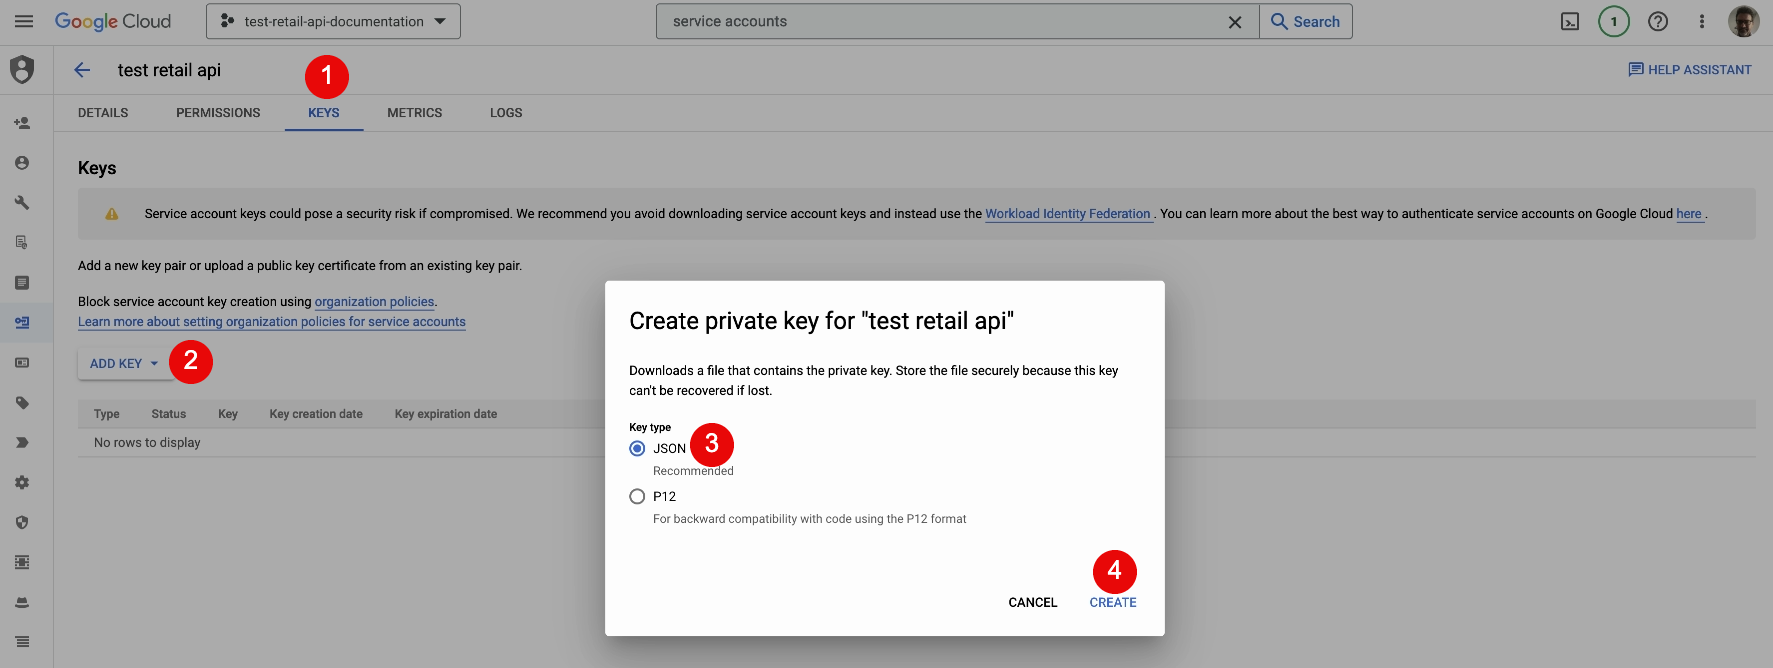
- Click on tab “Keys”
- Click on “Add key”
- Select “json”
- Click on “create”

- The json private key is downloaded on your computer

- Open your key.json and copy its content. It will be used later during the WPSOLR setup.
2 – Create the Google Retail index from WPSOLR admin
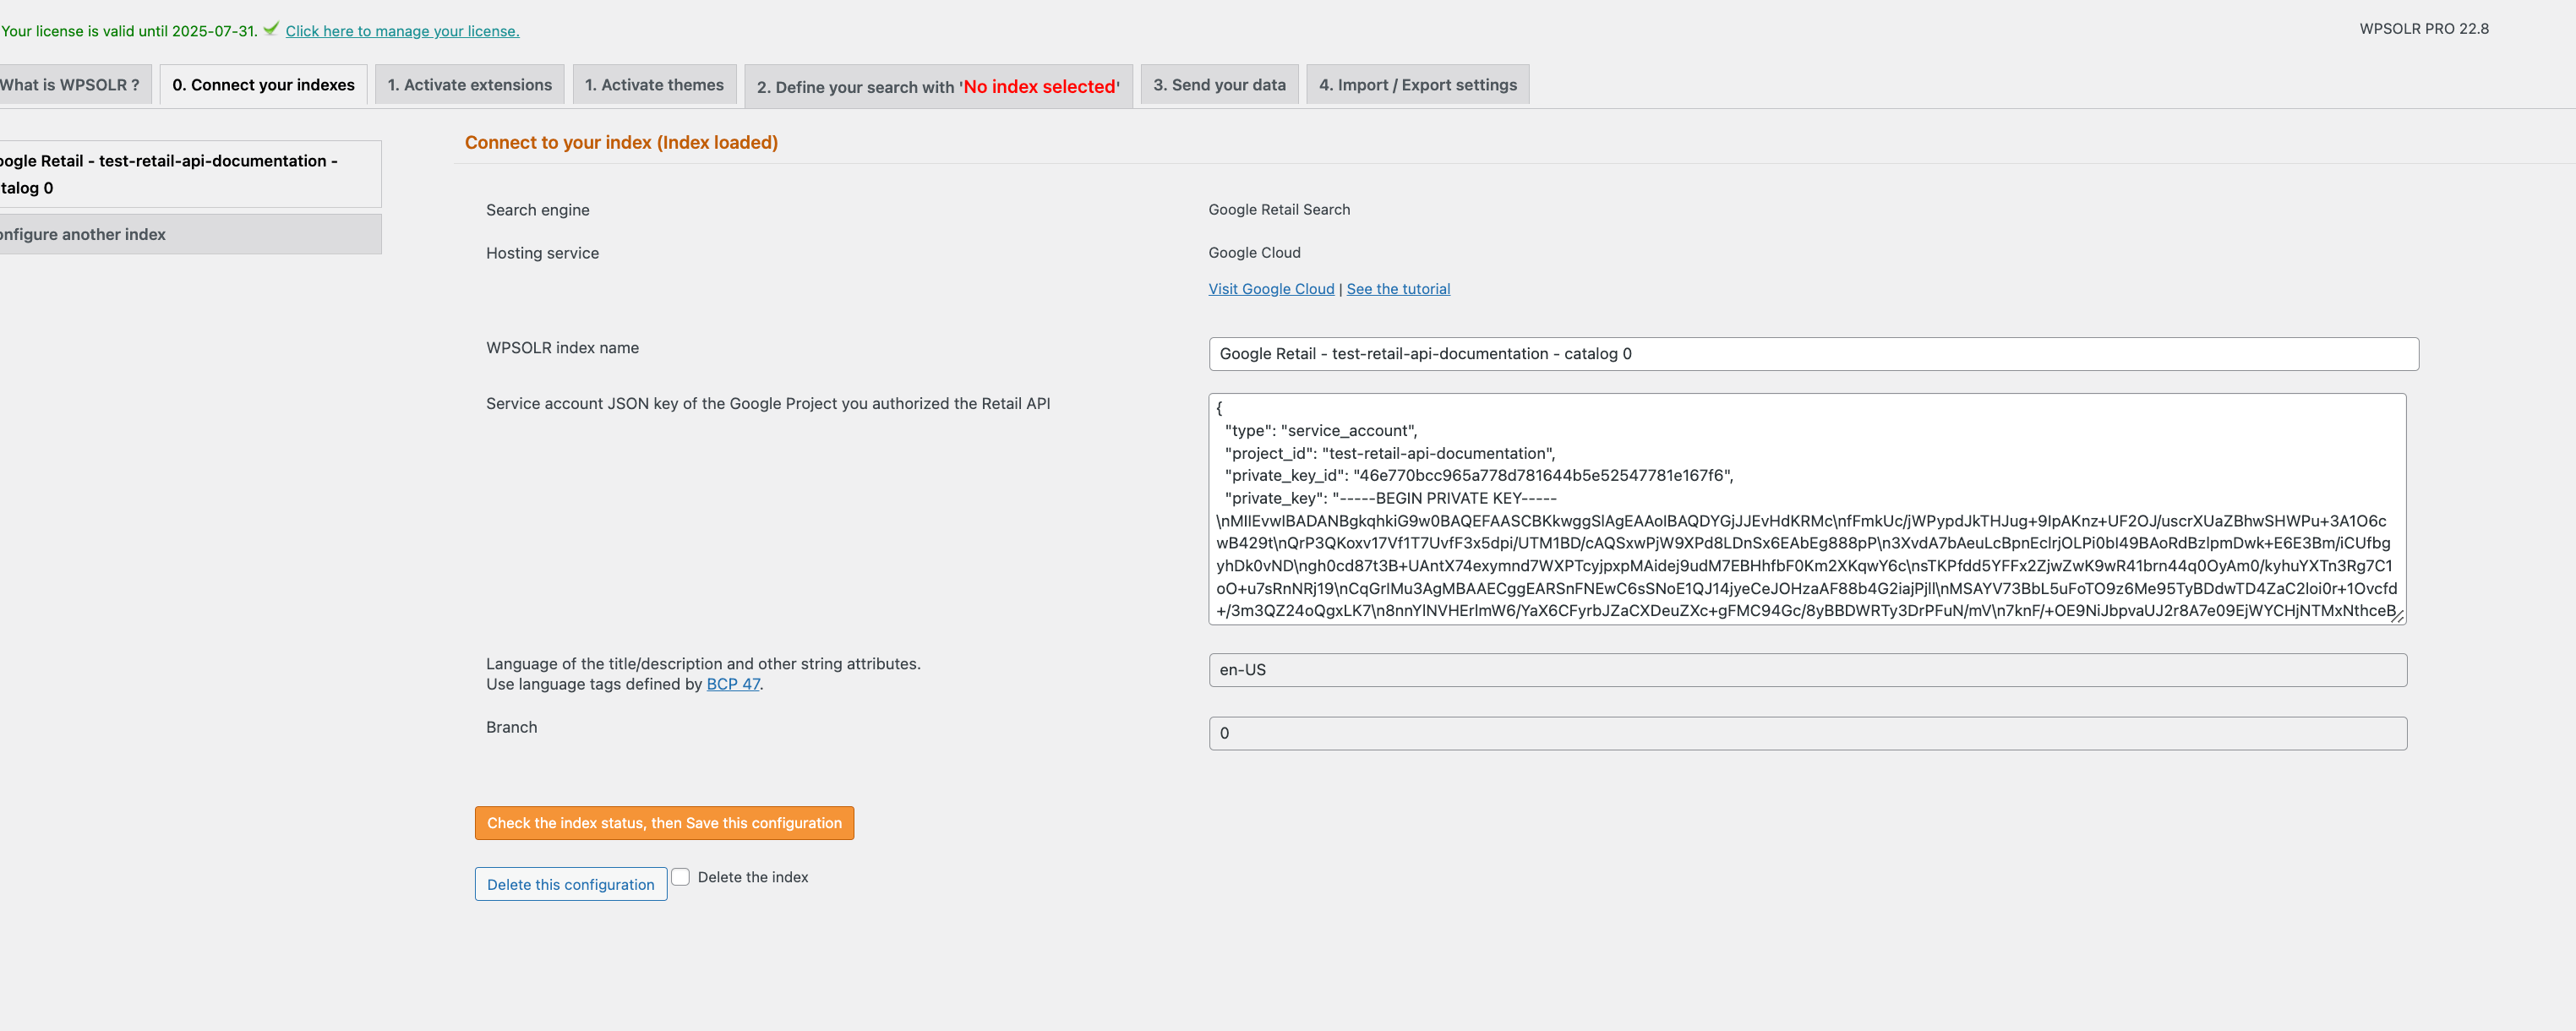
2.1 The WPSOLR new index form
Google Retail search: new index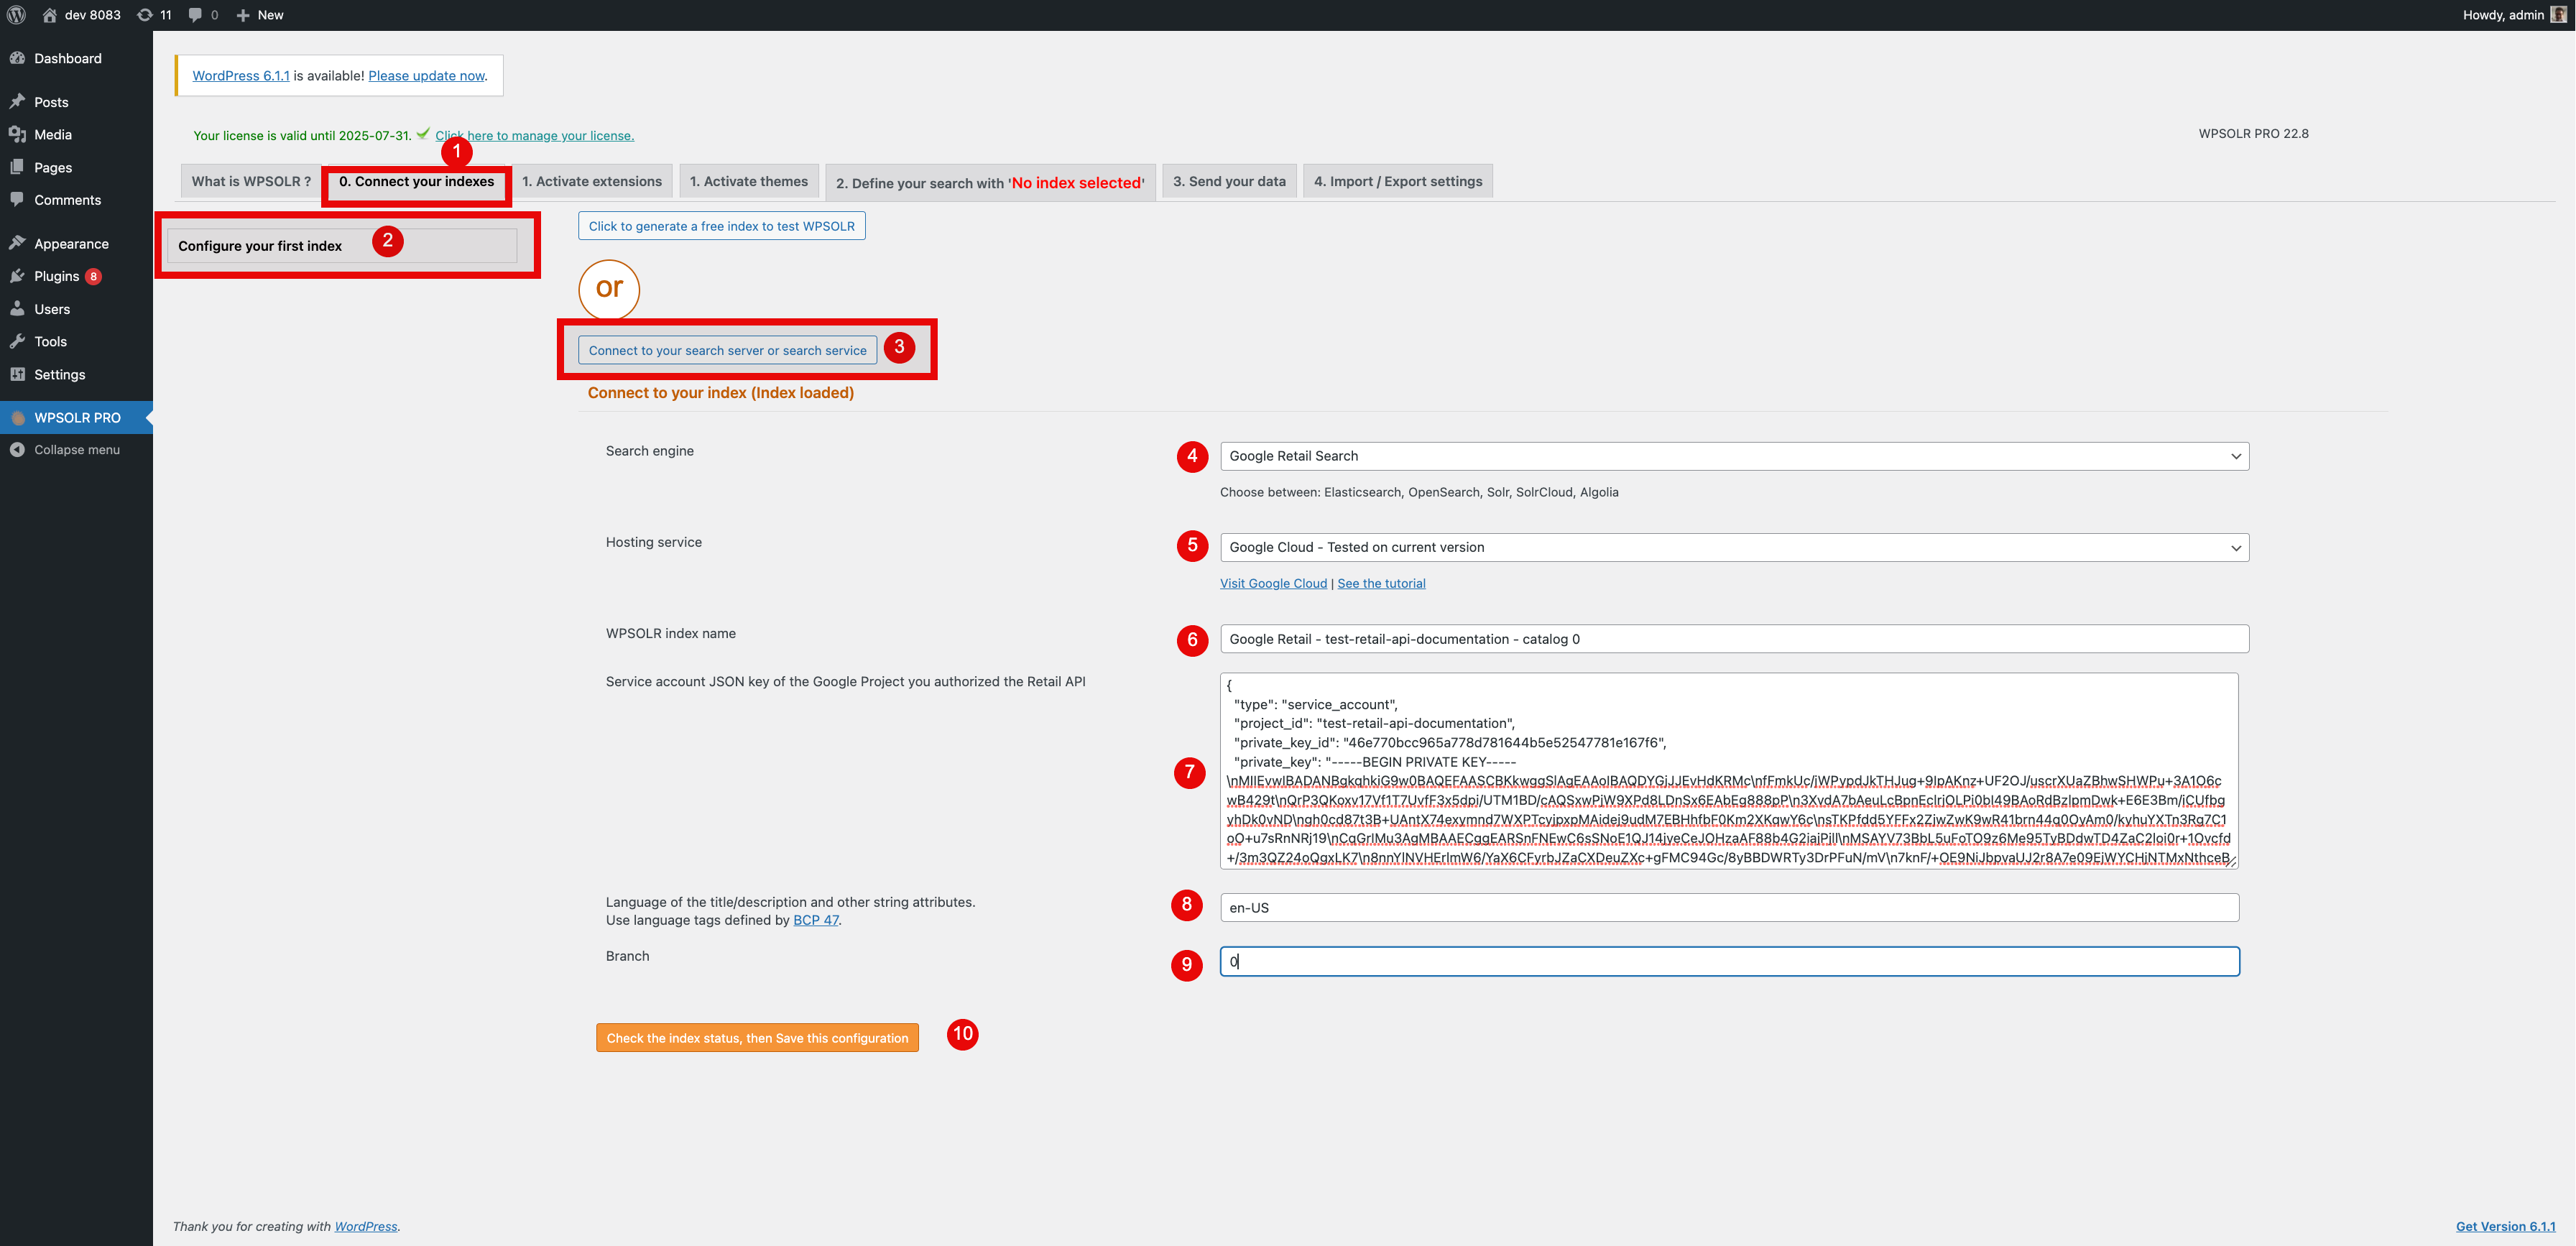
- (1), (2), then (3) to edit a new index
- (4) Select “Google Retail search” among index types
- (5) Select “Google Cloud” among Hosting Services
- (6) Set a name for you index, visible in WPSOLR admin
- (7) Copy your JSON Key as the credentials for this catalog
- (8) Enter a language among bcp47 official languages
- (9) Enter a branch among “0”, “1” and “2”. Each catalog (index) can have 3 branches, for testing purpose
- (10) Create the index. Done!

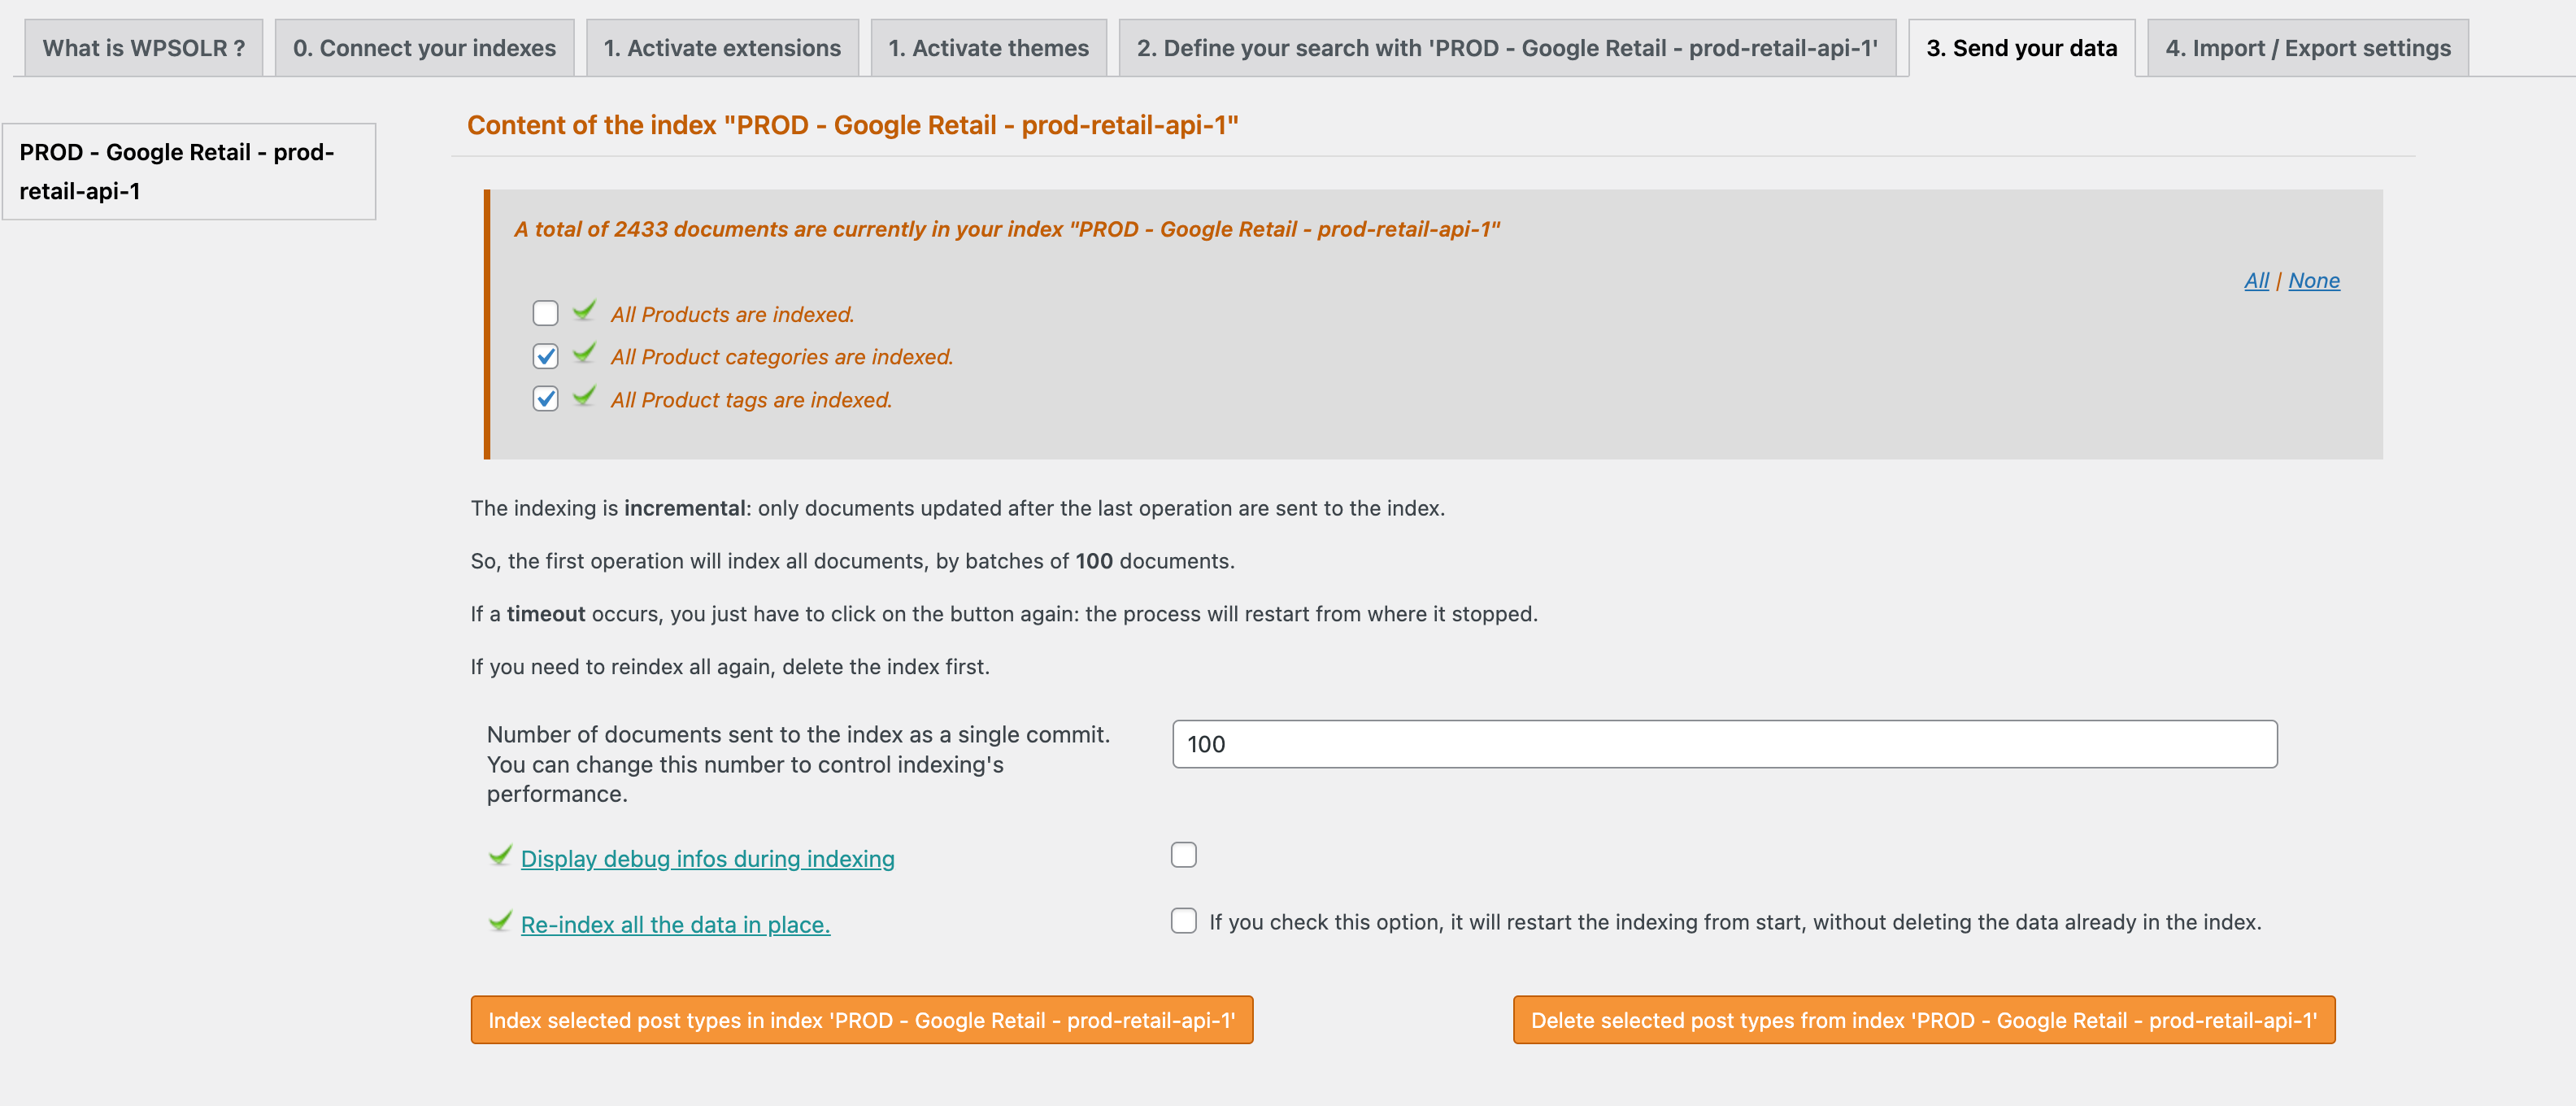
2.2 Select your data
2.3 Index your data
3 – Google Retail dashboard
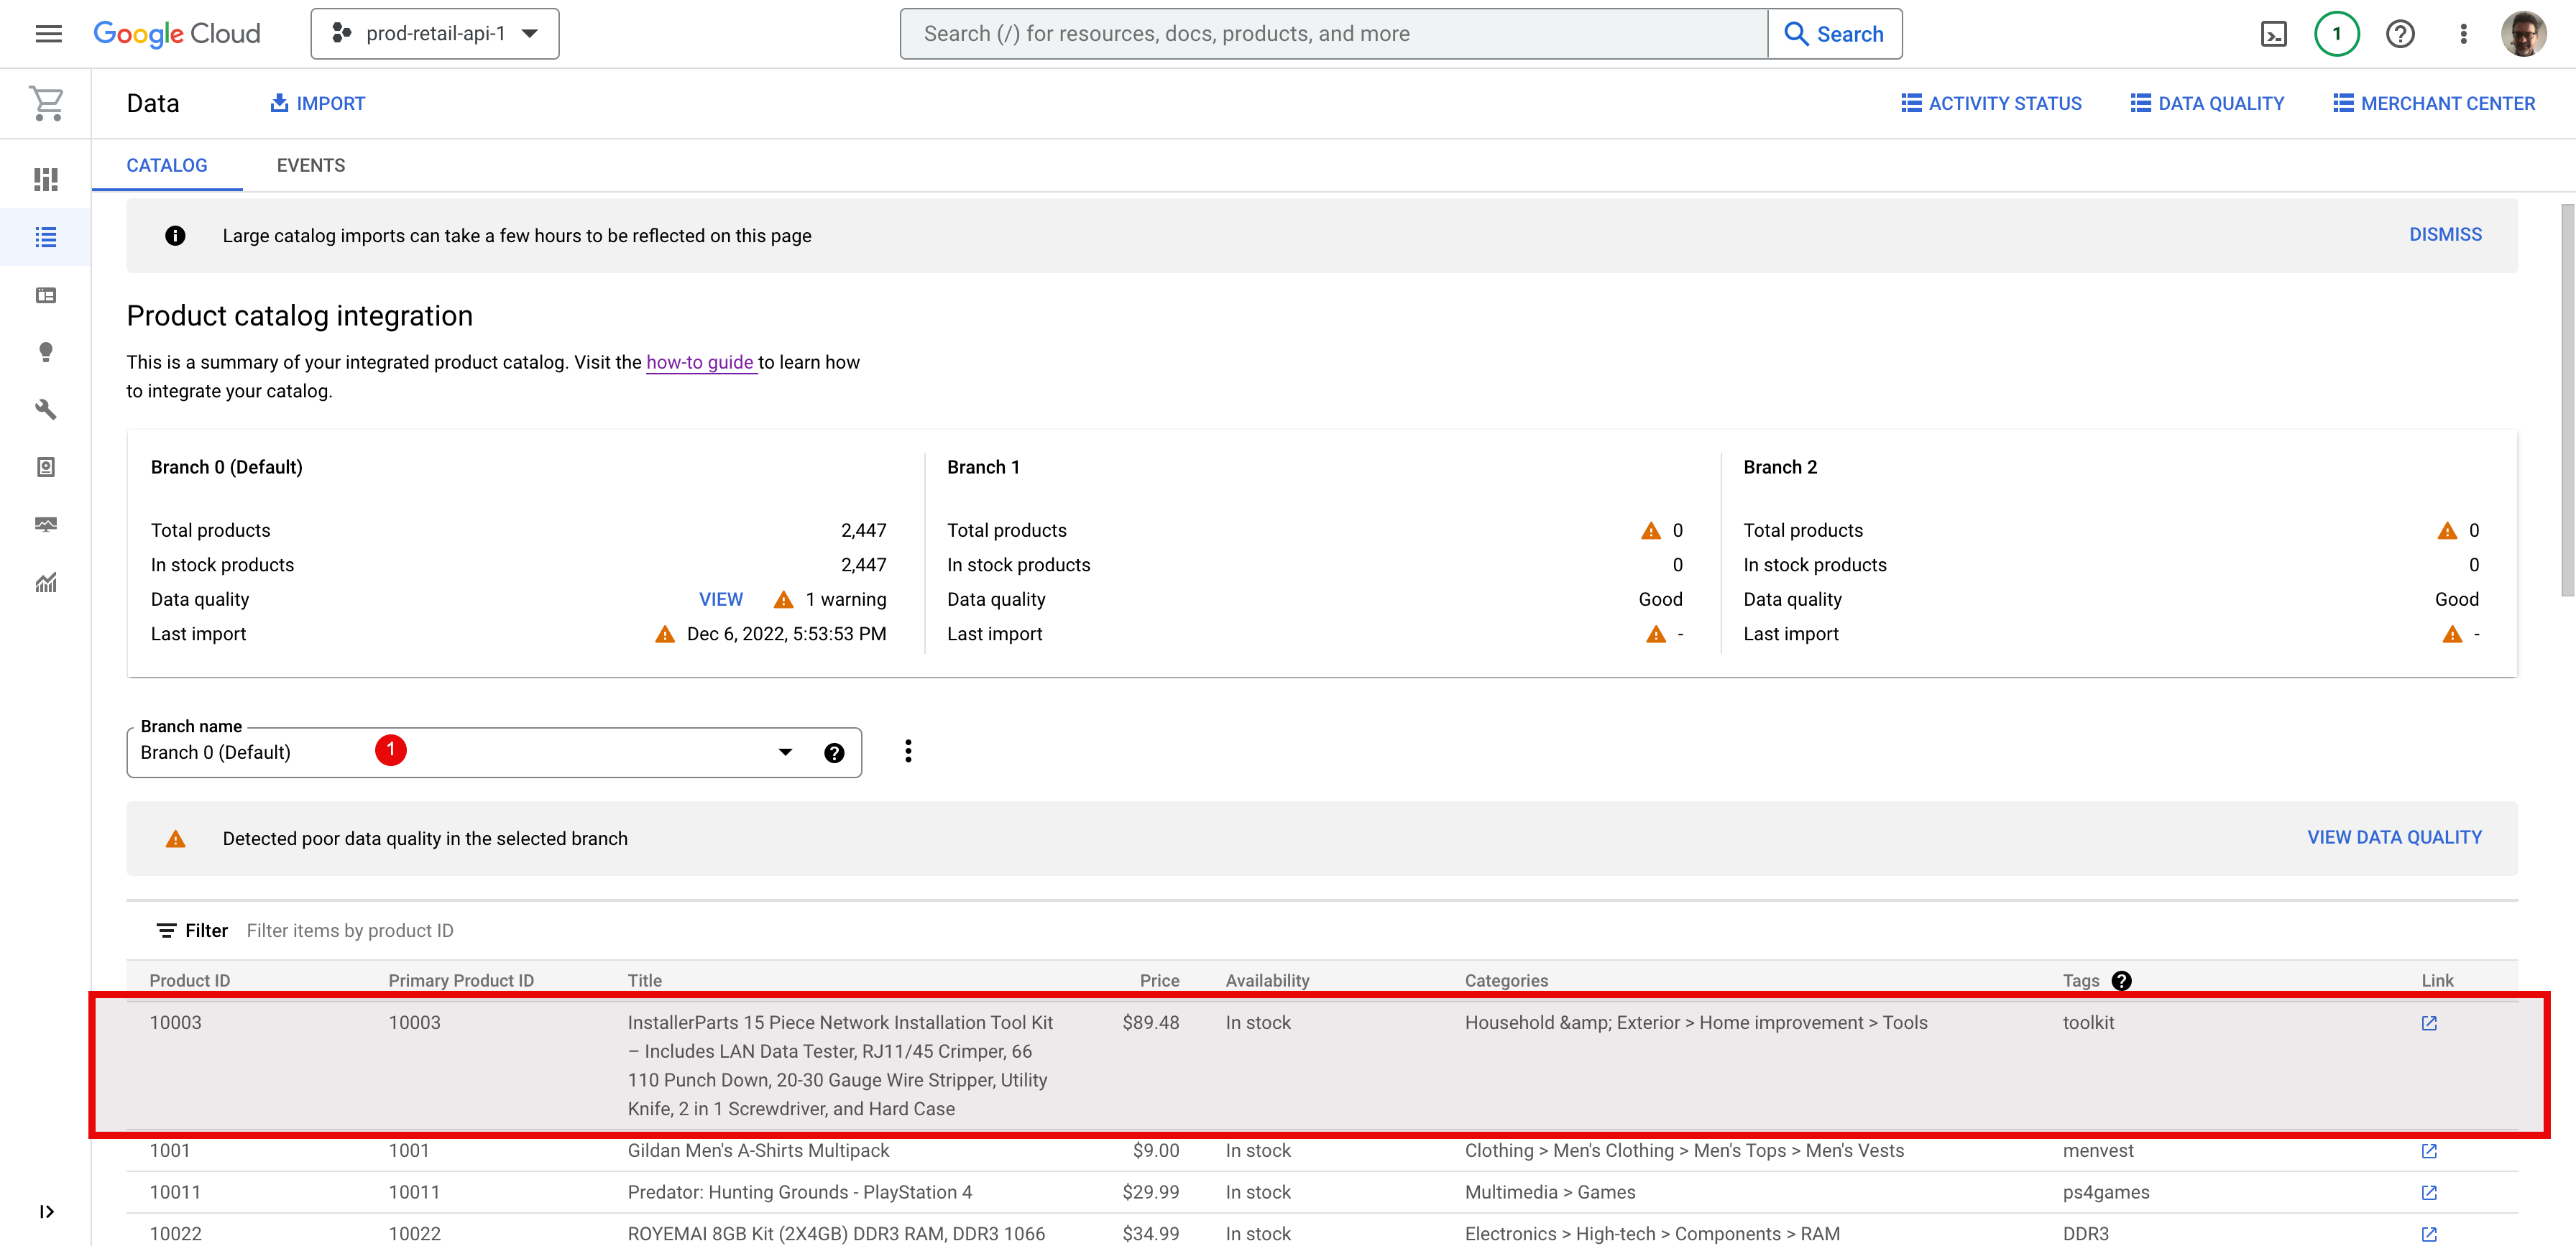
3.1 Catalog and branches
Consider your index as a catalog branch. After you index some WooCommerce products, the catalog branch will be filled with the products, their standard attributes and taxonomies, and also with the custom attributes you selected in screen 2.2
3.2 Events
WPSOLR does not collect nor send user events. Too many events are required to get acceptable recommendations or personalization (at least for small/medium WooCommerce sites).

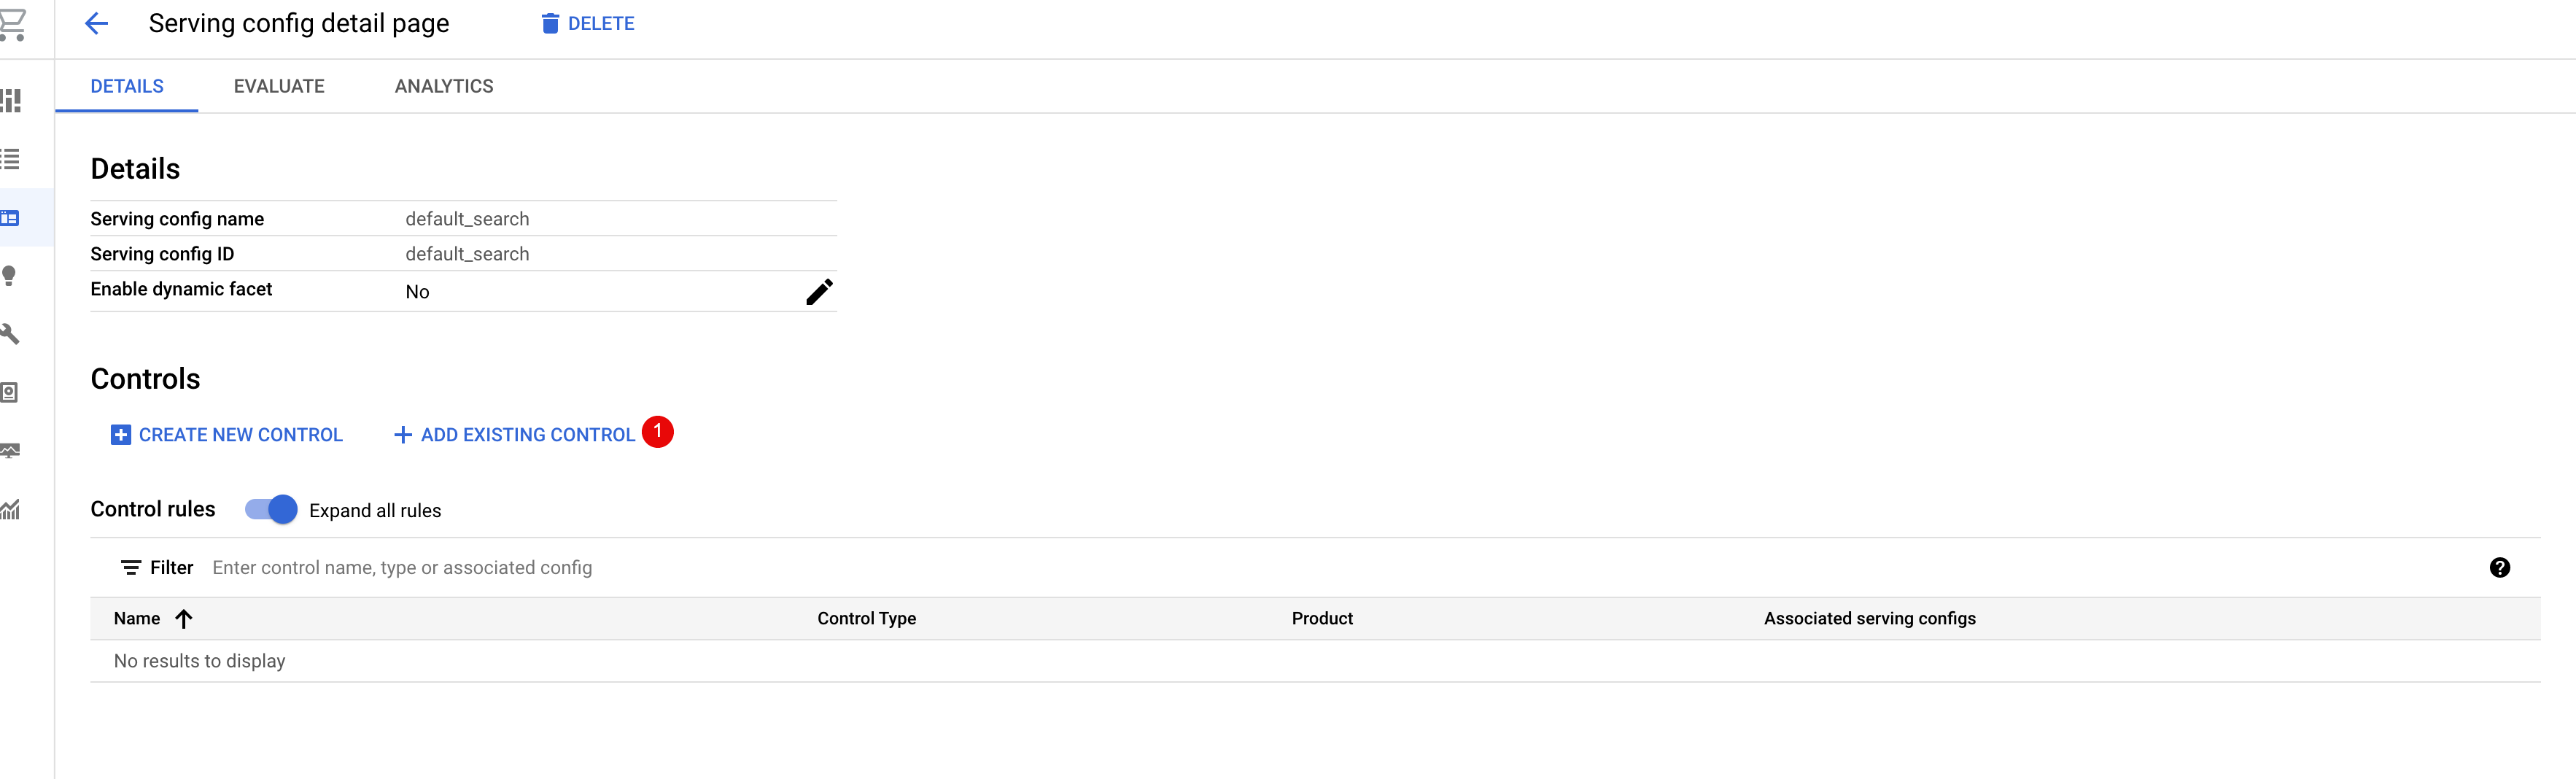
3.3 Serving configs
Google Retail uses the notion of “Serving configs” to let users define several search configurations. By default, WPSOLR will use “default_search”.


You can perform some searches with filters on the Serving configs “Evaluate” tab also:

You can customize your Serving configs by adding “Controls”, to filter, boost, or add synonyms to your search outside of WPSOLR: